VMware vCloud
Overview
VMware vCloud Director is a cloud computing management tool that manages IaaS architectures by monitoring and controlling various cloud-computing components, such as security, virtual machine provisioning, billing and self-service access. Our VMware vCloud integration will get you to start moving toward secure cloud computing. With this module you are empowered to sell vDC resources and apply charges based on IP, CPU, Disc allocation and rate limits.
Activating the module
- If the module is included in your HostBill edition you can download it from your client portal.
- If the module is not included in your HostBill edition you can purchase it from our marketplace and then download it from the client area.
- Once you download the module extract it in the main HostBill directory.
- Go to Settings → Modules → Hosting Modules, find and activate VMware vCloud (vCloud) module.
Connecting HostBill with VMware vCloud
- Proceed to Settings → Apps → Add new App
- From Applications list select VMware vCloud
- Enter:
- Name - Name of this connection
- Hostname
- IP Address
- Username - try with and without @organization part (ie.: "admin" and if it would not work "admin@yourorganization" )
- Password
4. Verify entered credentials by clicking Test Connection to check if HostBill can connect
5. Save Changes
Importing existing accounts
Note that this module supports Importing from control panel feature, so you can import existing accounts with ease
Adding VMware vCloud product
- In HostBill go to Settings → Products & Services, and Add new order page
- From Order Types select Other type
- After creating order page add new product in it, provide its name and Save changes
- In product configuration section proceed to Connect with App, select VMware vCloud and App server created in previous steps.
- Proceed with configuring vCloud limits below:
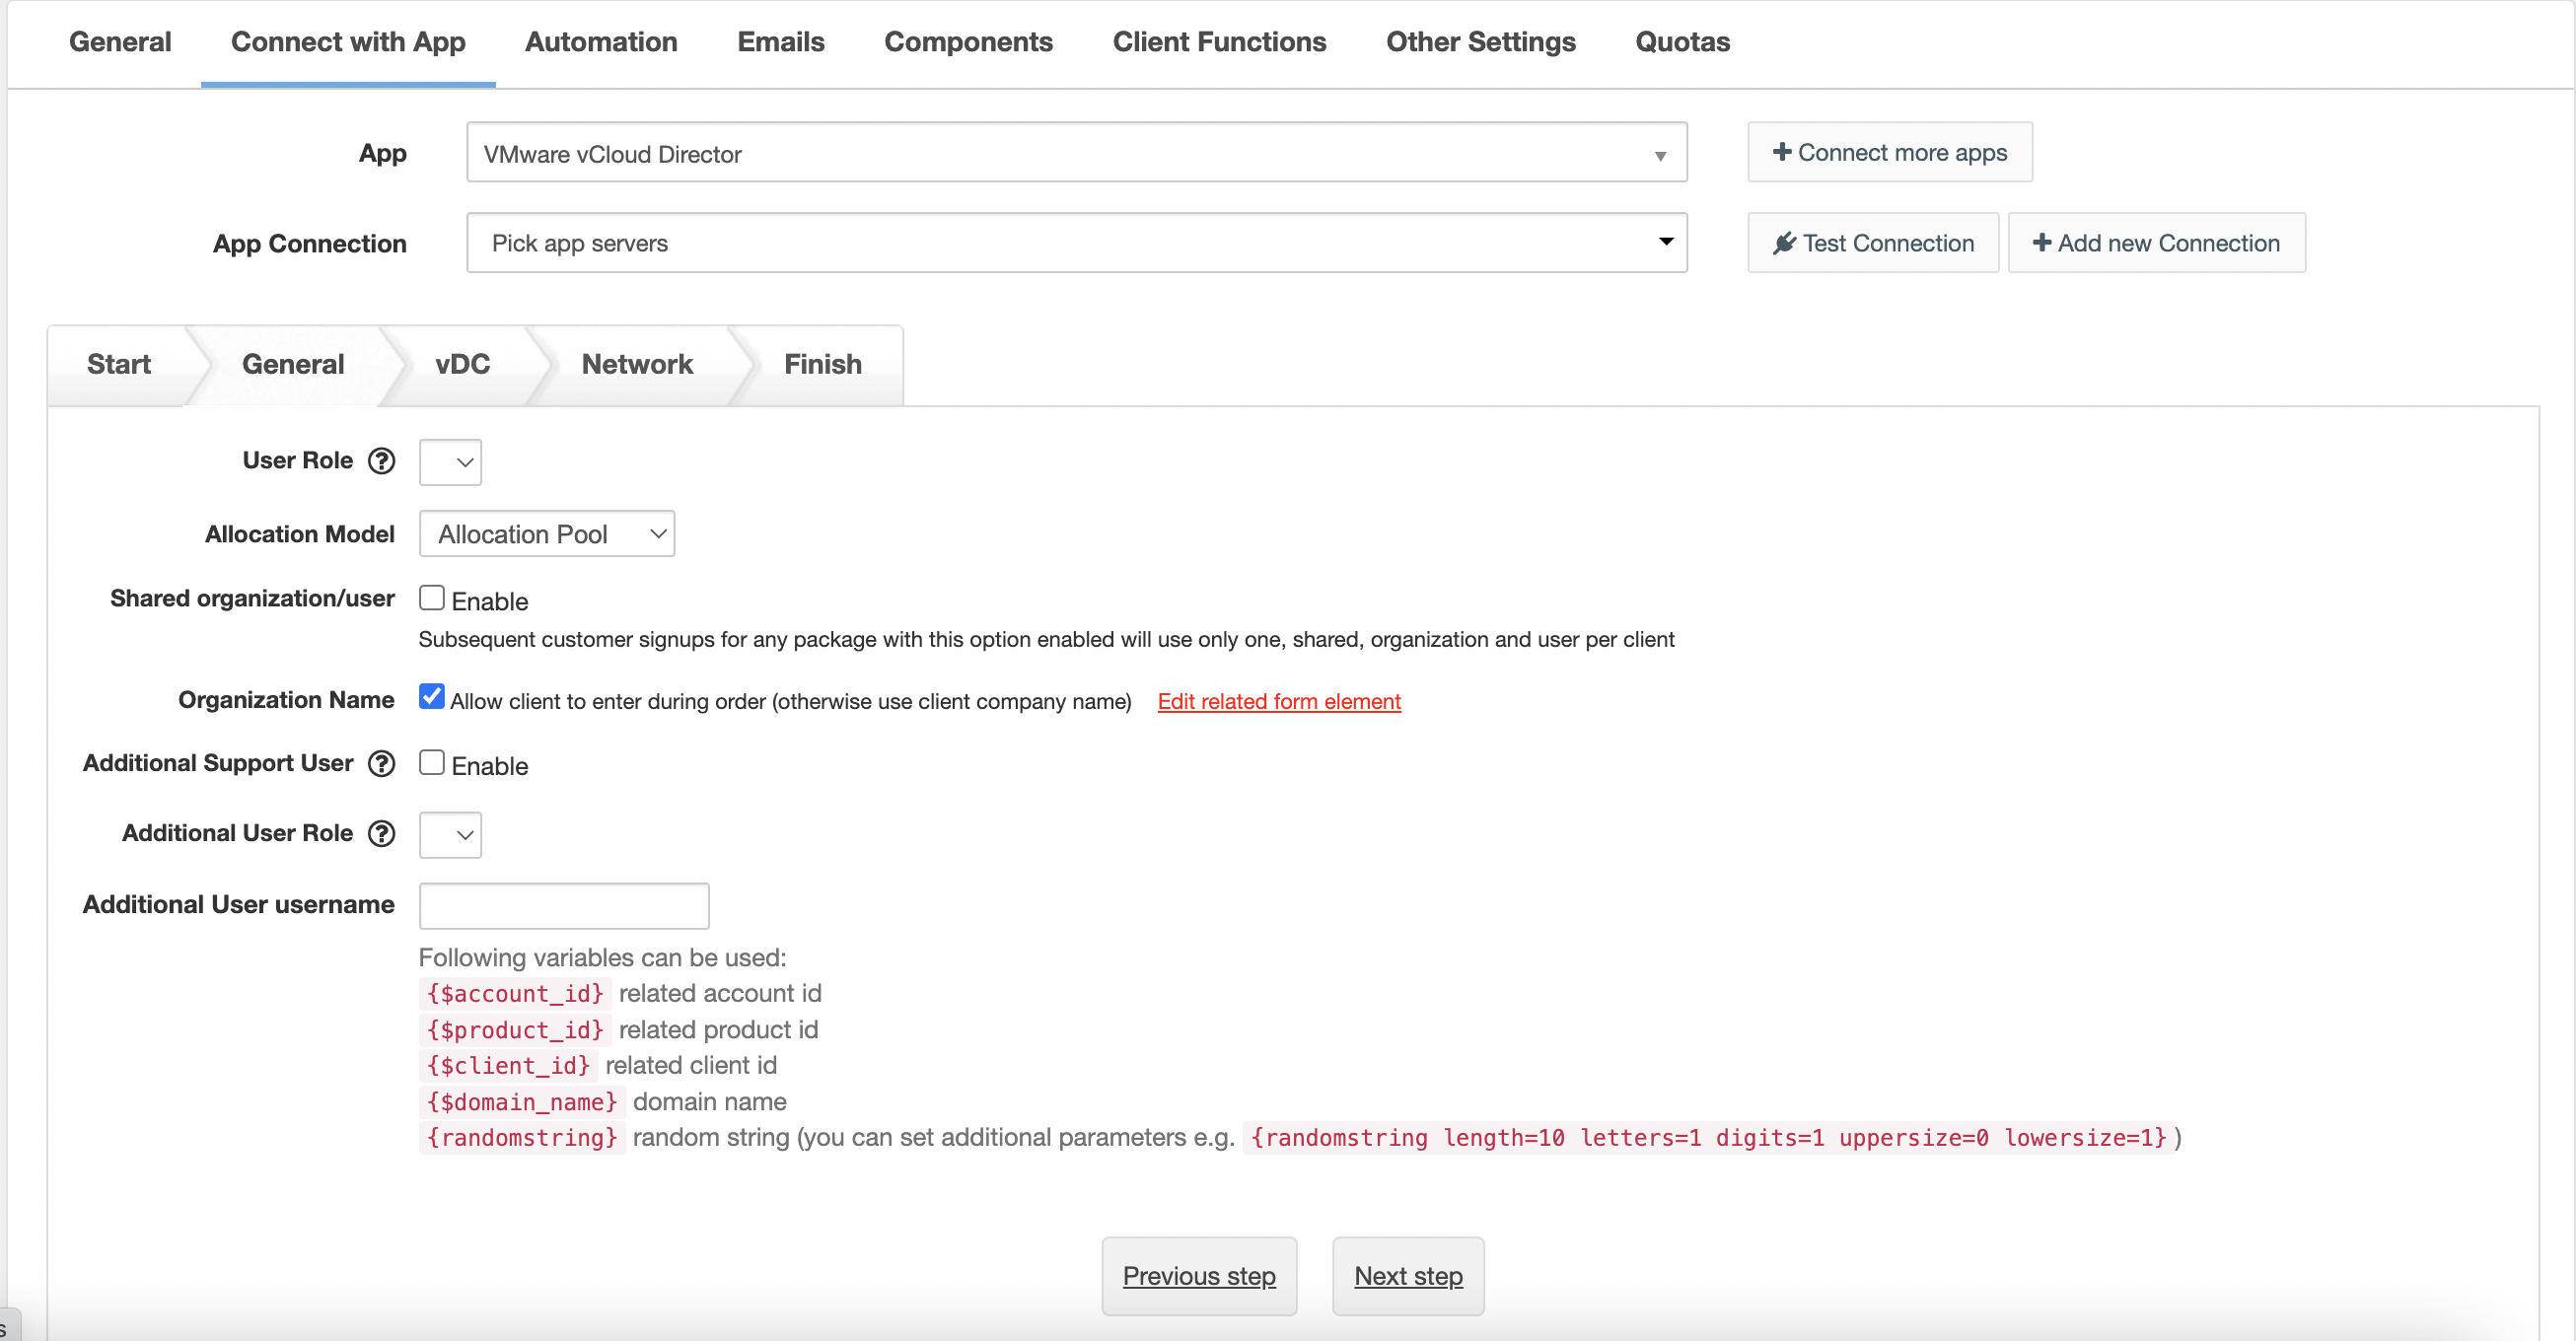
General
- User role
- Allocation model
- Shared organization/user
- Organization name
- Additional Support User - when enabled customer will have option to create/enable/disable support user for his organisation, which can then be utilised by your staff for performing support
- Additional User Role - pick a role of additional support user
- Additional User username - here you can define a pattern using which username for support user will be created
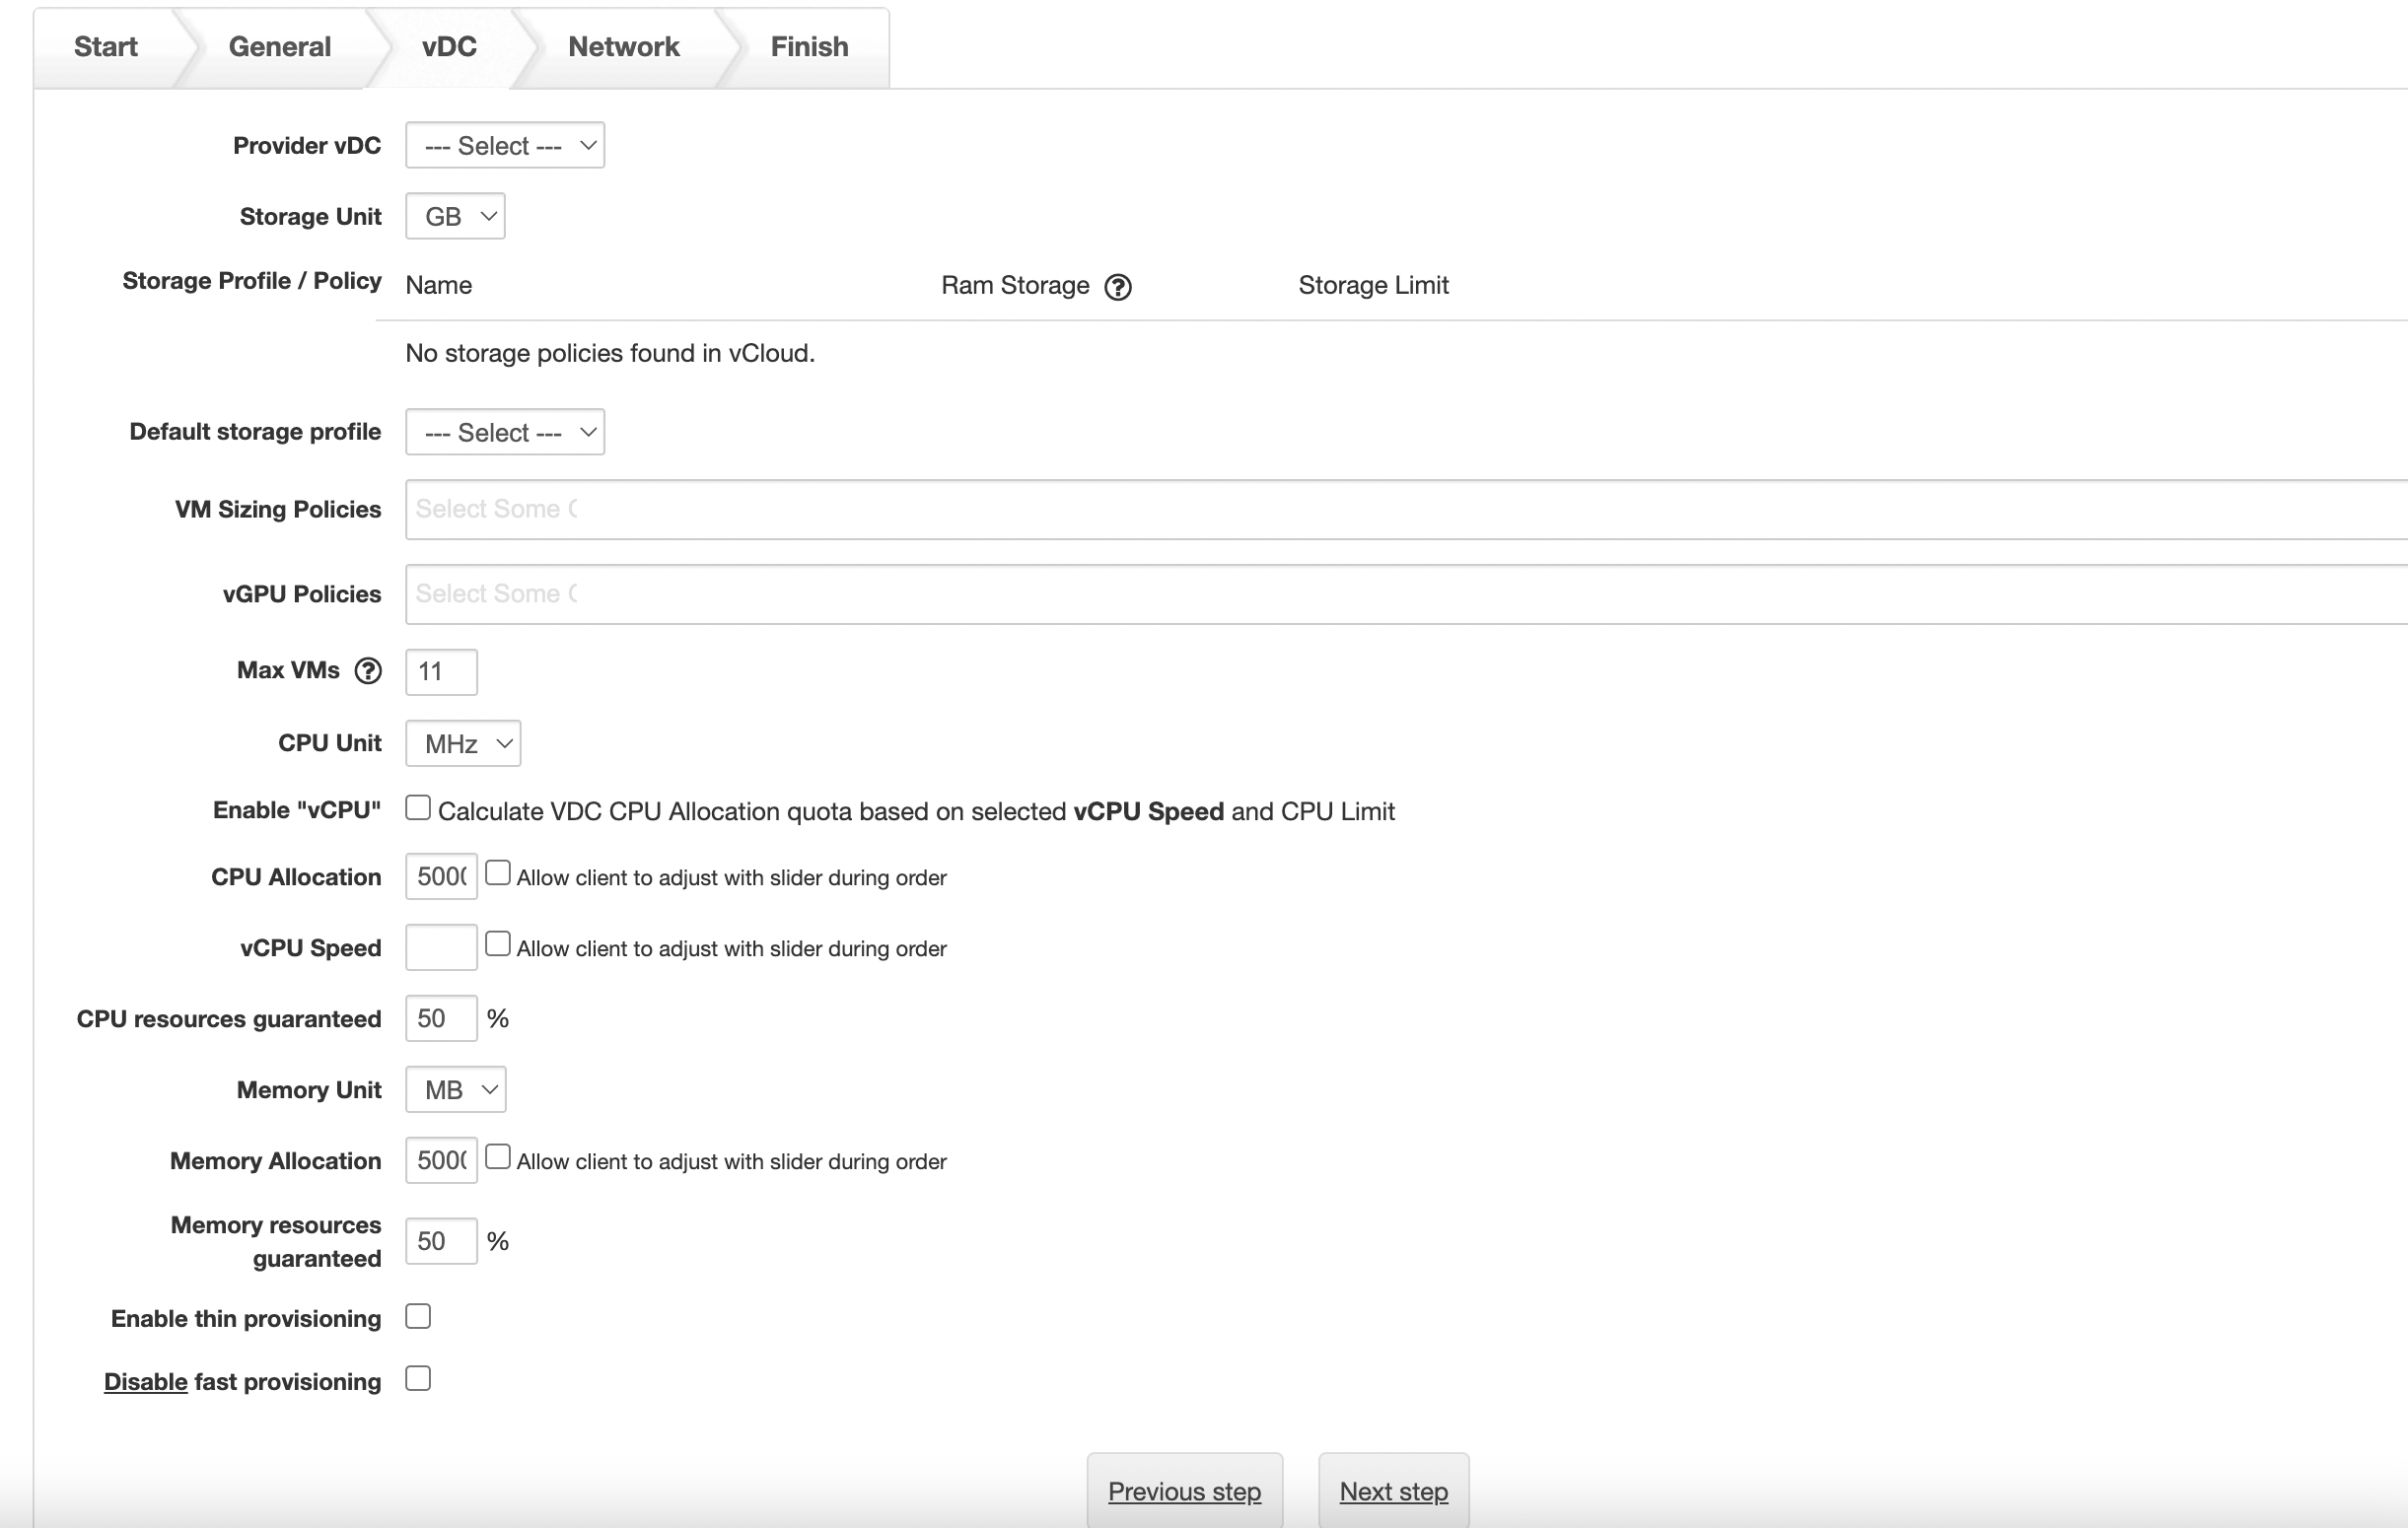
vDC
- Provider vDC
- Storage unit
- Storage profile/policy
- Default storage profile
- Max VMs
- CPU unit
- CPU allocation - Use "-1" in Flex model for unlimited allocation
- vCPU speed
- Memory unit
- Memory allocation - Use "-1" in Flex model for unlimited allocation
- Ram storage
- Enable thin provisioning
- Disable fast provisioning
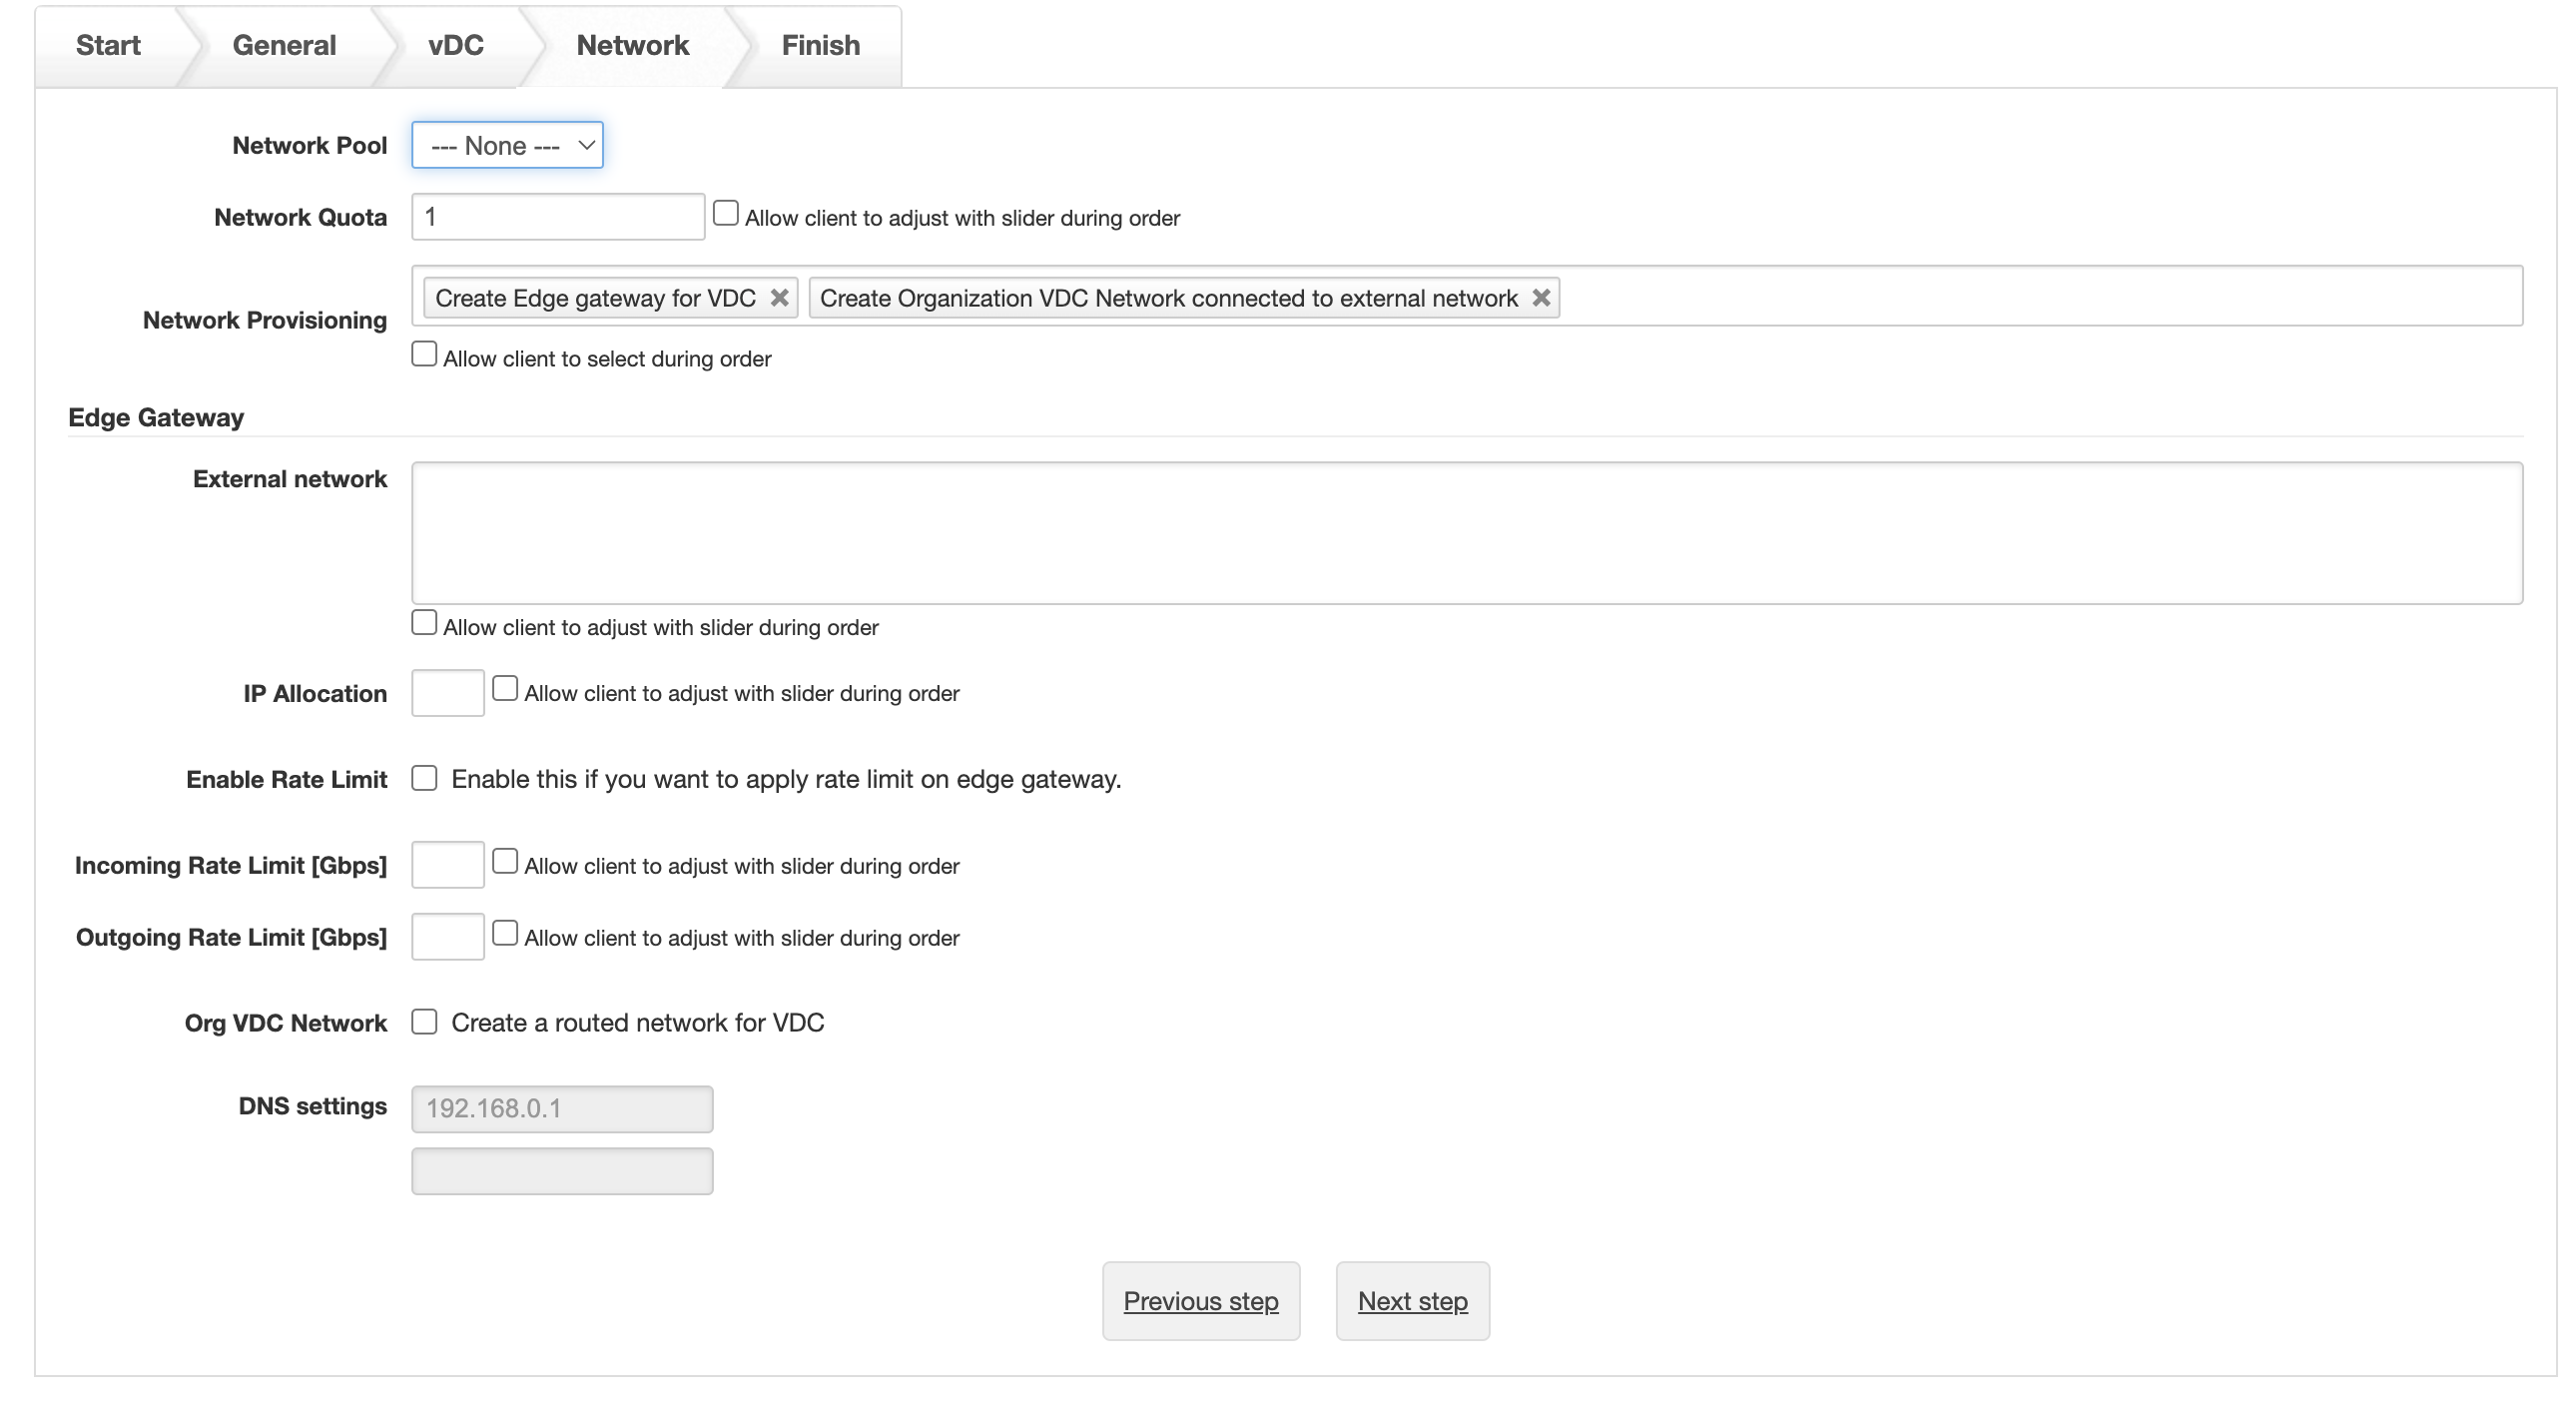
Network
- Network pool
- Network quota
For more generic product configuration details including price, automation, emails settings refer to Product Configuration article.
Quotas / Metrics / Metered billing
This module supports Quotas / Account Metrics feature, so you can setup limits & display usages, trigger automation based on usage and bill actual resource usage.
Configuring Client Functions
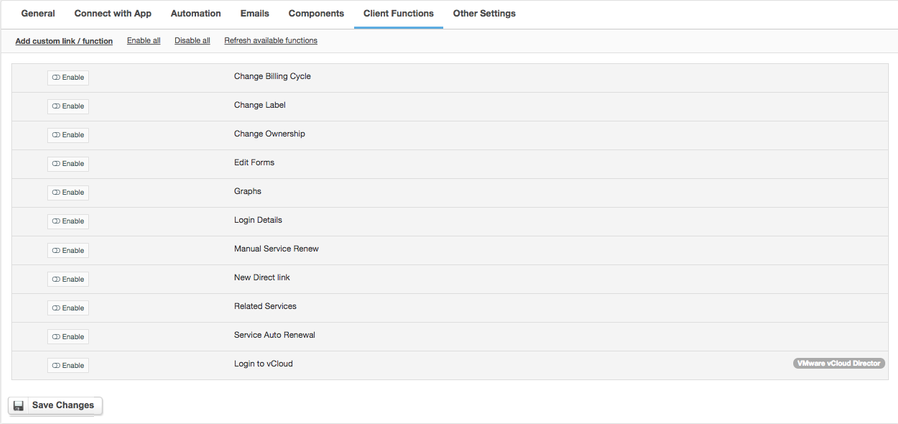
In Products & Services → Your Order Page → Your Product → Client Functions you can control what features customer will have access to in client portal, by clicking Enable/Disable next to the given option.
Use Edit button to adjust function appearance in the client portal.
For VMware vCloud you can enable the following client functions dedicated to this module:
- Login to vCloud - display Login to vCloud Director link.
- Support user - lets customer to create/enable/disable additional user (if its enabled in product) to his organization
As well as number of standard client functions, such as
- Change Billing Cycle
- Change Label
- Change Ownership
- Edit Forms
- Graphs
- Login Details
- Manual Service Renew
- New Direct Link
- Related Services
- Service Auto Renewal
Troubleshooting
Problem: Getting error when provided valid admin+password when connecting with vCloud Error: BAD_REQUEST: Bad request
Solution: Try adding system orgname to username when connecting - ie, if your username is admin, try username: "admin@system"


