cPanel DNS
- HostBill (Unlicensed)
- HostBill
Overview
cPanel is the premier control panel for automating and simplifying server configuration, email, and website management. cPanel DNS integration is a full-featured, white-label DNS solution that lets you start your own Managed DNS Hosting service with HostBill.
cPanel configuration
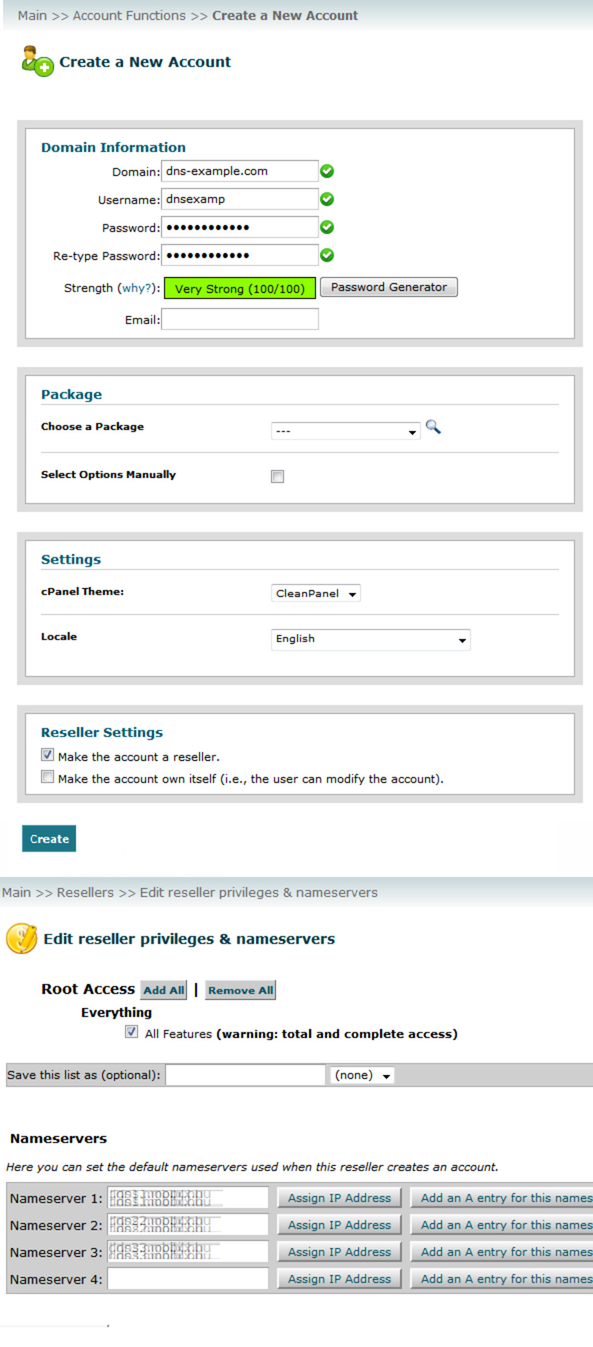
cPanel DNS module needs root privileges otherwise it won't work as expected. You can use WHM's root login but we recommend creating a new reseller so you can have all Domains under one reseller account.
- Go to Account Functions section and create new reseller account.
- Enter new user domain, username and password. Be sure to check Make the account a reseller option before clicking Create
- Go to Resellers section and Reseller Center page, under Reseller Modifications select the reseller account that you created and click Edit Privileges/Nameservers
- Scroll down till you find Root Access, select All Features
- Click Assign IP Address for both Nameservers
- Click Save All Settings
Activating the module
- If the module is included in your HostBill edition you can download it from your client portal.
- If the module is not included in your HostBill edition you can purchase it from our marketplace and then download it from the client area.
- Once you download the module extract it in the main HostBill directory.
- Go to Settings → Modules → Hosting Modules, find and activate cPanel DNS module.
Connecting HostBill with cPanel DNS
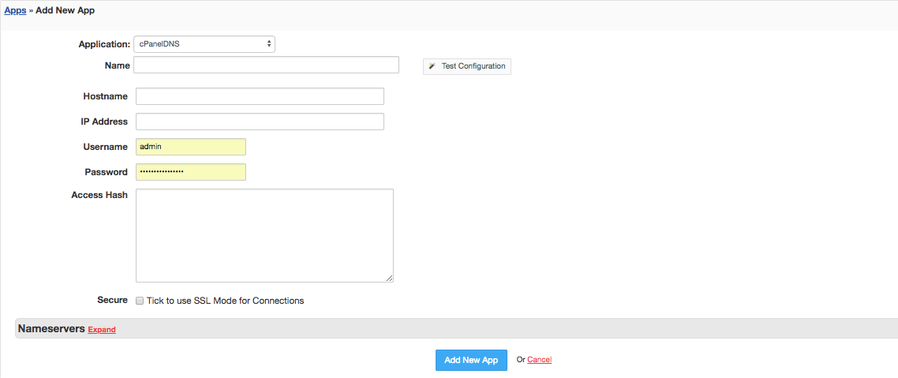
- Proceed to Settings → Apps → Add new App
- From Applications list select cPanel DNS
- Enter:
- Name - Name of this connection
- Hostname
- IP Address
- Username
- Password
- Access Hash
4. Verify entered credentials by clicking Test Connection to check if HostBill can connect
5. Save Changes
Adding cPanel DNS product
- In HostBill go to Settings → Products & Services, and Add new order page
- From Order Types select DNS Services
- After creating order page add new product in it, provide its name & Save changes
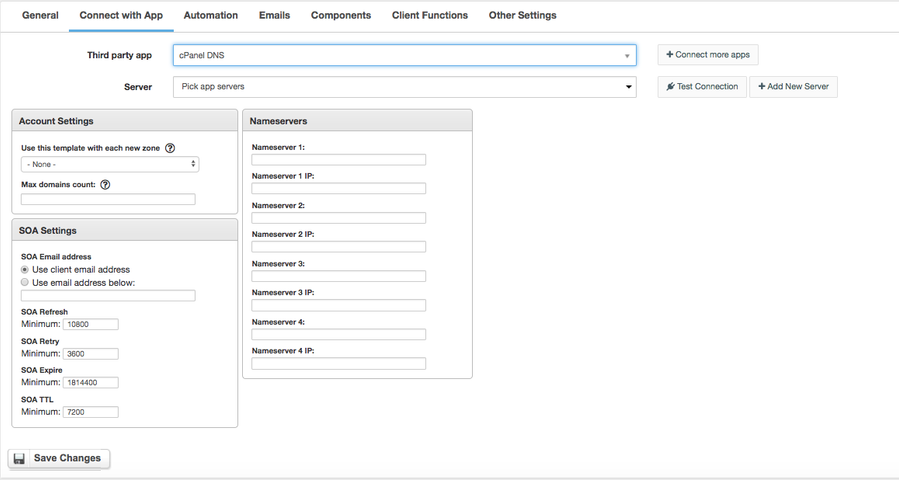
- In product configuration section proceed to Connect with App, select cPanel DNS module and App server created in previous steps.
- Enter number of domains your client can add, provide nameservers that will be used with new zones and appear in client area.
- Submit changes - your package is ready
For more generic product configuration details including price, automation, emails settings refer to Product Configuration article.
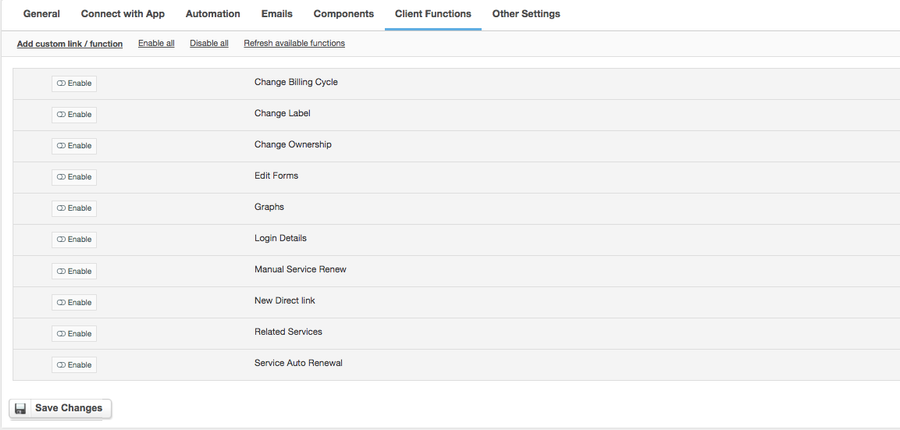
Configuring Client Functions
In Products & Services → Your Order Page → Your Product → Client Functions you can control what features customer will have access to in client portal, by clicking Enable/Disable next to the given option.
Use Edit button to adjust function appearance in the client portal.
For cPanel DNS you can enable a number of standard client functions:
- Change Billing Cycle
- Change Label
- Change Ownership
- Edit Forms
- Graphs
- Login Details
- Manual Service Renew
- New Direct Link
- Related Services
- Service Auto Renewal