/
PowerDNS
PowerDNS
- HostBill (Unlicensed)
- HostBill
- HostBill
Owned by HostBill (Unlicensed)
Last updated: Jan 07, 2025 by HostBill
Overview
PowerDNS is a DNS server with focus on security, scalability and reliability with a wide range of features. PowerDNS module for HostBill is a full-featured, white-label DNS solution with seamless client portal integration that will help you to start managed DNS hosting service and give your customers the tool to manage all details of their DNS zones right from your billing portal.
Installing PowerDNS
PowerDNS installation guide can be found at //doc.powerdns.com/.
You need to install and configure PowerDNS with MySQL backend.
To learn how to manage DNSSEC with PowerDNS module, visit DNSSEC with PowerDNS module for HostBill
Activating the module
- If the module is included in your HostBill edition you can download it from your client portal.
- If the module is not included in your HostBill edition you can purchase it from our marketplace and then download it from the client area.
- Once you download the module extract it in the main HostBill directory.
- Go to Settings → Modules → Hosting Modules, find and activate PowerDNS module.
Connecting HostBill with PowerDNS
- In HostBill go to Settings → Modules, find and activate PowerDNS hosting module
- You will be redirected to Settings → Apps to set connection with PowerDNS
- Enter PowerDNS database credentials, choose from PostgreeSQL and MySQL backend, use Test Connection to check if HostBill can connect
Creating your first Managed DNS package
- In HostBill go to Settings → Products & Services, and Add new order page
- From Order Types select PowerDNS
- After creating order page add new product in it, provide name & Save changes
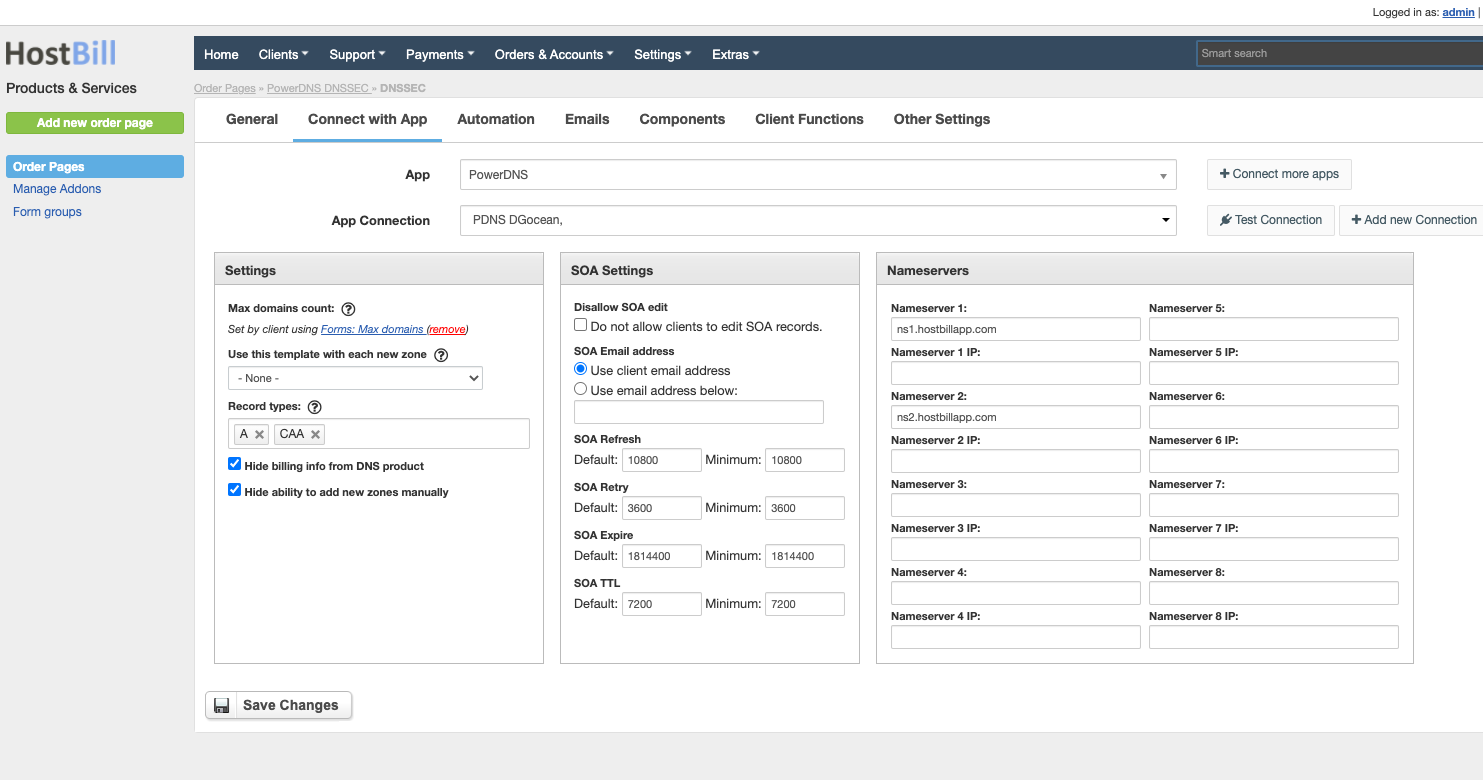
- In product configuration section proceed to Connect with App, select PowerDNS module and App server created in previous steps.
- Enter:
- Max domains count - the maximum number of domains client can create (after selecting the checkbox, a field will be created in which the customer will be able to select the maximum number of domains when placing the order)
- Use this template with each new zone - select dns template that will be applied to each new zone created under this package (you can define DNS Templates in Components → DNS Templates)
- Record types - record types that client can add in client portal (when the field is empty, all types of records that the module offers will be available)
SOA Settings - settings for the SOA record that will be added after the zone is created
- Nameservers - nameservers that will be added after the zone is created
- Hide billing info from DNS product - when enabled customer will not see related billing info (cycle/price) in service - this is useful if DNS management is part of domain automation
- Hide ability to add new zones manually - when enabled customer will not be able to add/remove zones in client portal - this is useful if DNS management is part of domain automation
, multiple selections available,
Related content
PowerDNS Slave
PowerDNS Slave
Read with this
DNSSEC with PowerDNS module for HostBill
DNSSEC with PowerDNS module for HostBill
Read with this
Hetzner DNS
Hetzner DNS
More like this
Install PowerDNS with MySQL Backend on CentOS 6.6 x64
Install PowerDNS with MySQL Backend on CentOS 6.6 x64
Read with this
Domain DNS Automation
Domain DNS Automation
More like this
Moniker
Moniker
More like this