AD / LDAP Provisioning
Overview
LDAP, the Lightweight Directory Access Protocol, is a mature, flexible, and well supported standards-based mechanism for interacting with directory servers. The HostBill module allows to sell any AD/LDAP-Authenticated service and charge for number of active users in AD/LDAP Group. An AD/LDAP Group can be later used by a client for various purposes, for example to authenticate Remote Desktop service.
Activating the module
- If the module is included in your HostBill edition you can download it from your client portal.
- If the module is not included in your HostBill edition you can purchase it from our marketplace and then download it from the client area.
- Once you download the module extract it in the main HostBill directory.
- Go to Settings → Modules → Hosting Modules, find and activate AD / LDAP Provisioning module.
Connecting HostBill with AD / LDAP Provisioning
- Proceed to Settings → Apps → Add new App
- From Applications list select AD / LDAP Provisioning
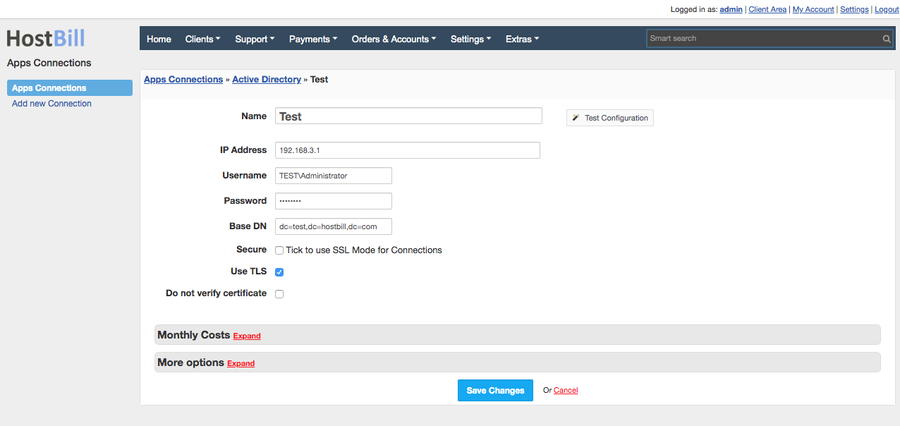
- Enter:
- Name - Name of this connection
- AD / LDAP Server IP
- Administrator username
- Administrator password
- Base DN
- Tick checkboxes for:
- SSL if SSL should be used for connections
- TLS if TLS should be used for connections
- Do not verify certificate - if your AD/LDAP server uses self-signed SSL certificate
4. Verify entered credentials by clicking Test Connection to check if HostBill can connect
5. Save Changes
Creating your first AD / LDAP Provisioning-based package
- In HostBill go to Settings → Products & Services, and Add new order page
- From Order Types select Other type
- After creating order page add new product in it, provide its name and Save changes
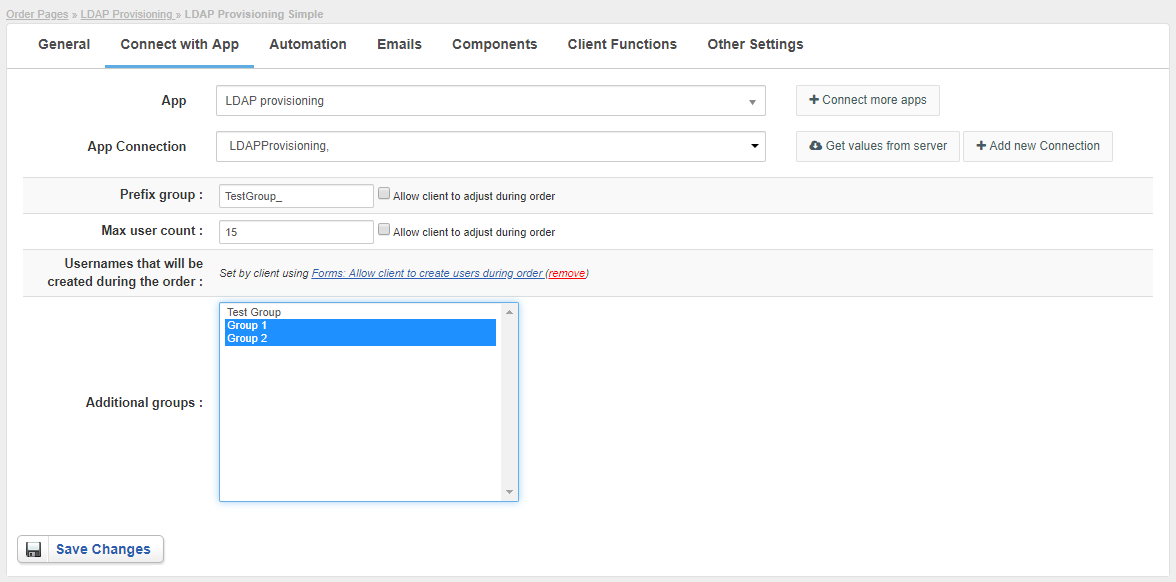
- From Connect with App section select AD / LDAP Provisioning module & app.
- Under Prefix enter group name prefix that customer group should be created with. Group name will be created from HostBill account id prefixed with value of this setting.
- User Count sets limits of users that customer can create under his account with this package.
Clicking on "Allow to select by client during order" will create a Component:Form element for you, where you can apply additional pricing for user-entered value. - Choose Additional groups. Users that will be created in LDAP automatically will also be assigned to selected groups.
For more generic product configuration details including price, automation, emails settings refer to Product Configuration article.
Configuring Client Functions
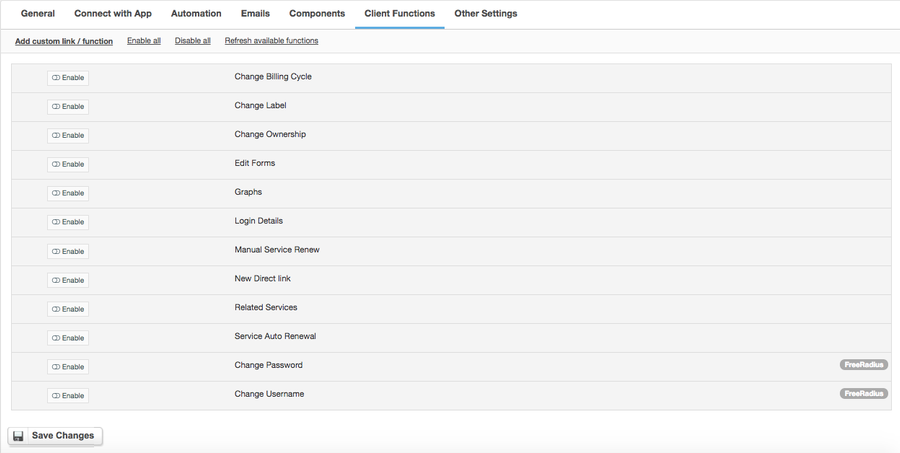
In Products & Services → Your Order Page → Your Product → Client Functions you can control what features customer will have access to in client portal, by clicking Enable/Disable next to the given option.
Use Edit button to adjust function appearance in the client portal.
Standard client functions apply such as
- Change Billing Cycle
- Change Label
- Change Ownership
- Edit Forms
- Graphs
- Login Details
- Manual Service Renew
- New Direct Link
- Related Services
- Service Auto Renewal


