Pax8
- HostBill
- HostBill
Overview
Pax8 simplifies the way organizations buy, sell, and manage cloud solutions, empowering partners to achieve more with cloud technology. Pax8 provides a born-in-the-cloud platform that modernizes the channel’s cloud journey with consolidated billing, automated provisioning, and industry-leading PSA integrations. Thanks to the integration with HostBill you can resell Microsoft cloud products using Pax8 platform and benefit from HostBill automation features. HostBill not only offers a complete product automation, but also seamless and hassle-free product portfolio import from Pax8.
Activating the module
- If the module is included in your HostBill edition you can download it from your client portal.
- If the module is not included in your HostBill edition you can purchase it from our marketplace and then download it from the client area.
- Once you download the module extract it in the main HostBill directory.
- Go to Settings → Modules → Hosting Modules, find and activate Pax8 module.
Connecting HostBill with Pax8
In Pax8 Platform:
- Login to Pax8 platform (Partner Administrator)
- Proceed to Tools → Partner Shells
- Enable / make sure its enabled: Pax8 API - Pax8 Partner API Partner Shell
- Proceed to (Your User) → User Settings → Developer Apps
- Click on Create to add new app
- Enter name for your app/connnection
- Copy your Client ID and Client Secret
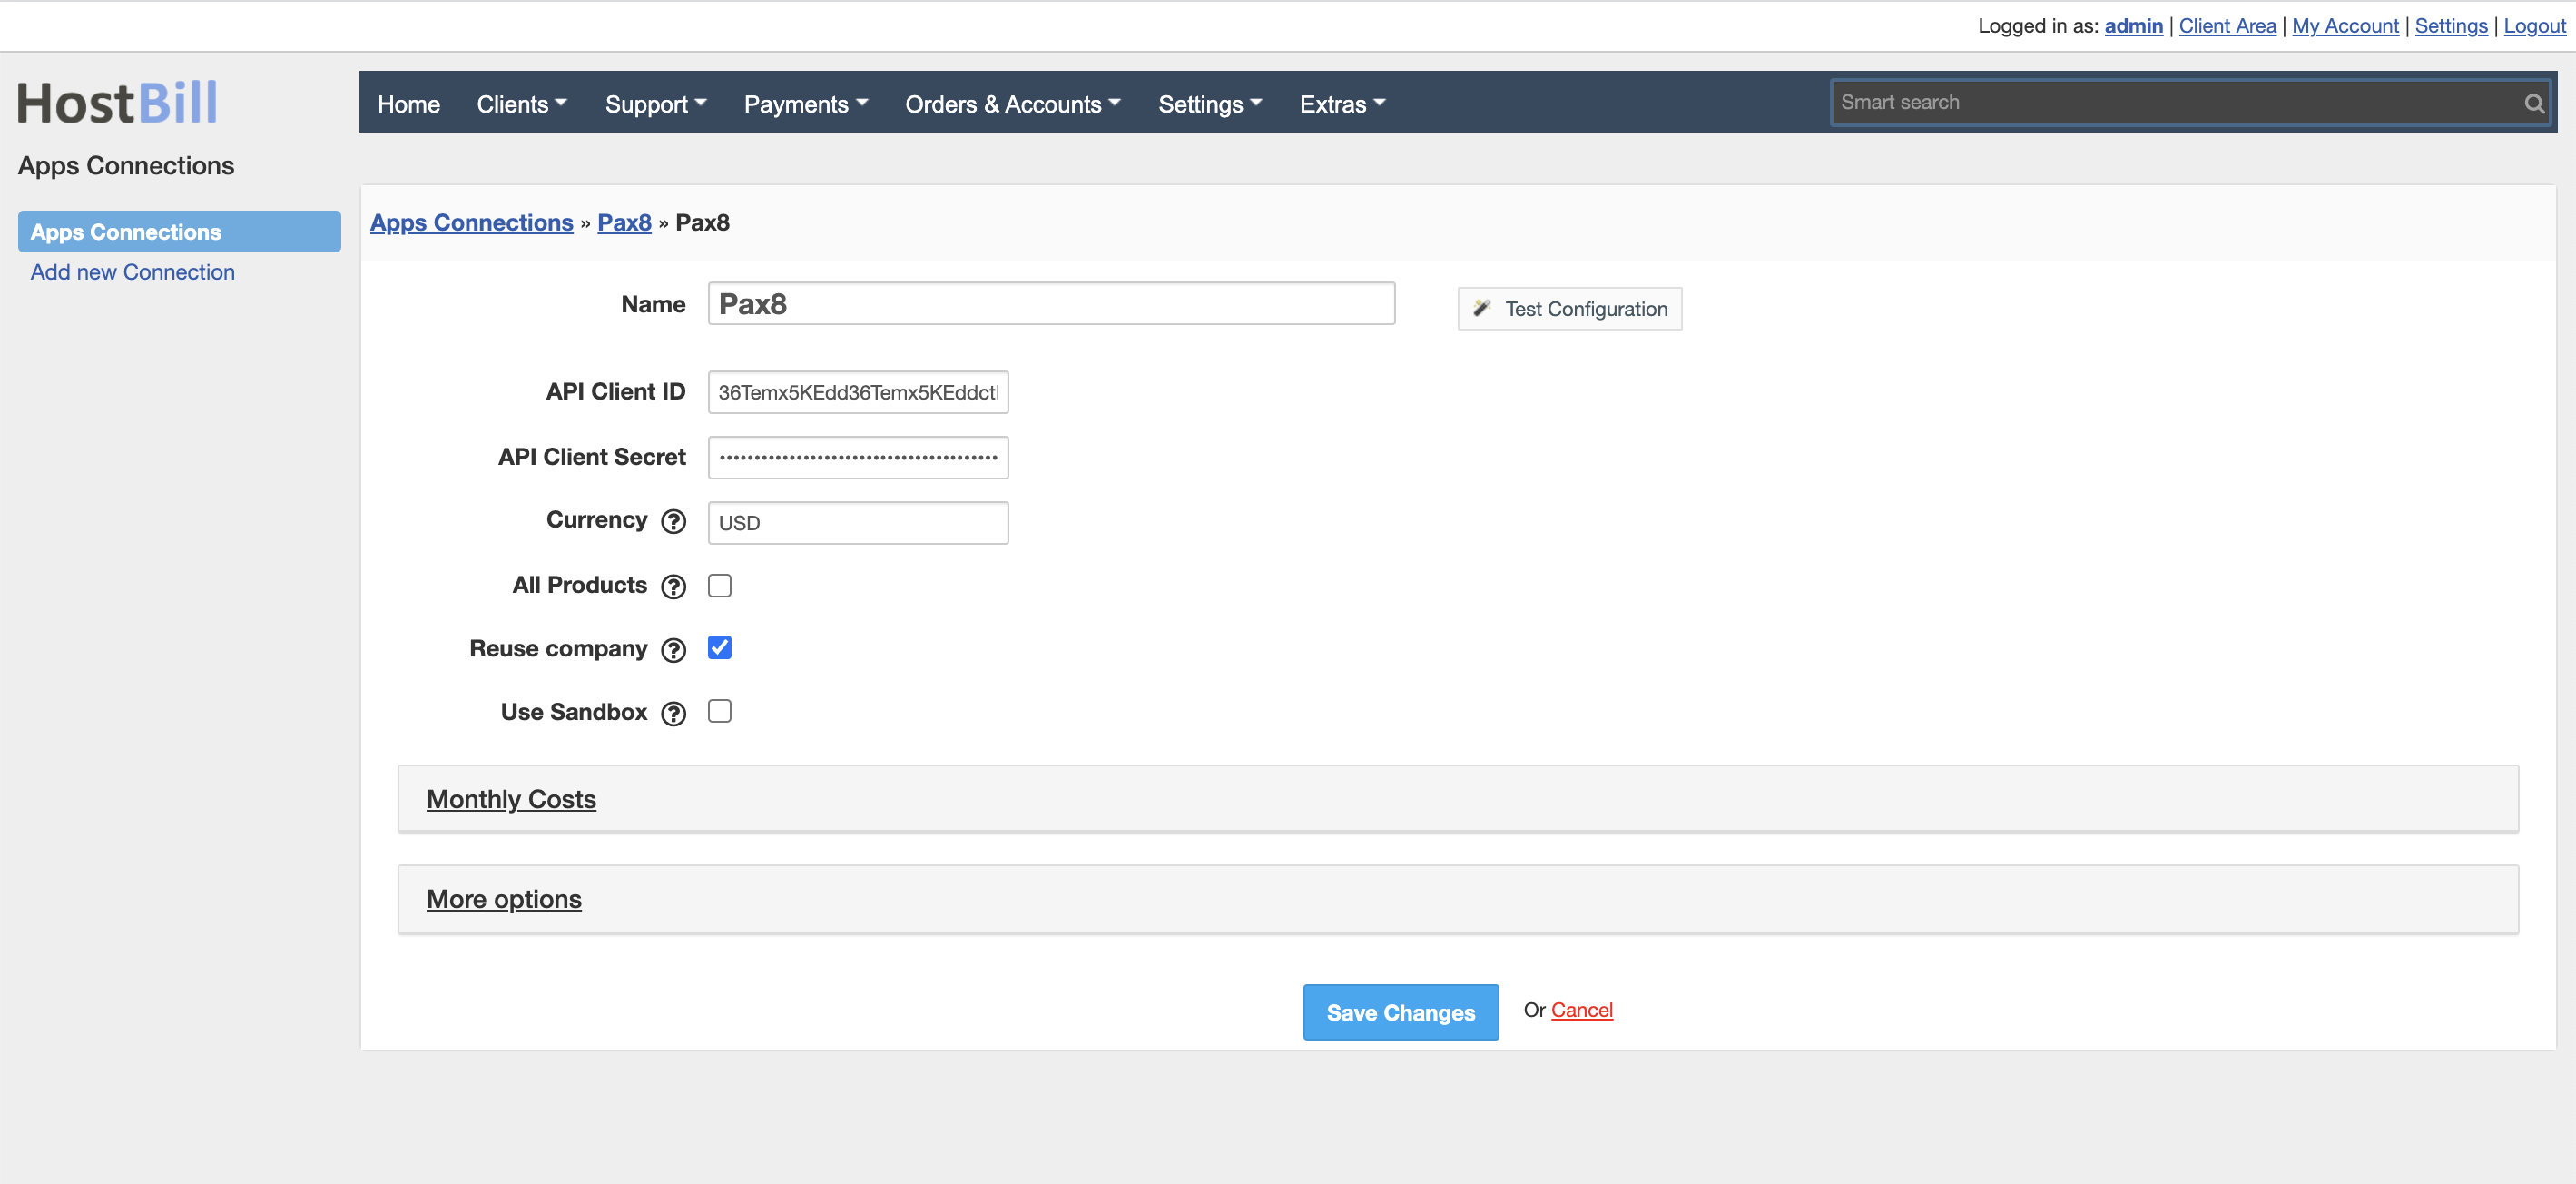
In HostBill:
- Proceed to Settings → Apps → Add new App
- From Applications list select Pax8
- Enter:
- API Client ID - Obtained in previous steps
- API Client Secret - Obtained in previous steps
- Currency - enter currency ISO code of your Pax8 partner account
- All Products
- When disabled module will show/list/import only Microsoft products
- When enabled it will list/import all products from Pax8 - note that its time consuming process to import all products from API
- Reuse company
- when enabled only one client company will be created for first license order, subsequent orders will fall under single company
4. Verify entered credentials by clicking Test Connection to check if HostBill can connect.
5. Save Changes
Adding Pax8 product
- In HostBill go to Settings → Products & Services, and Add new order page
- From order types select Other Services
- Enter your orderpage name, select orderpage template. Save Changes
- Add new product in the new orderpage. Provide product name and setup price and then Save Changes.
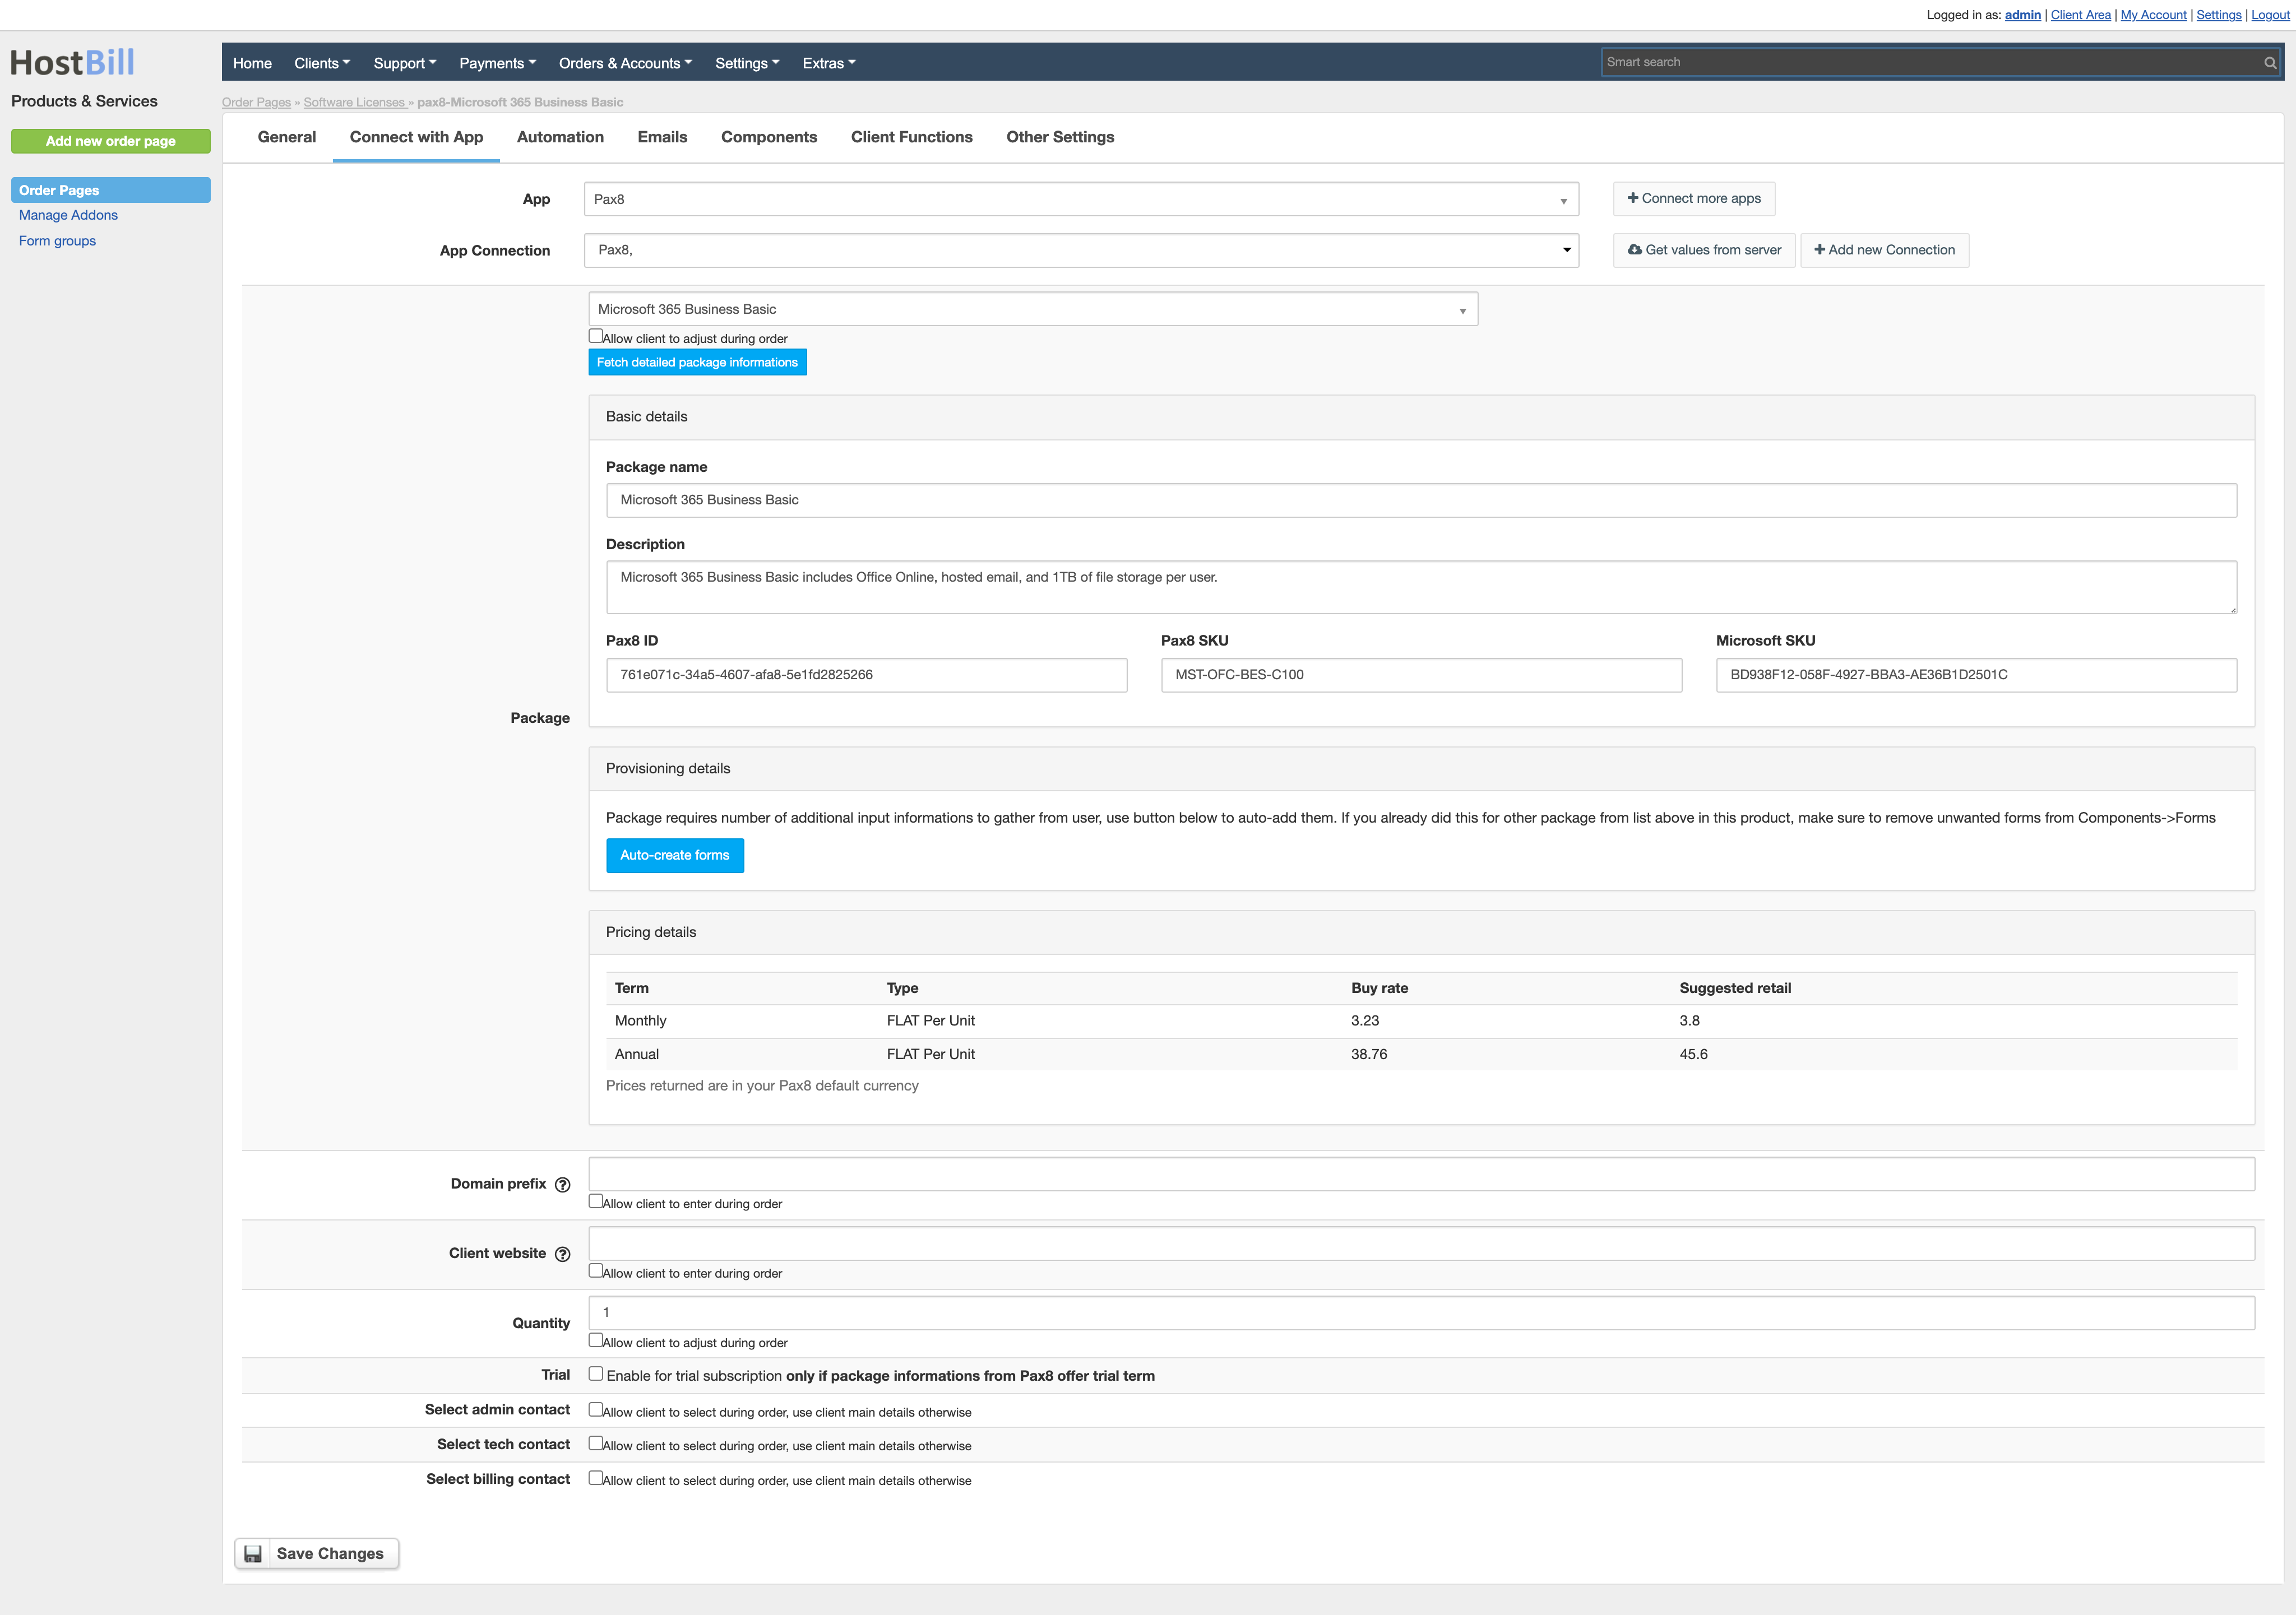
- In product configuration section proceed to Connect with App, select Pax8 and App server created in previous steps
- Configure module connection settings:
- Click on Get Values from Server to load available products
- Select Package
- Once selected you will be able to click on Fetch detailed package informations
- This will load all package detail from API, including product description, name, ids/skus
- Click on Auto-create forms - this button will show if package comes with some provisioning requirements (additional fields required from user for signup)
- Pricing details will show Buy and suggested retail prices for given package
- Enter Domain prefix
- This option is useful for Microsoft products. This is sub-domain for the onmicrosoft.com domain (prefix.onmicrosoft.com). this domain will be used to access the account. Only alphanumeric (alphabetic and numeric) characters are allowed, use Allow client to adjust during order to create input field for this property
- Enter Client website
- Pax8 requires customer/company website domain name to create account, use Allow client to adjust during order to create input field for this property
- Enter Quantity
- Trial
- You can enable for trial subscription only if package informations in Pricing Details from Pax8 offer trial term.
- Select admin contact
- When enabled with checkbox it will create form element to select one of customer-created contacts during order.
If not selected main customer account details will be used to create such contact
- When enabled with checkbox it will create form element to select one of customer-created contacts during order.
- Select tech contact
- When enabled with checkbox it will create form element to select one of customer-created contacts during order.
If not selected main customer account details will be used to create such contact
- When enabled with checkbox it will create form element to select one of customer-created contacts during order.
- Select billing contact
- When enabled with checkbox it will create form element to select one of customer-created contacts during order.
If not selected main customer account details will be used to create such contact
- When enabled with checkbox it will create form element to select one of customer-created contacts during order.
For more generic product configuration details including price, automation, emails settings refer to Product Configuration article.
Importing Pax products
Once the first package is configured, you can have HostBill automatically import remaining Microsoft CSP products offered by Pax8, as well as keep their prices/portfolio in sync.
To manage importer, visit Extras → Import Services → Import Products
Refer to importing products article for details.