VMmanager
- HostBill
- HostBill
Overview
VMmanager is a solution developed by ISP System and a convenient tool for centralised management of computing and network resources, which allows to manage a virtual environment to host any company services. Thanks to HostBill integration you can sell and manage VMmanager VPS Hosting. Use various product configuration options offered by HostBill to create your product and set up your automation. HostBill will handle billing, invoicing, creating user accounts and virtual machines, upgrading the resources and the whole account lifecycle. Client panel provides end customers with the ability to manage VMs: start, stop and reboot and enables to display login details or SSO/Login to VMManager for machine management.
Activating the module
- If the module is included in your HostBill edition you can download it from your client portal.
- If the module is not included in your HostBill edition you can purchase it from our marketplace and then download it from the client area.
- Once you download the module extract it in the main HostBill directory.
- Go to Settings → Modules → Hosting Modules, find and activate VMmanager module
Connecting HostBill with VMmanager
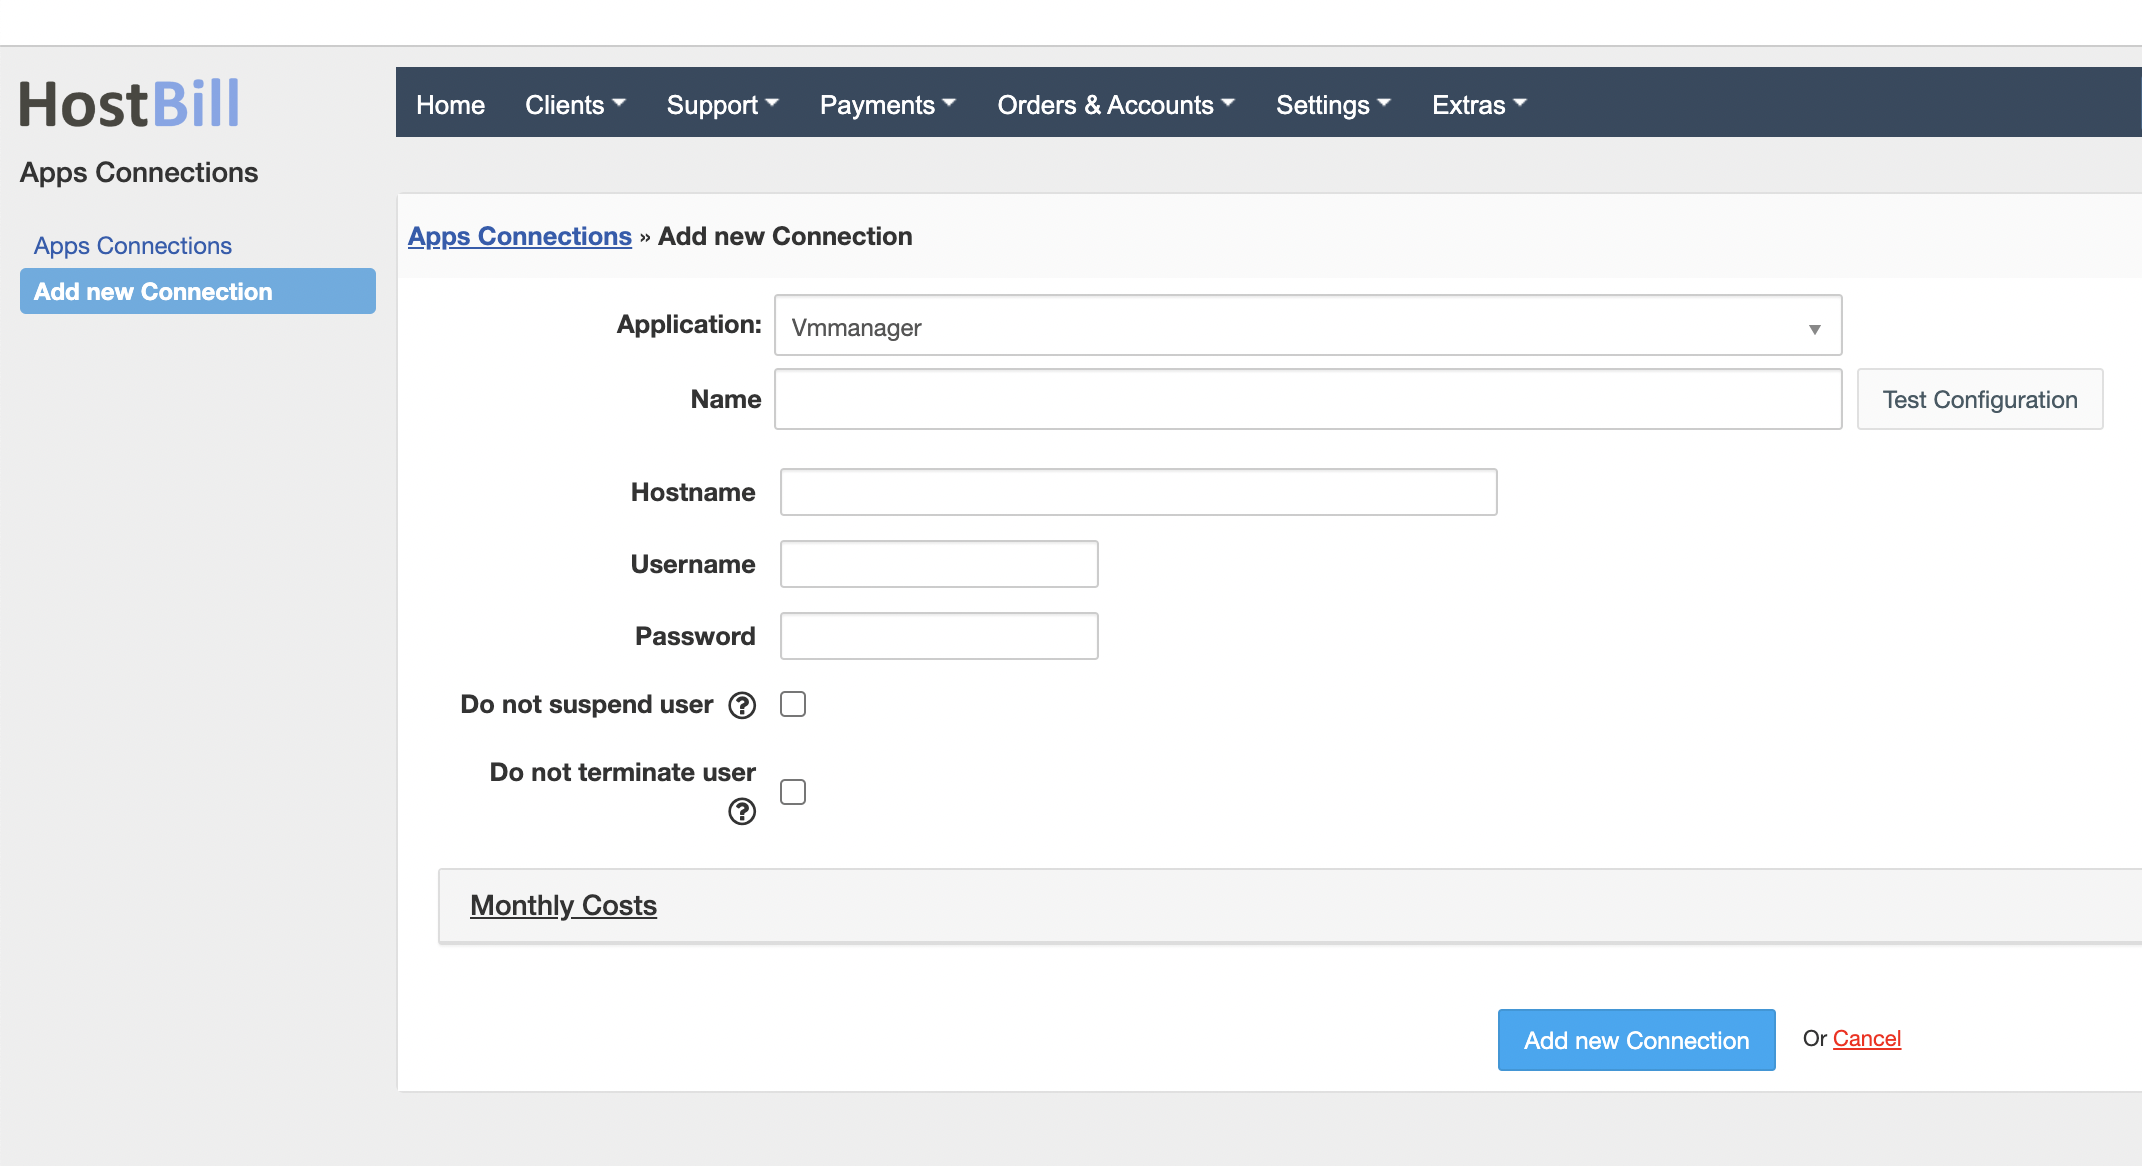
- Proceed to Settings → Apps → Add new App
- From Applications list select VMmanager
- Enter:
- Hostname - Your VMManager installation hostname
- Username - Your VMManager admin username
- Password - Your VMManager admin password
- Do not suspend user - When enabled, during account suspension module will not attempt to suspend user. Instead related VM will be stopped
- Do not terminate user - When enabled, during account termination module will not attempt to remove corresponding user
4. Verify entered credentials by clicking Test Connection to check if HostBill can connect.
5. Save Changes
Adding VMmanager product
- In HostBill go to Settings → Products & Services, and Add new order page
- From order types select VPS Accounts
- Enter your orderpage name, select orderpage template. Save Changes
- Add new product in the new orderpage. Provide product name and setup price and then Save Changes.
- In product configuration section proceed to Connect with App, select VMmanager and App server created in previous steps.
- Press the Get values from server button to get available values for configuration.
- Fill the fields, note that using "Allow client to adjust during order" creates related form element in Components:Forms for user to fill in during order, allowing you to specify per-resource pricing
- Package ID - Predefined package from VMmanager.
- System ID - Os template from VMmanager
- Node ID - It can be left empty, if Cluster ID is set
- Cluster ID - It can be left empty, if Node ID is set
- Recipe ID - Leave blank for no recipe
- IPv4 pool ID - Leave empty for VMmanager to auto-select. When more than one selected, module will randomly select one for provisioning
- IPv4 count - Amount of IP addresses to assign
- IPv6 enabled - Should newly created VMs have IPv6 assigned/enabled
- Manual - when enabled rather than using Package, module will create machine using CPU/Ram/Storage options specified
- CPU - amounts of CPUs for machine created with manual resources
- RAM - amount of RAM for machine created with manual resources
- STORAGE - Disk space storage for machine created with manual resources
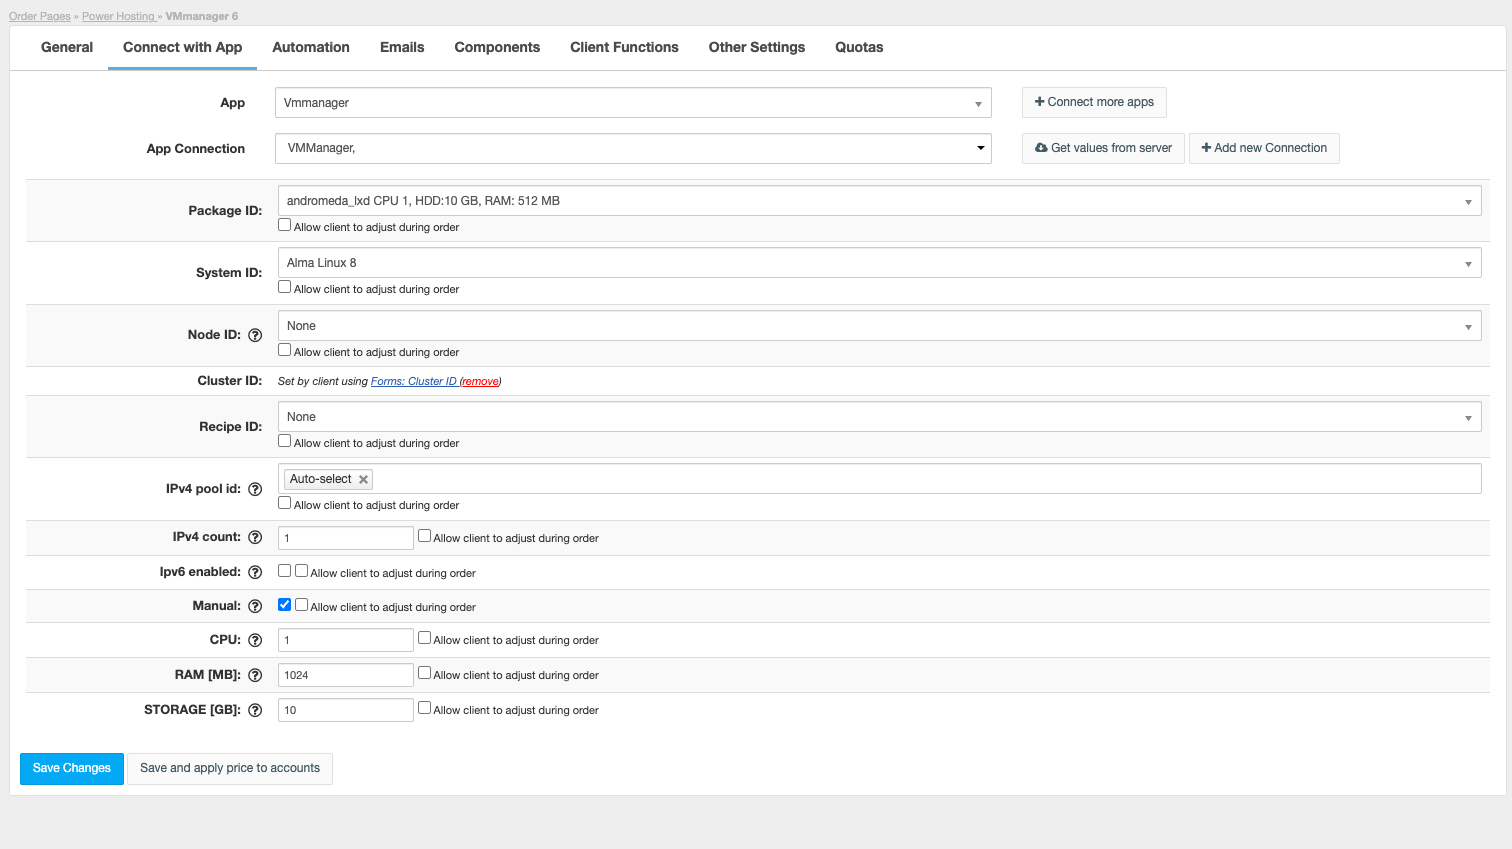
- Save changes.
For more generic product configuration details including price, automation, emails settings refer to Product Configuration article.
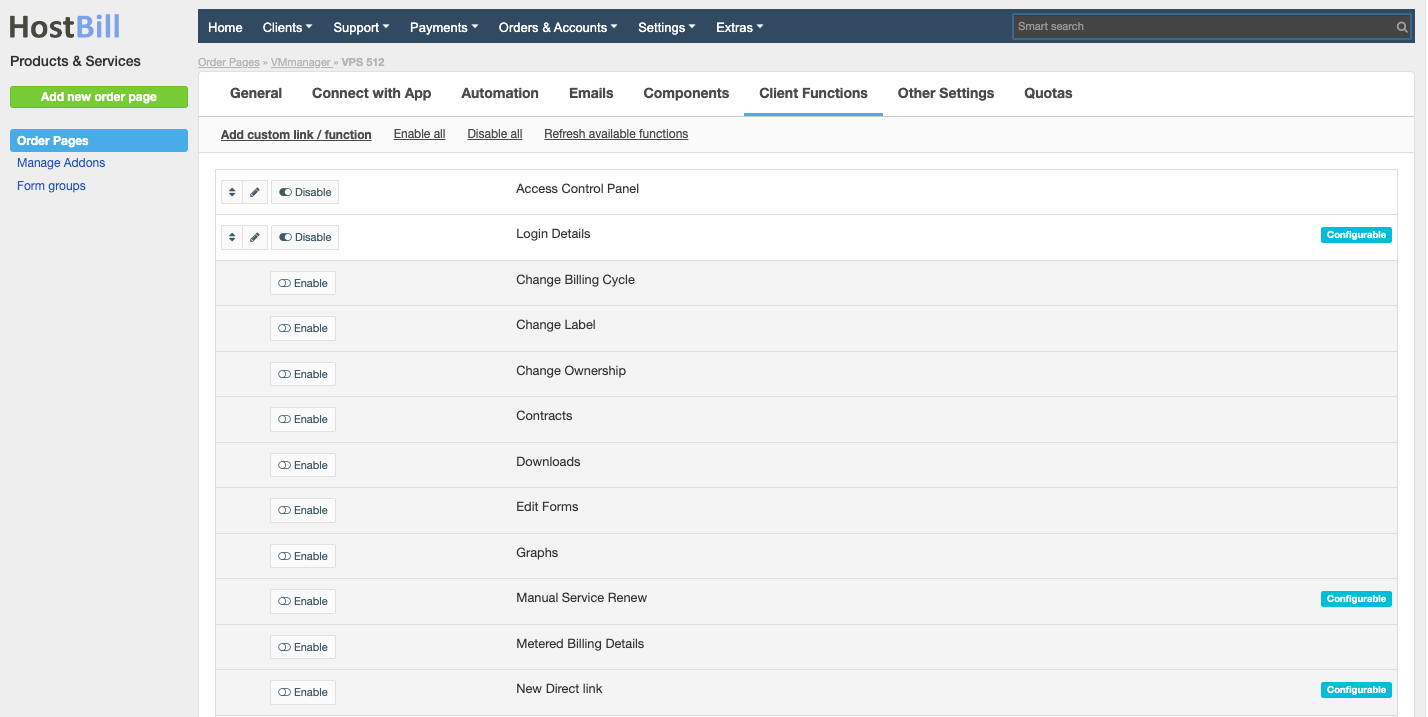
Configuring Client Functions
In Products & Services → Your Order Page → Your Product → Client Functions you can control what features customer will have access to in client portal, by clicking Enable/Disable next to the given option.
Use Edit button to adjust function appearance in the client portal.
For VMmanager you can enable a number of standard client functions:
- Login details
- Access control panel
- Change Billing Cycle
- Change Label
- Change Ownership
- Contracts
- Downloads
- Edit Forms
- Graphs
- Login Details
- Manage IP
- Manual Service Renew
- Metered Billing Details
- Related Services
- Service Auto Renewal