Constellix DNS
- HostBill
- HostBill
Overview
Constellix provides DNS management tool that is specially engineered for optimizing multi-cloud and multi-CDN architectures using intelligent traffic routing services. The Constellix DNS module for HostBill is the ultimate tool to sell DNS services to your clients in various models! With HostBill you get the opportunity to bill your customers per DNS Zone or offer DNS management bundled with domain names or offer DNS free of charge as an addition to other products and services in your portfolio. HostBill will automatically handle the service: automatically import existing zones, create client accounts and manage their lifecycle, manage predefined templates and enable to automatically import and export the DNS Templates.
Activating the module
- If the module is included in your HostBill edition you can download it from your client portal.
- If the module is not included in your HostBill edition you can purchase it from our marketplace and then download it from the client area.
- Once you download the module extract it in the main HostBill directory.
- Go to Settings → Modules → Hosting Modules, find and activate Constellix DNS module.
Connecting HostBill with Constellix DNS
- Proceed to Settings → Apps → Add new App
- From Applications list select Constellix DNS
- Enter:
- Name - Name of this connection
- API Key - obtained from Constellix management portal
- Secret Key - obtained from Constellix management portal
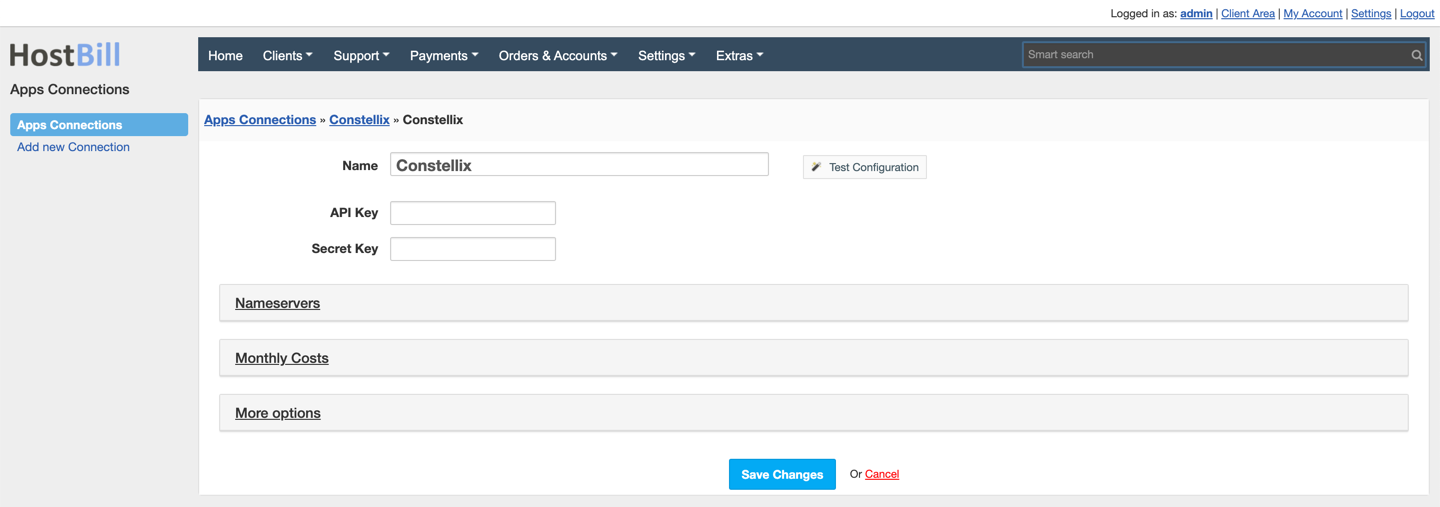
4. Verify entered credentials by clicking Test Connection to check if HostBill can connect
5. Save Changes
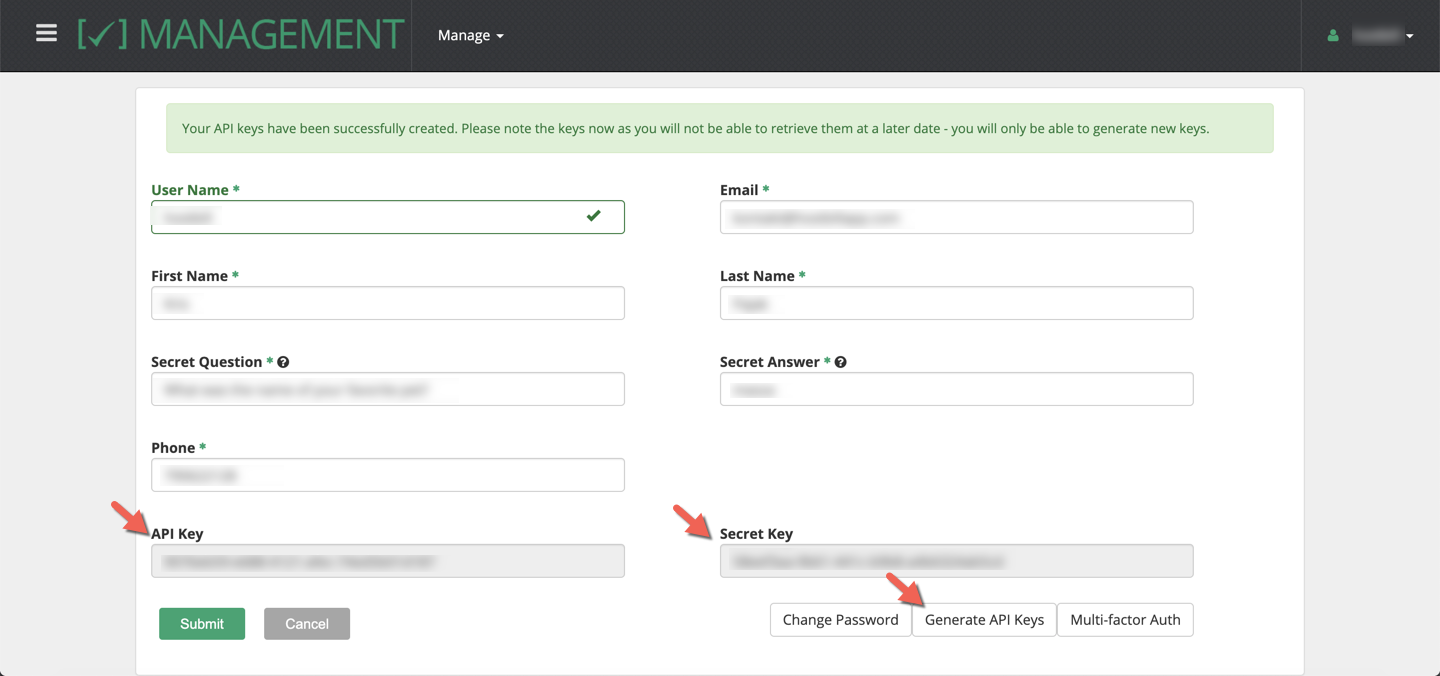
Api Key/secret can be obtained from Constellix → Management → Manage → Users → /User/ → Generate API Keys
Adding Constellix DNSproduct
- In HostBill go to Settings → Products & Services, and Add new order page
- From Order Types select DNS Services
- After creating order page add new product in it, provide its name & Save changes
- In product configuration section proceed to Connect with App, select Constellix DNS module and App server created in previous steps.
- Enter:
- Max number of domains your client can add,
- Use this template with each new zone - select DNS Template to be used with each new provisioned zone
- Record types - this option allows you to limit available DNS records to be added by customer
- Hide billing info from DNS product - this option works great when DNS management is free features you offer to your clients
- Hide ability to add new zones manually - enable if zones are autoprovisioned for this product and client should not add them anually
- Nameservers - provide default set of Nameservers zones should be provisioned with + those nameservers are being used when comparing for dns zone automation
- Submit changes - your package is ready
For more generic product configuration details including price, automation, emails settings refer to Product Configuration article.