Plesk DNS Helper
Configuring HostBill DNS Helper in Plesk
To begin, you need to install Plesk Extension that is shipped with Plesk module for HostBill.
- Copy extension zip file from
includes/modules/Hosting/plesk12/pleskmodule/distdirectory of your HostBill installation. ie: hostbill-dns-1.0-1.zip to your plesk server Login to your plesk ssh, and install extension as instructed in https://docs.plesk.com/en-US/onyx/extensions-guide/extensions-management-utility.73617/
Sample of extension installplesk bin extension -i /root/hostbill-dns-1.0-0.zip
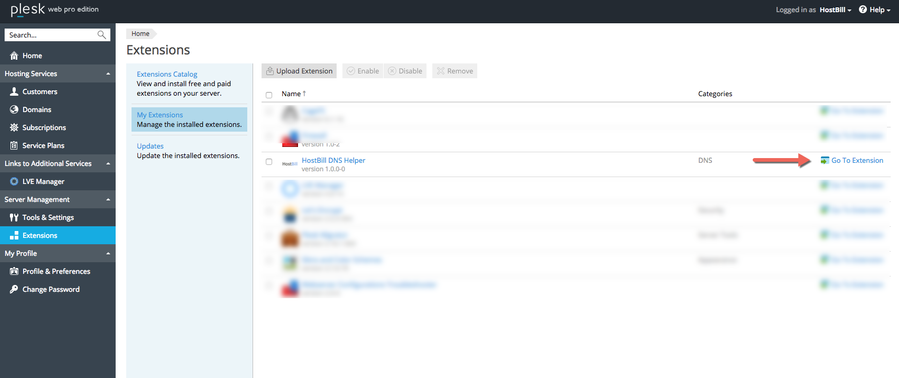
- Once extension is installed, click "Go to extension" next to it:
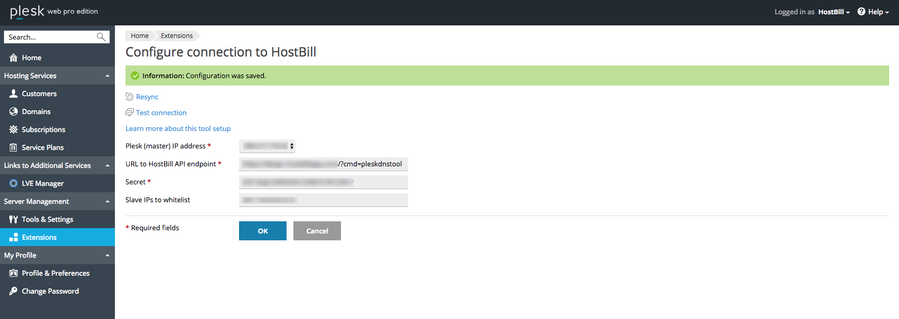
- Configure connection to HostBill
- Select your Plesk master IP address (used by primary nameserver on Plesk)
- Enter URL to HostBill API endpoint (described in section below)
- Enter Secret to HostBill API (save it for later)
- In field Slave IPs to whitelist, enter comma separated list of IP addresses of your slave servers that should be added to Plesk DNS ACL.
This is required if target DNS server (configured in HostBill, read below) you will be exporting zones to should be responsible for storing slave zones, while Plesk DNS will serve as storage for master zones. - Submit with OK button
You can now verify connection to your HostBill by clicking Test Connection button. If connection succeeds, you should see following message:
Configuring Plesk module in HostBill
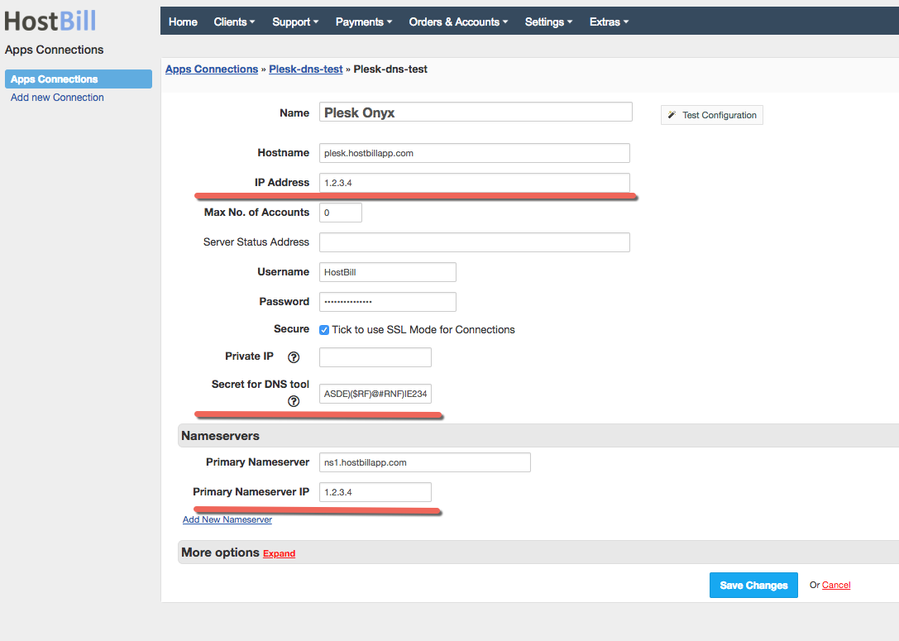
Make sure that any Plesk you will be synchronizing data from have configured connection in HostBill → Connect with app (read more about configuration in: Plesk ).
Especially ensure that following fields:
- IP address
- Secret for DNS tool
- Primary nameserver IPs
are configured in your Plesk connection in HostBill.
Configuring Plesk DNS Tool in HostBill
- Find and activate Plesk DNS Tool plugin in your HostBill → Extras → Plugins
- Once activated proceed to Extras → Plugins → Plesk DNS Tool to configure the module
- Copy HostBill API endpoint URL to be used on Plesk extension configuration
- Select Target DNS server you wish zones coming from your Plesk installations should be hosted on
If you'd like your clients to manage their DNS zones in HostBill DNS manager - tick "Try to assign synchronized zone to HostBill account"
Warning
This option should be used with caution, possibly only for PowerDNS Slave module. If you enable this option, client will "see" imported zone in DNS management section.
If customer would then update anything directly on DNS server, his changes may later be overwritten by another synchronization made with Plesk DNS tool.
It's best to have clients manage their DNS directly on Plesk or via HostBill client portal, using Plesk DNS management function
- Copy HostBill API endpoint URL to be used on Plesk extension configuration
Resyncing zones from Plesk to HostBill
This operation can be used ie: when you've installed our Plesk extension, and have some zones you'd like to export / test. Calling it, will send all zones information to Plesk DNS Tool in HostBill.
To resync zones:
- Proceed to Extensions → My Extensions in Plesk
- Click Go to Extension next to HostBill DNS Helper
- Click on Resync button
- Confirm
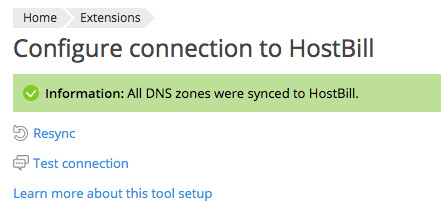
- After resync is ready, you should see following info:
Note about existing zones
If you use Resync option on Plesk server with many zones in DNS you may need to wait a little while for all zones to be synchronized. You can track progress of synchronization in HostBill → Extras→ Plugins→ Plesk DNS Tool → Synch Logs


