/
PowerDNS REST
PowerDNS REST
- HostBill
- HostBill
- HostBill Support
Owned by HostBill
Overview
PowerDNS REST is a replacement for PowerDNS module that provides the exact same functionality without the need of direct MySQL / ssh access. Instead PowerDNS Rest API is used.
PowerDNS REST module requires:
- PowerDNS (version 4.0 or higher)
- PowerDNS Webserver - Documentation
- PowerDNS API - Documentation
Activating the module
- If the module is included in your HostBill edition you can download it from your client portal. This module is shipped with regular PowerDNS module.
- If the module is not included in your HostBill edition you can purchase it from our marketplace and then download it from the client area.
- Once you download the module extract it in the main HostBill directory.
- Go to Settings → Modules → Hosting Modules, find and activate PowerDNS REST module.
Connecting HostBill with PowerDNS
- Proceed to Settings → Apps → Add new App
- From Applications list select PowerDNS REST
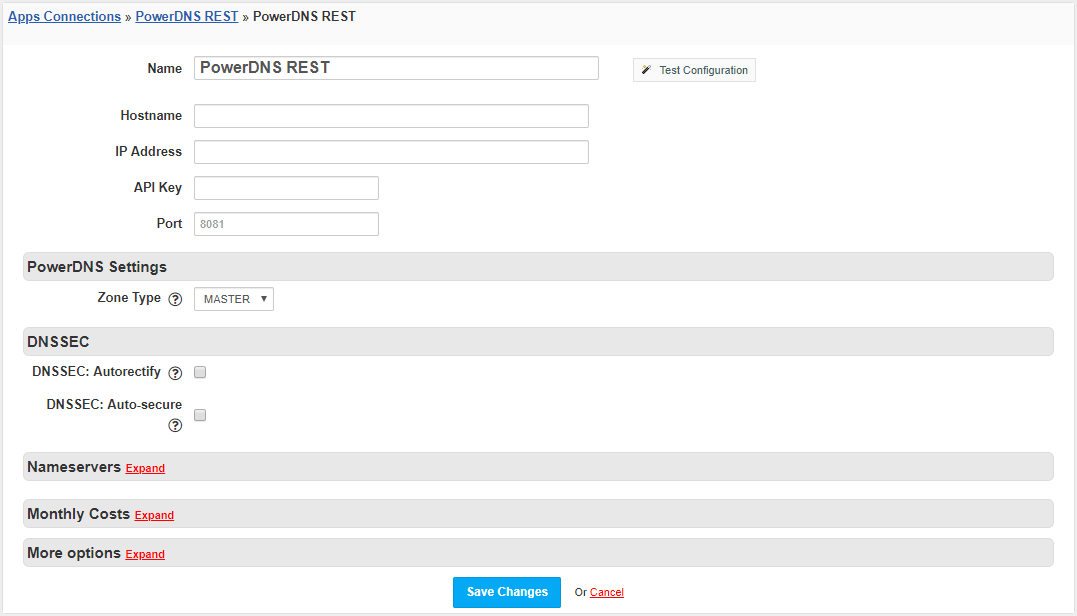
- Enter:
- Name - the connect name
- Hostname - optional field, if the value is specified in the IP Address field
- IP Address - optional field, if the value is specified in the Hostname field
- API Key
- Port - if a standard 8081 port is used, this field can be left empty
- Zone Type - zone type that this app will allow to add/create
- DNSSEC: Autorectify - if enabled, any DNS change with PowerDNS module will cause zone to be rectified (if DNSSEC for zone is enabled). Requires enabling HostBill Queue module
- DNSSEC: Auto-secure - if enabled, all new zones will automatically be secured with DNSSEC
- Test the connection and save the changes
Adding PowerDNS product
- Go to Settings → Products & Services
- Create a new Order Pages or go to an existing one
- If you create a new Order Page in the Order type field, select DNS Services
- Create a new product and enter the name
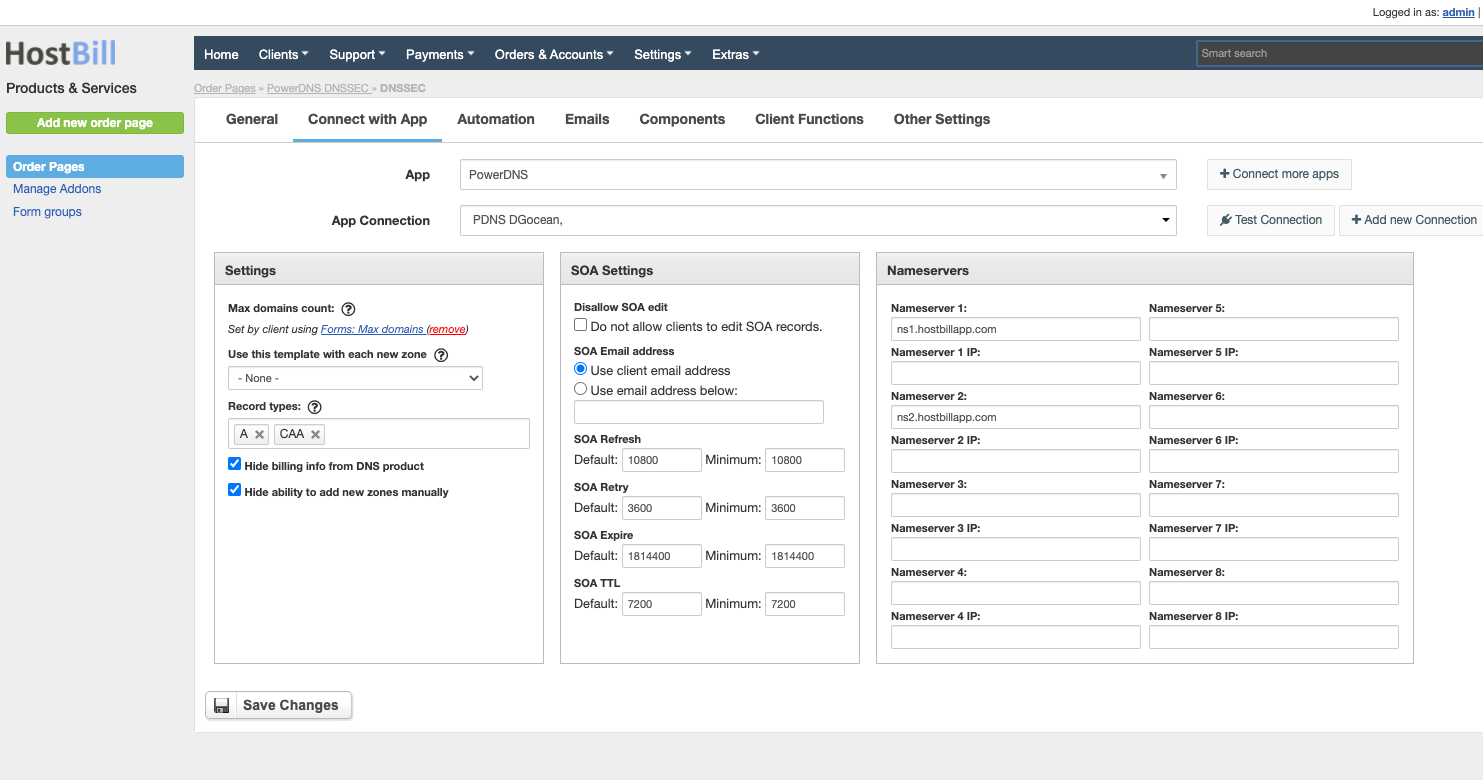
- Go to the Connect with App tab and select App and App Connection
- Enter:
- Max domains count - the maximum number of domains client can create (after selecting the checkbox, a field will be created in which the customer will be able to select the maximum number of domains when placing the order)
- Use this template with each new zone - select dns template that will be applied to each new zone created under this package (you can define DNS Templates in Components → DNS Templates)
- Record types - record types that client can add in client portal (when the field is empty, all types of records that the module offers will be available)
SOA Settings - settings for the SOA record that will be added after the zone is created
- Nameservers - nameservers that will be added after the zone is created
- Hide billing info from DNS product - when enabled customer will not see related billing info (cycle/price) in service - this is useful if DNS management is part of domain automation
- Hide ability to add new zones manually - when enabled customer will not be able to add/remove zones in client portal - this is useful if DNS management is part of domain automation
- After set up the product, save changes
For more generic product configuration details including price, automation, emails settings refer to Product Configuration article.
Related content
PowerDNS
PowerDNS
More like this
Install PowerDNS with MySQL Backend on CentOS 6.6 x64
Install PowerDNS with MySQL Backend on CentOS 6.6 x64
More like this
Plesk Automation
Plesk Automation
Read with this
PowerDNS Slave
PowerDNS Slave
More like this
DNS Settings
DNS Settings
Read with this
DNSSEC with PowerDNS module for HostBill
DNSSEC with PowerDNS module for HostBill
More like this