DCImanager v6 Dedicated servers
- Hostbill Support
- HostBill
Overview
DCImanager is a DCIM and dedicated server provisioning software aimed at managing hundreds of dedicated servers and taking control of the entire data center infrastructure. With DCImanager module for HostBill you can sell dedicated servers and bill for bandwidth or IP usage.
Note
This module supports DCImanager server starting with version 6. For DCImanager v5 please see DCImanager v2 Dedicated servers
What happens during account provisioning using this module?
When you accept the order or click on create in account our module will:
- create an user in DCImanager
- find a server with no owner
- update server owner and name
- enable sever ports and update their speed
- update server IPs to product limit, this may remove current IP and re-add another.
- start os installation
Activating the module
- If the module is included in your HostBill edition you can download it from your client portal.
- If the module is not included in your HostBill edition you can purchase it from our marketplace and then download it from the client area.
- Once you download the module extract it in the main HostBill directory.
- Go to Settings → Modules → Hosting Modules, find and activate DCImanager v6 module.
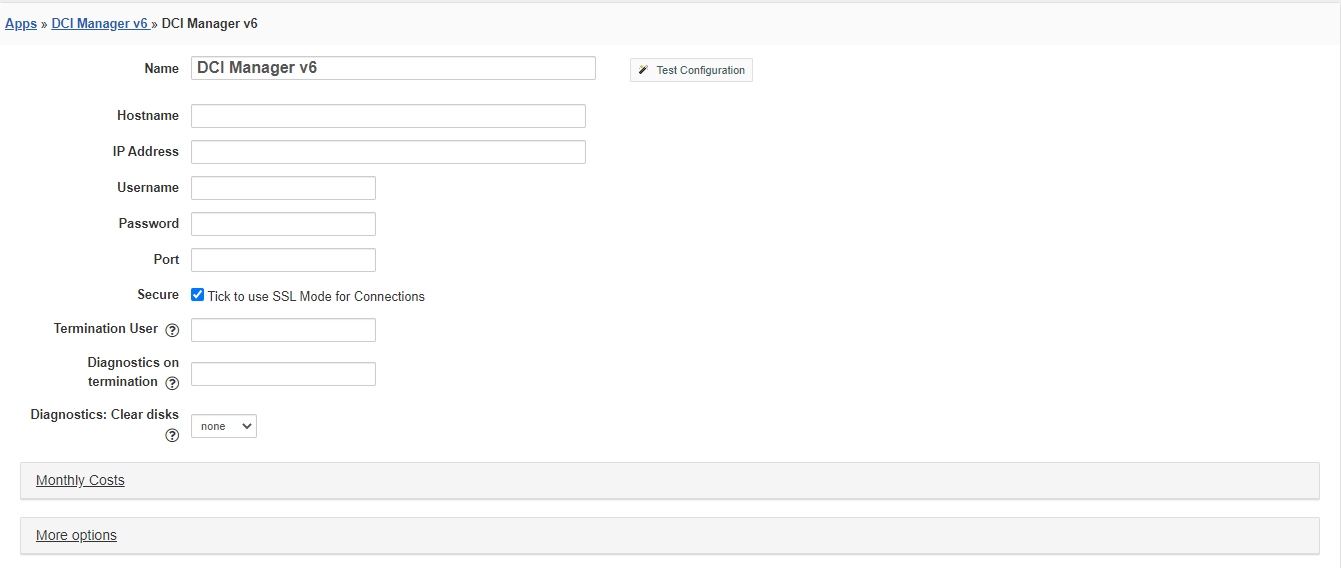
Connecting HostBill with DCI Manager
- Proceed to Settings → Apps → Add new App
- From the Applications list select DCImanager v6
- Enter:
- Name - Name of this connection
- IP -Your DCImanager server ip address
- Host - Your DCImanager server hostname
- Username - Your DCImanager Username
- Password - Your DCImanager Password
- Port - Port number used by your DCImanager server
- SSL - Check if you want to use secure connection
4. Verify entered credentials by clicking Test Connection to check if HostBill can connect
5. Save Changes
Adding DCI Manager Dedicated servers Product
- In HostBill go to Settings → Products & Services, and Add new order page
- From Order Types select Dedicated Servers
- Enter your order page name, select the template and Save Changes
- Add a new product to your order page. Provide product name, setup price, Save Changes.
- In the product configuration section proceed to "Connect with App", select "DCI Manager v6" and App server created in previous steps.
- Proceed to configuration wizard and set your package limit.
- Submit changes.

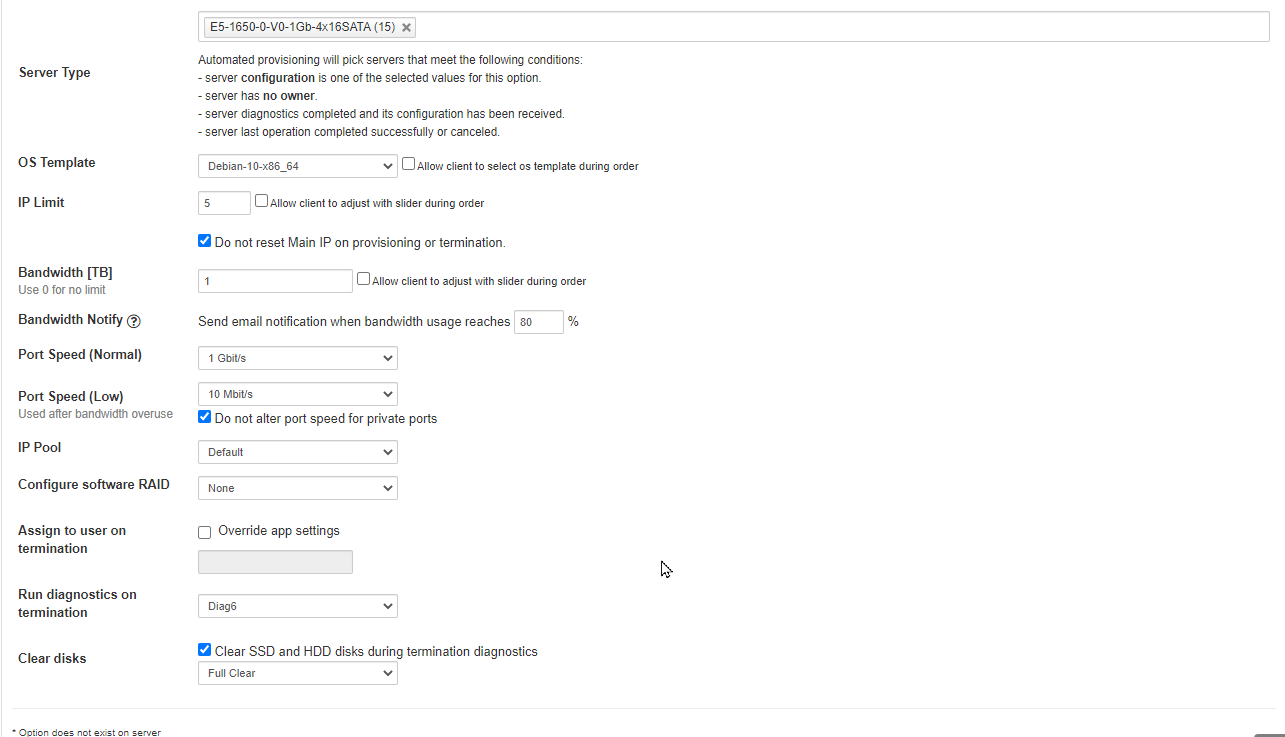
Connect with App configuration
Server Type
- Select which server configuration you want to provision with this product. It is possible to select multiple options.
Automated provisioning will pick servers that meet the following conditions:
- server configuration is one of the selected values for this option
- server has no owner, diagnostics operation was completed successfully and the last operation had no errors.
Os Template
- Select an OS template to use during provisioning.
- It is possible to allow clients to select the OS template during order.
IP Limit
- The number of IPs a client can use for his server. IP will be assigned to the server during provisioning and can be later managed from the client area.
- It is possible to allow clients to select the IP limit during order.
Bandwidth
- Select the bandwidth limit for client service. Leave empty or set to 0 to set unlimited bandwidth.
- Bandwidth usage will reset every month relative to the service due date.
- It is possible to allow clients to select the Bandwidth limit during order.
Bandwidth Notify
- Send email notification when bandwidth usage reaches the selected percent of bandwidth limit.
- Notification uses Bandwidth: Near Limit email template set in Emails tab, it won't send if no template is set.
Port Speed (Normal)
- Select speed for server ports. This speed is applied when bandwidth usage is below selected limit.
Port Speed (Low)
- Select speed for server ports when bandwidth usage exceeds selected limit.
Do not alter port speed for private ports - with this option enabled automation will skip all ports with Disable traffic collection enabled in DCIManager.
IP Pool
- The selected IP pool will be used when assigning new IPs for the server.
Configure software RAID
- Select what raid option to use when starting OS installation operation.
- None - Do not use raid
- Raid 1-10 - Apply selected raid option. In case the selected template does not support raid this option will be ignored.
Assign to user on termination
- Select the username to assign a server to when it is terminated. Use this if you want to run some checks before making the server available for provisioning.
- This option can be defined in App, to select different user per product you need to enable Override app settings checkbox.
Run diagnostics on termination
- Select a diagnostic template to run on service termination.
- Clear SSD and HDD disks during termination diagnostics
- Quick clear - enable to clear disk while running diagnostics.
- Full clear - enable to fully remove data from disk without chance of recovery.
- When diag is enabled automation will perform server termination in the background, server IPs will be removed and server owner changed after the diagnostics operation is complete.
- If owner is changed manually during this time server termination will abort.
For more generic product configuration details including price, automation, emails settings refer to Product Configuration article.
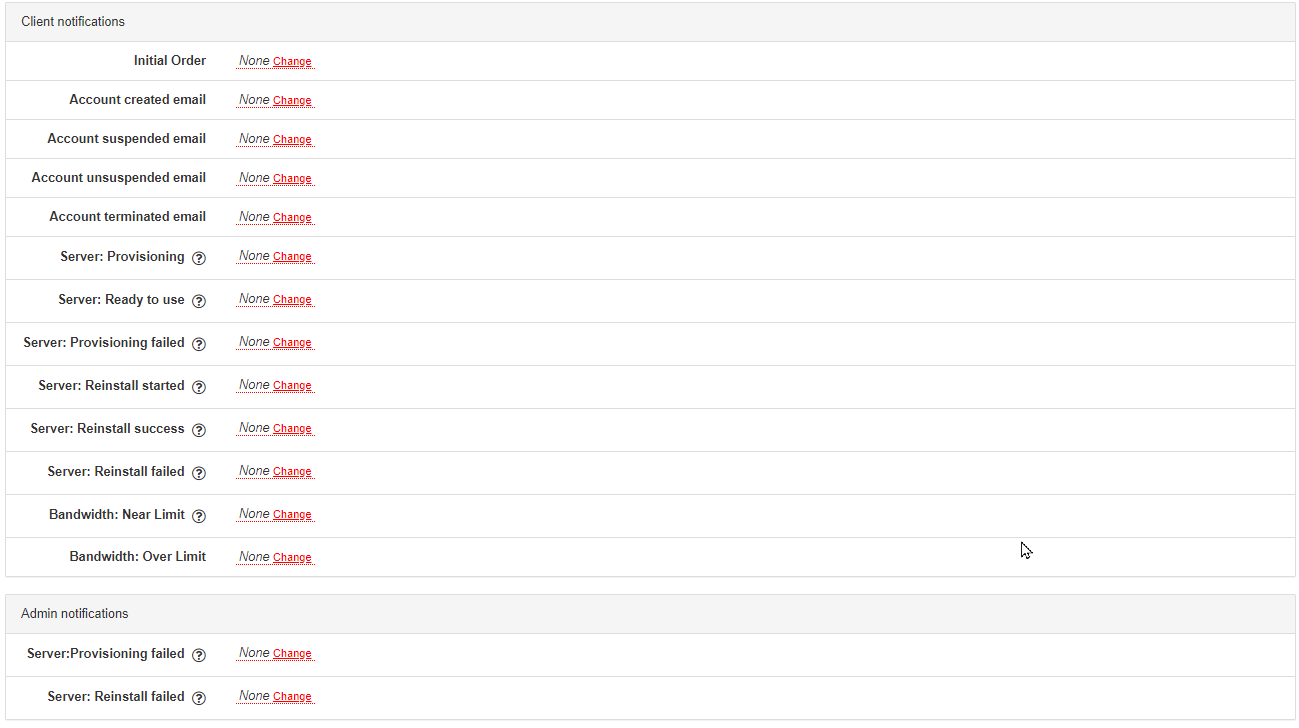
Configuring Email Notifications
In Products & Services → Your Order Page → Your Product → Emails you can control which notifications to send to staff and clients.
For DCImanager v2 you can enable the following notification:
Initial Order - Sent right after a new order, before provisioning
Account created email - Sent after successful service provisioning
Account suspended email - Sent after service suspension
Account unsuspended email - Sent after service unsuspension
Account terminated email - Sent after service termination
Server: Provisioning - Sent when the first OS install operation is started
Server: Ready to use - Sent when the OS install operation is completed without errors
Server: Provisioning failed - Sent when the OS install ends with errors
- Can be enabled for client and administrators
Server: Reinstall started - Sent when the OS install operation is started from the client area
Server: Reinstall success - Sent when the OS install operation started by user is completed without errors
Server: Reinstall failed - Sent when the OS install operation started by user ends with errors
- Can be enabled for client and administrators
Bandwidth: Near Limit - Sent when usage reaches the threshold set in Connect WIth App → Bandwidth Notify
Bandwidth: Over Limit - Sent when usage exceeds the bandwidth limit
Additional Email variables
In email configured in Products & Services → (Your DCI Product) → Emails module exposes following useful variables:
- {$service.rootpassword} - Root/Adminstrator password
- {$service.ip} - Main IP address for created server
- {$service.additional_ip} - String with Additional IP addresses
- {$service.os} - OS Name
- {$service.bw_limit} - Bandwidth limit
You can also refer to Forms: Accessing Forms elements in email templates for variables defined for your Components:Forms
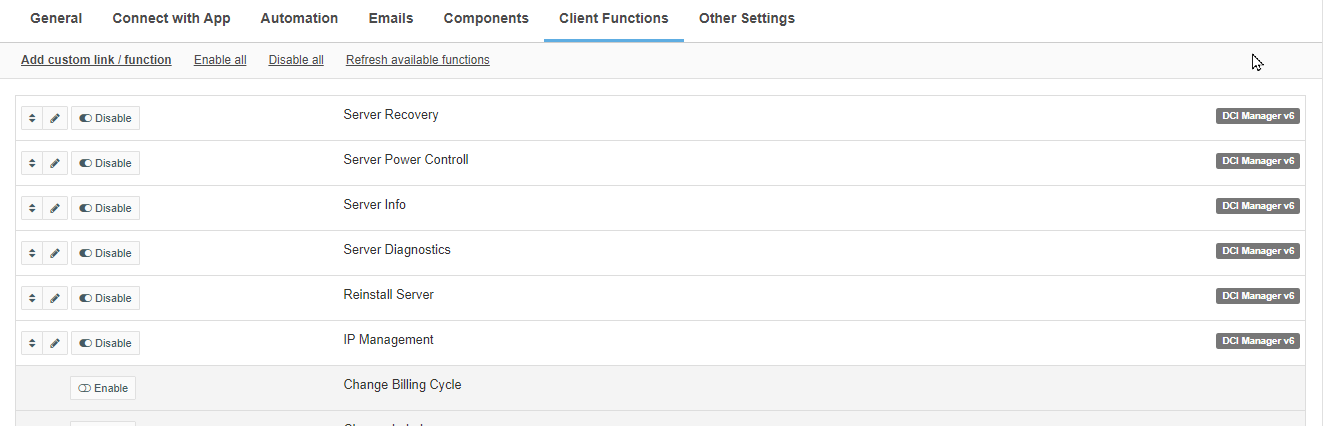
Configuring Client Functions
In Products & Services → Your Order Page → Your Product → Client Functions you can control what features customer will have access to in client portal, by clicking Enable/Disable next to the given option.
Use Edit button to adjust function appearance in the client portal.
For DCImanager you can enable the following client functions dedicated to this module:
- IP Management
- Reinstall Server
- Server Diagnostics
- Server Info
- Server Power Control
- Server Recovery
As well as number of standard client functions