Virtualmin
- HostBill (Unlicensed)
- HostBill
- HostBill Support
Overview
Virtualmin is a cost-effective and comprehensive solution to virtual web hosting management designed to make it easy to manage websites, mailbox users, databases, and web applications. Thanks to the integration with HostBill billing, automation and support system you will get the capabilities you need to run your business operations with ease.
Activating the module
- If the module is included in your HostBill edition you can download it from your client portal.
- If the module is not included in your HostBill edition you can purchase it from our marketplace and then download it from the client area.
- Once you download the module extract it in the main HostBill directory.
- Go to Settings → Modules → Hosting Modules, find and activate Virtualmin module.
Connecting HostBill with Virtualmin
- Proceed to Settings → Apps → Add new App
- From Applications list select Virtualmin
- Enter:
- Name - name of this connection
- Hostname - A hostname is a unique identifier for a server that is used to identify it on the network. It can be a domain name, such as server.example.com, or a local name used on an internal network.
- IP Address - An IP address is a unique number assigned to a server that allows it to communicate with other devices on the network. It can be an IPv4 or IPv6 address, depending on your configuration.
- Max No. of Accounts - The maximum number of accounts determines how many user accounts or domains can be created on a server. This limitation can be set based on server resources or licensing.
- Server Status Address - The server status address is the URL or IP where you can check the current status of the server, e.g. whether it is working properly, what the load is, or if any errors have occurred.
- Username - Username is the identifier used to log in to the server. This is usually the administrative name or the user with the appropriate rights to manage the server.
- Password - The password is a confidential phrase used together with the username to authenticate access to the server. It should be strong and changed regularly for security.
- Secure - The Secure option enables the use of SSL/TLS connections to communicate with the server. Selecting this option enables encryption of data sent between the user and the server, providing an additional layer of security.
4. Verify entered credentials by clicking Test Connection to check if HostBill can connect
5. Save Changes

Adding Virtualmin Product
- In HostBill go to Settings → Products & Services, and Add new order page
- Enter your orderpage name, select orderpage template. Save Changes
- Add new product in the new orderpage. Provide product name and setup price and then Save Changes.
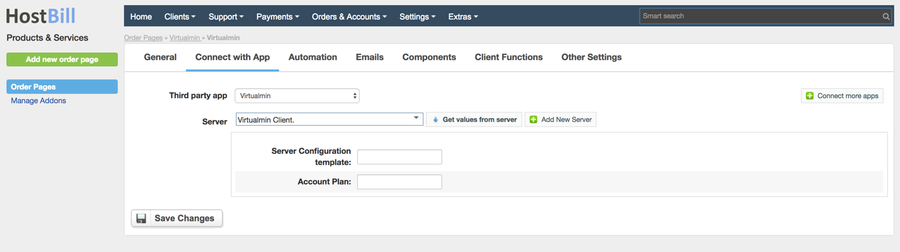
- In product configuration section proceed to Connect with App, select ISP Manager and App server created in previous steps.
- You will be presented with following configuration options:
- Server Configuration Template - A server configuration template is a set of predefined settings that can be applied to a server to quickly configure it according to specific requirements. It can include settings such as software versions, security rules, backup policies and more.
- Account Plan - An account plan defines the resources and permissions available to accounts created on the server. It can define limits on disk space, bandwidth, number of databases, and access to specific features or services on the server.
For more generic product configuration details including price, automation, emails settings refer to Product Configuration article.
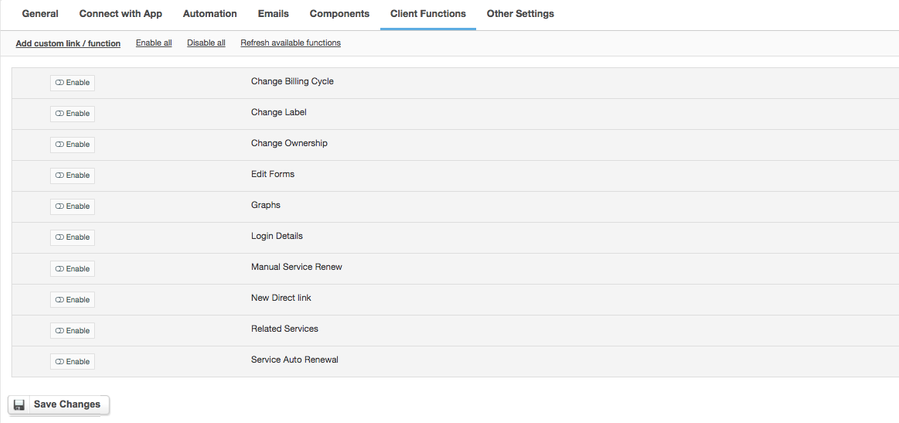
Configuring Client Functions
In Products & Services → Your Order Page → Your Product → Client Functions you can control what features customer will have access to in client portal, by clicking Enable/Disable next to the given option.
Use Edit button to adjust function appearance in the client portal.
For Virtualmin you can enable a number of standard client functions:
- Change Billing Cycle
- Change Label
- Change Ownership
- Edit Forms
- Graphs
- Login Details
- Manual Service Renew
- New Direct Link
- Related Services
- Service Auto Renewal