Migration Manager
- HostBill (Unlicensed)
- HostBill
Overview
Migration manager is the tool to keep your migrations organised and related clients updated. With Migration Manager addon you can store scenarios how to move accounts between two servers or two control panels, migrate customer account from competitors, move from one hardware model to newer one or upgrade control panel/server software.
Activating the module
- If the plugin is included in your HostBill edition you can download it from your client portal.
- If the plugin is not included in your HostBill edition you can purchase it from our marketplace and then download it from the client area.
- Once you download the plugin extract it in the main HostBill directory.
- Go to Settings → Modules, find and activate Migration Manager plugin.
Once the plugin is activated you will be directed to Settings→ Modules→ Plugins to configure the plugin.
Module configuration
- Choose module display name
- Select if you want the module to be accessible for all staff members or only selected staff members

Using the module
Once the plugin is activated you click on 'Manage' or go to Extras → Plugins → Migration Manager to further configure the module, add Migration Scenarios and configure Migration Cases.
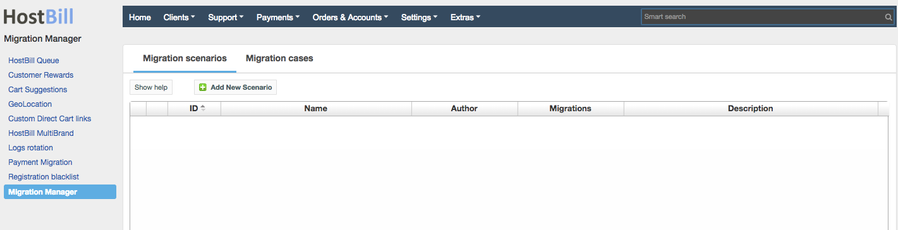
Adding new Migration scenario
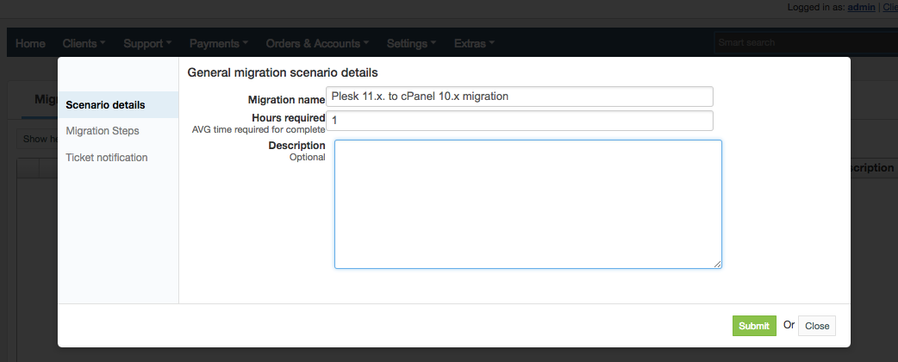
To create a new migration scenario, click on 'Add new Scenario' button and complete general migration scenario details:
- Migration name
- Hours required - average time required to complete the migration
- Optionally you can also add the description:
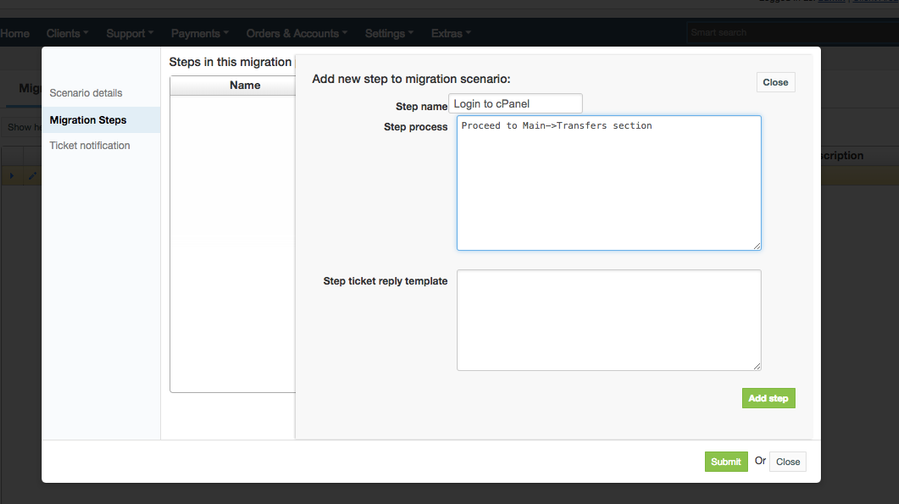
Then you proceed to adding migration steps. For each step you need to add step name, step process (description) and additionally you can provide step ticket reply template.
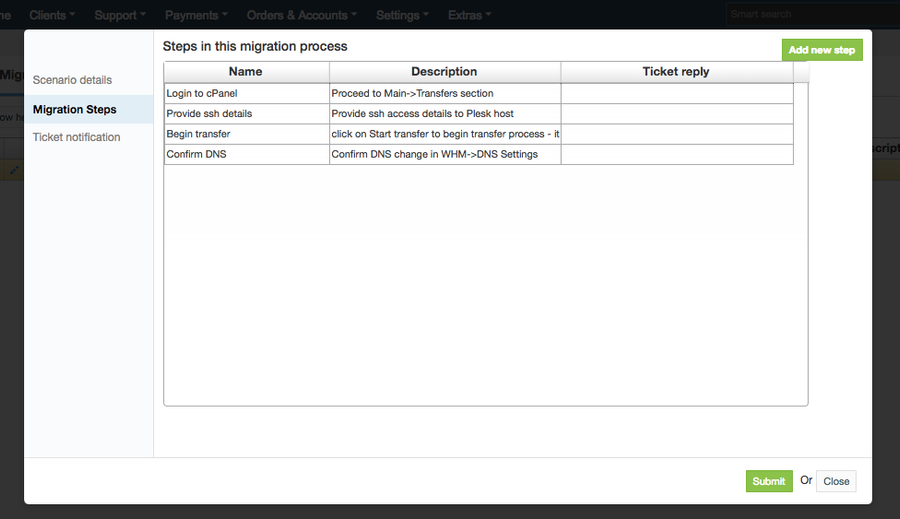
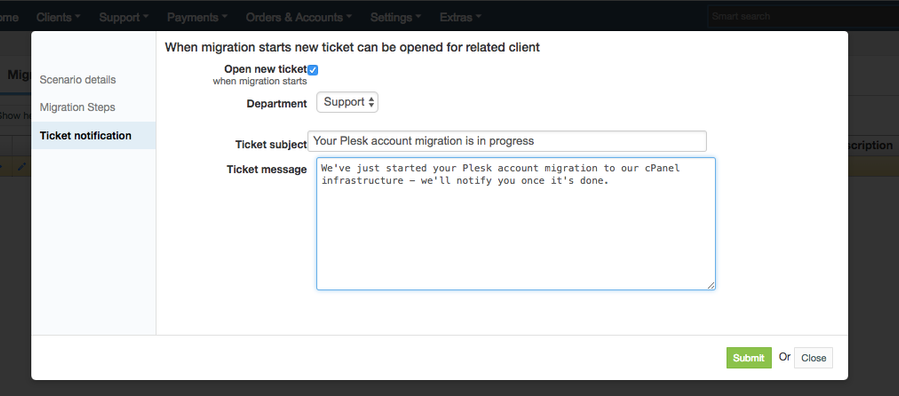
Once all the migration steps are listed you can also add ticket notification - when a migration starts new ticket can be opened for related client.
Once the migration scenario is created you can use it to perform a migration case.
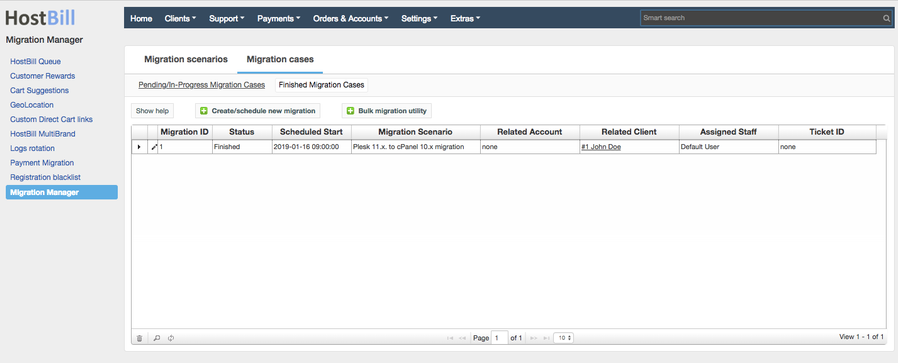
Migration cases
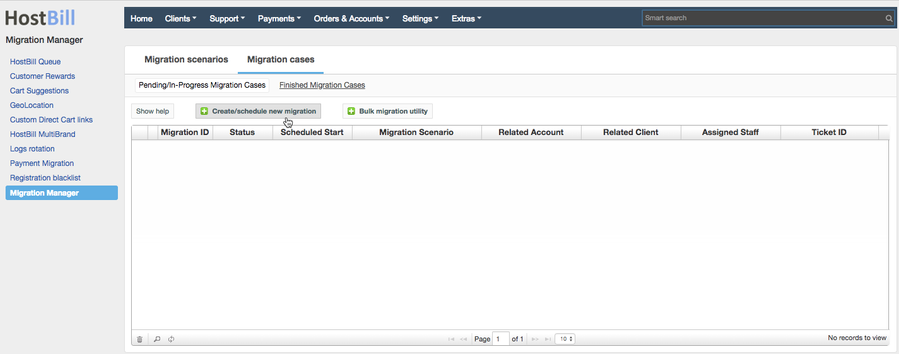
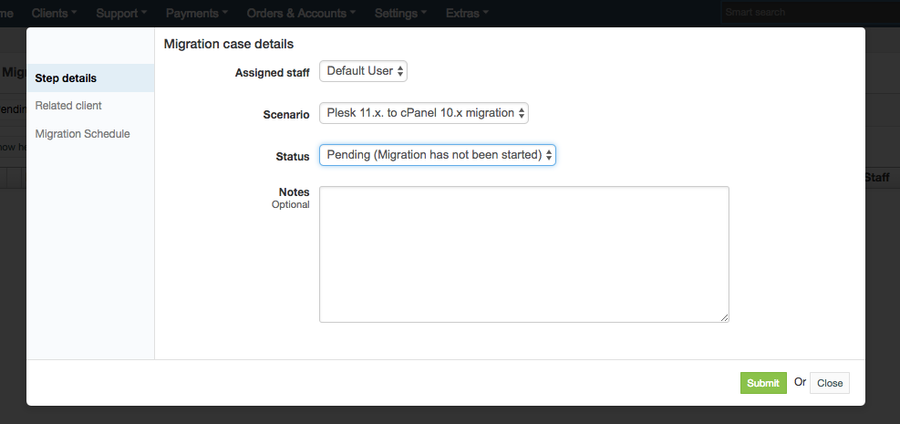
To perform a new migration click on Create/schedule new migration button in Migration cases tab. Then you will be able to configure migration case details:
- Assigned staff - choose a staff member assigned to perform the migration
- Choose the scenario
- You can manually change the status of the migration
- And add optional notes
Then you can proceed to 'Related client' tab, to choose the client that the migration should be performed for and his/her related service for the migration.

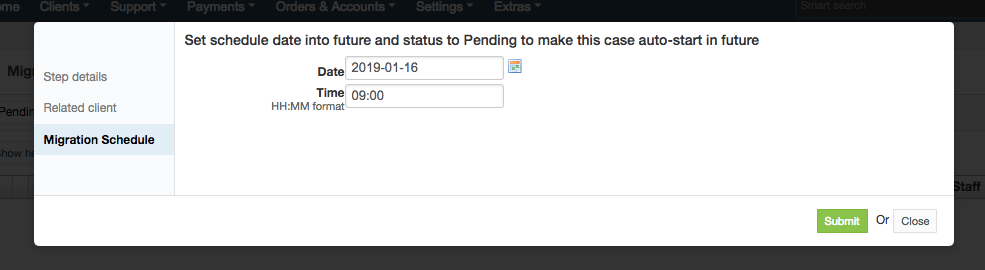
The next step is scheduling the migration: choose the date and time when the migration should be performed:
Finished migration cases are stored for future reference:
Watch the video with the plugin overview: