/
Forms: Select server field
Forms: Select server field
- HostBill
Owned by HostBill
Apr 26, 2021
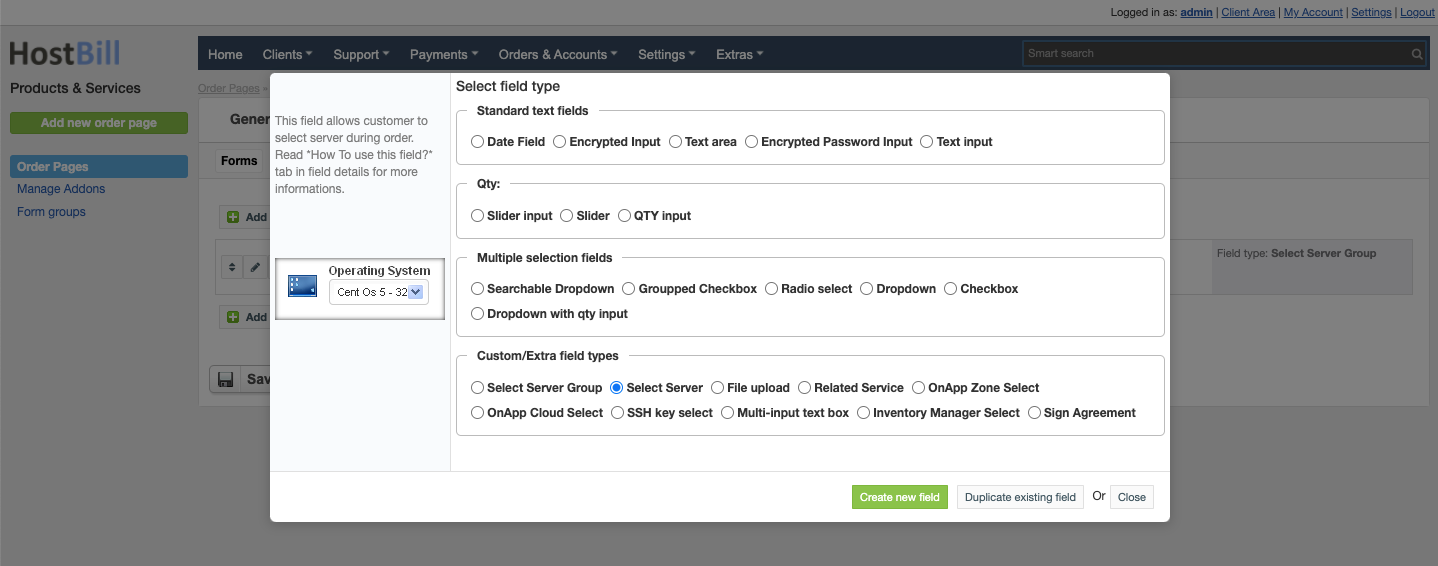
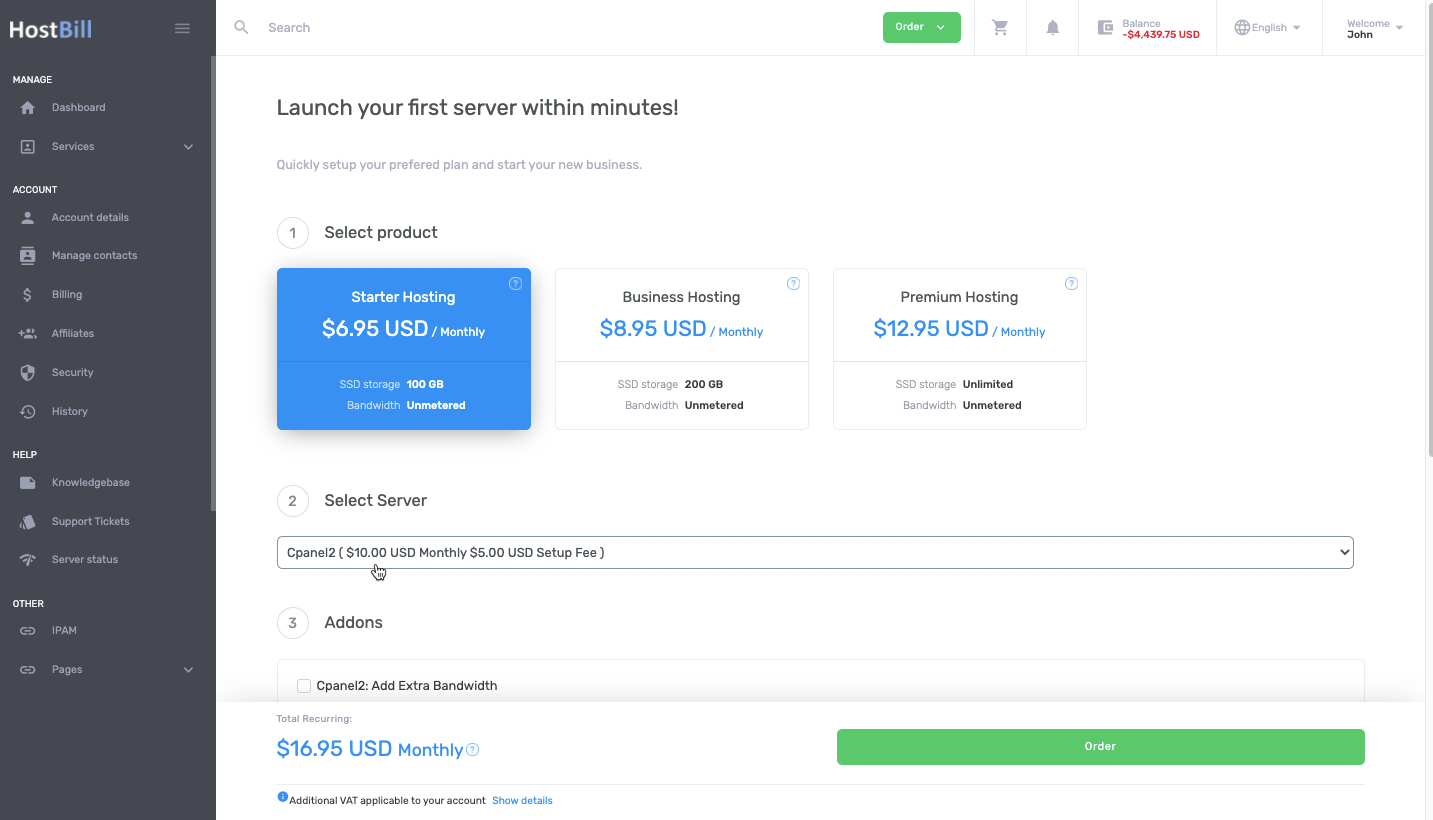
You can find this section in HostBill Admin → Settings → Products & Services → Your order page → Your product → Components → Forms → Add new form field → Custom/Extra field types → Select server.
How to use this field
- Make sure to save product changes before configuring this field
- For newly added field use "Preconfigure field" button above, this option will set required variable name + load servers you've have available in Connect with App for this product
- You can update server names in Values tab
- If you've added new server, use "Update field values" button that will appear above.
- When account is inserted to database, this field will change default server for account to server that customer selected
Field limitations
- This field will work correctly with "simple" provisioning apps, like cPanel, DirectAdmin etc.
- Do not use it for more advanced apps, because:
- HostBill often fetch resource IDs from certain server configured in this product for provisioning.
- If customer would choose different server those IDs would not be valid, resulting in provisioning errors.
- "Advanced" app is any app that under "Connect with app" present options that loads IDs rather than names/simple options
- Make sure to monitor servers usage that are available in this field.
- By default (when this field is not available), HostBill attempts to best-fit new accounts on configured servers.
- When this field is enabled your customers can quickly overload single servers with new accounts.
- When certain server is getting full, make sure to remove it from "Values" tab in this field.
Basic settings
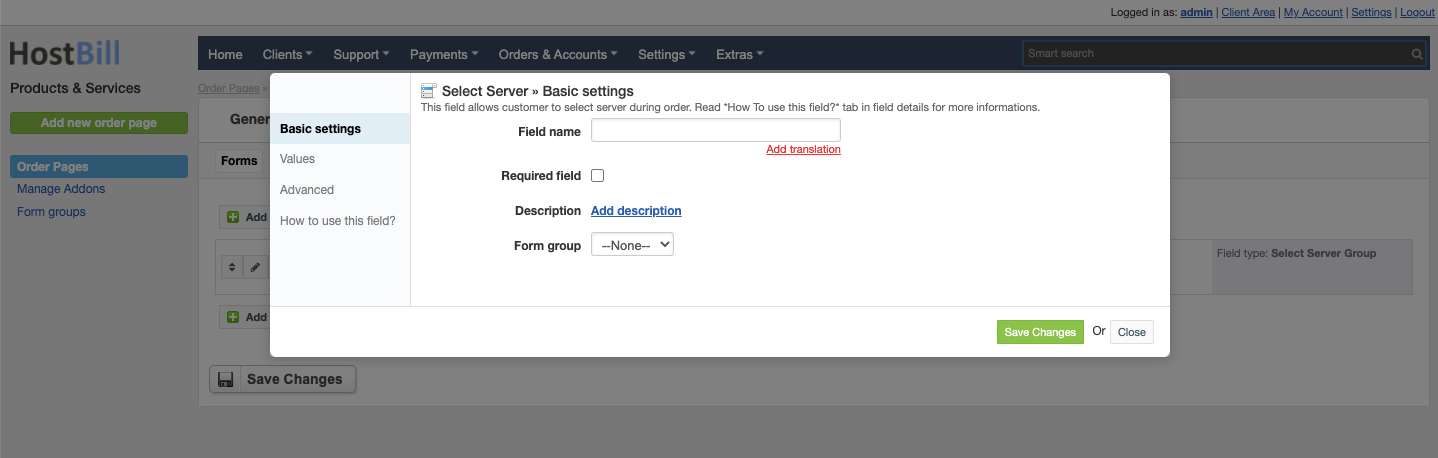
In the Basic settings section you can configure:
Field name - the name for this field
- Required field - choose if you want the field to be required to proceed
- Description - optionally you can add the description for the field
- Form group
Values
In the Values section you can use values from Preconfigured field or add your own values.
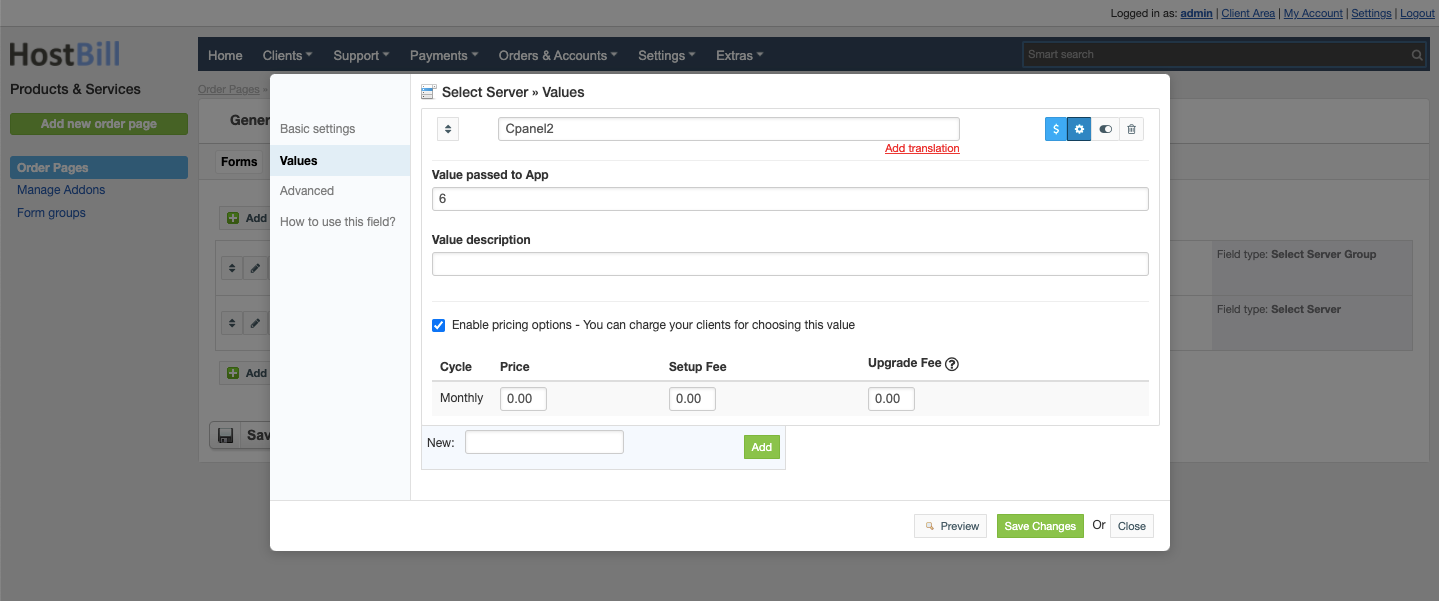
For each value added you can configure:
- Value passed to App
- Value description
- Enable pricing option - you can charge your clients for choosing this value:
- Price in a given cycle
- Setup fee
- Upgrade fee
You also have a toggle option to hide value from the order page.
Advanced settings
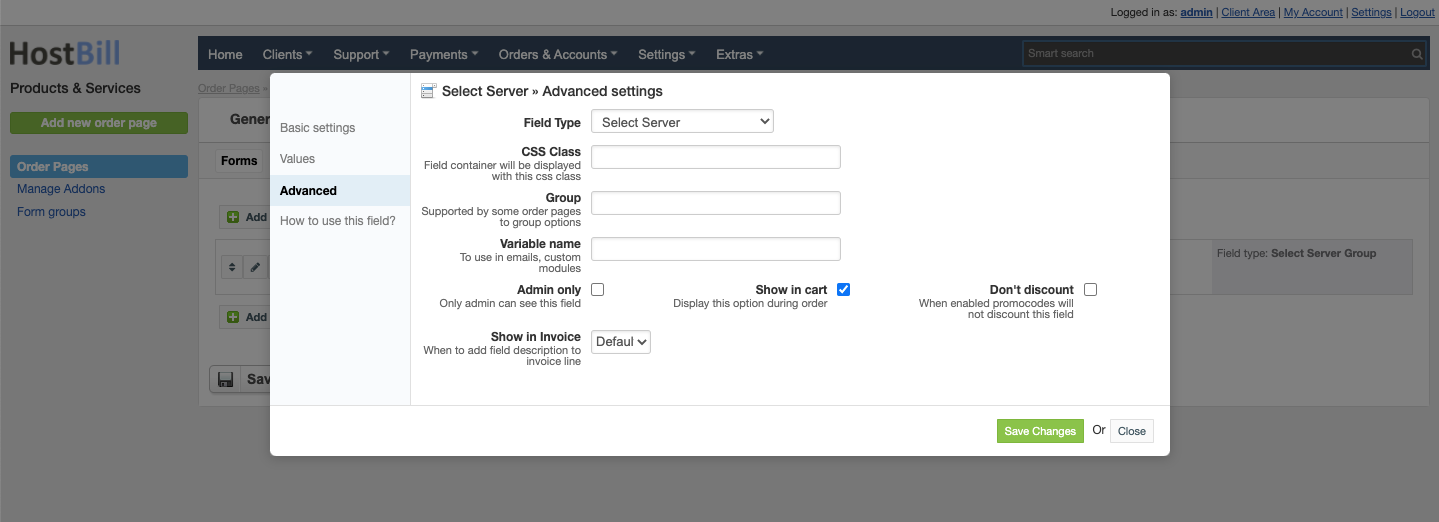
In the Advanced settings section you can configure:
- CSS Class - field container will be displayed with this css class
- Group - supported by some order pages to group option
- Variable name - to use in emails
- Admin only - if this option is enabled o
- Show in cart - d
- Don't discount - when enabled promo codes will not discount this field
- Default - show when priced or enabled in cart and not empty
- Priced - show when selected value isn't free
- Force - show even when it's empty or free
Client area sample view
, multiple selections available,
Related content
Online.net Dedicated Servers
Online.net Dedicated Servers
More like this
SynergyCP
SynergyCP
More like this
ISPConfig
ISPConfig
More like this
cPanel
cPanel
More like this
HostBill Multi-Brand
HostBill Multi-Brand
More like this
It.com
It.com
More like this