Ticket Billing
You can find this section in HostBill Admin → Support → Support Tickets → Tickets Billing.
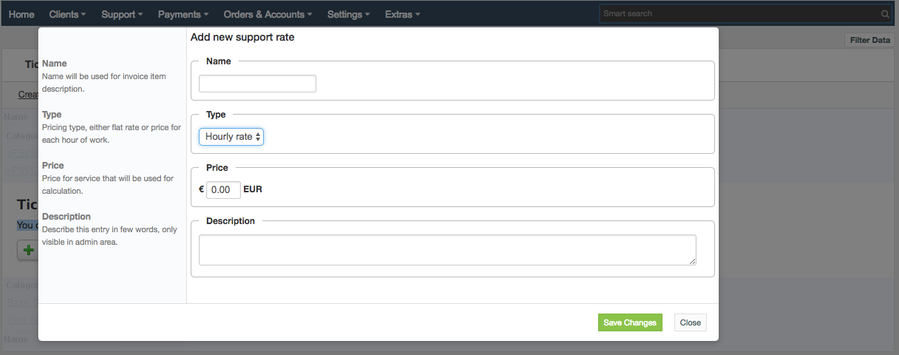
Add new support rate
To be able to create support bills first you need to define support rates. To add new support rate simply click on Create new rate button in Support Rates section. You will need to provide:
- Name - that will be used for invoice item description.
- Pricing type - either flat rate or price for each hour of work.
- Price - price for service that will be used for calculation.
- Description - you can describe this entry in few words, this is only visible in admin area.
Apply support rate to a ticket
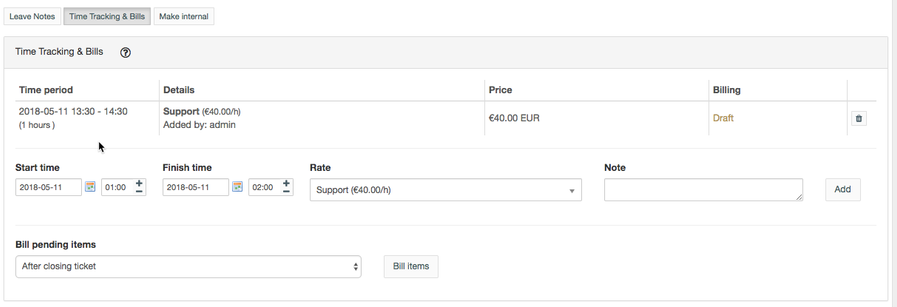
Once you have support rates created you can apply them to existing or new tickets. To do so, from the ticket list choose the ticket you want to bill and go to Time Tracking & Bills section in ticket details.
Here you enter time spent on working on the given ticket and select support rate, optionally you can also add note. Click on Add button to add the bill - new items are added as drafts. Staff members with billing privileges can generate invoices from them.
New invoices can be generated either immediately or after closing the ticket or can be added to the next client invoice. You can choose the preferred option in Bill pending items drop-down menu.
Billed tickets will be displayed in the ticket list with the dollar icon next to them:
Ticket billing overview:


