Support Tickets
- HostBill
You can find this section in HostBill Admin → Support → Support Tickets.
Support Tickets
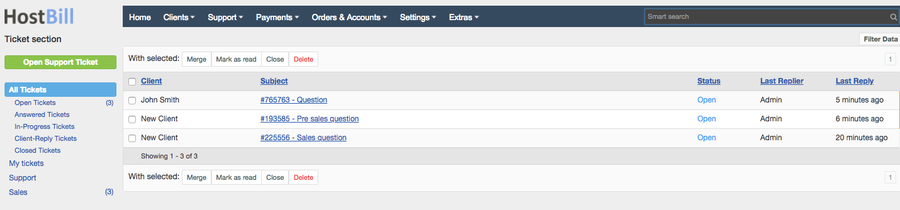
Support tickets in HostBill can be submitted by client directly from your client portal, or by sending you an email. HostBill can automatically fetch emails from your multiple mailboxes using forwarding or by downloading all messages using POP/IMAP. All support tickets are tagged automatically as: Open, Client Reply and Answered. The other two statuses: in-Progress and Closed need to be sat manually. The ticket displays a submitter name, subject and the open date. After ticket is submitted it can be edited by allowed staff member.
Support tickets may contain attachments. Both submitter and staff can attach files in allowed file extension which can be set in Settings->General->Support. Also, you may add Tags to a certain tickets, e.g. to tag a common subject, module problem etc. In order to add a tag you need to open a given support ticket and in the space right below the ticket's subject type in a tag's name. Once, you do it a green box appears.
Create new ticket from admin area
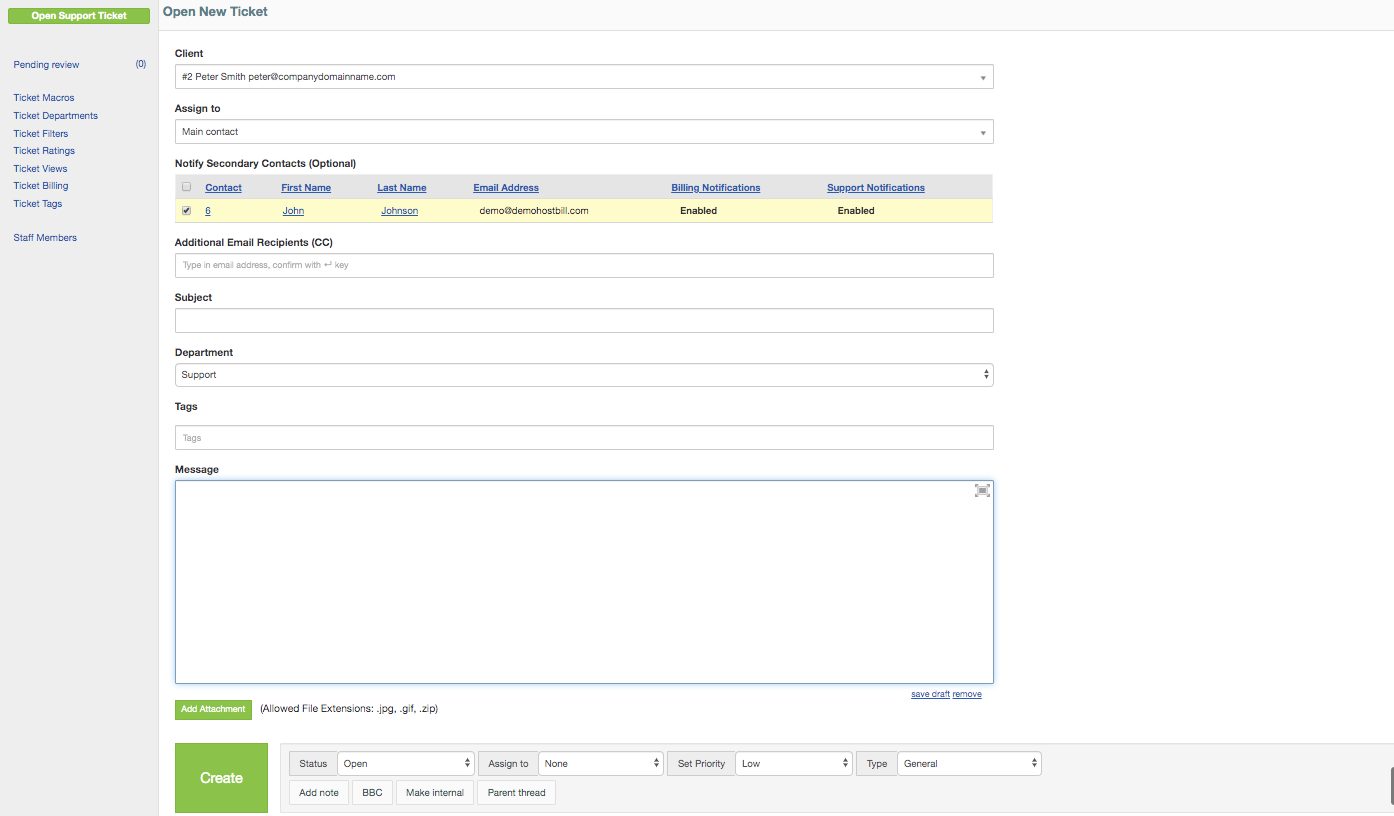
In general, support tickets are created by your clients, but HostBill also gives you the opportunity to create new ticket on behalf of the client from your admin area. Simply go to Support Tickets section and click on Open Support Ticket button. You will be presented with the following options:
- Client - from the drop-down list choose the name of the client that the ticket should be created for
- Assign to - if the main client has additional contacts, you will be presented with an option to assign the ticket to one or multiple client contact. You will also be to see if given contact has billing and support notifications on.
- CC - in this field you can enter additional email recipients
- Subject - enter the subject for the ticket
- Department - choose the department the ticket should be directed to
- Tags - optionally you can add tags to the ticket. Tag will help you to better organize and manage tickets.
- Message - provide the message to describe ticket issue.
- Add attachment - optionally you can add the file to the ticket
- Status - enter the status of the ticket (open, in progress, closed, answered, client reply)
- Assign to - you can assign this ticket to a particular staff member
- Set priority - set the ticket priority (low, medium, high, critical)
- Type - you can choose the ticket type to categorize the issue (general, incident, problem, question, task)
- Add note - optionally you can add notes to the ticket
- Carbon copy - you can provide email addresses to which the ticket notification should be sent
- Make internal - tickets can be made internal for staff usage only
- Parent thread - you can assign tickets to other threads.
You can optionally use macros/knowledgebase toolbox available for staff member. Select predefined reply to use as ticket message or paste knowledgebase link.
Once the ticket is created, related client will be notified.
Create new public ticket

Public support tickets feature allows your staff members to open single ticket for a group of customers. This is a perfect tool to update certain group of your clients (ie. sharing one server) about certain event and keep them updated about it. Your clients will get ticket notification, will be able to view this ticket - but by design, will not be allowed to reply directly to it.
To create new public ticket, Open new ticket and in the Client field choose Public Ticket (multiple clients) option. In the field below provide IDs of the Clients you want to notify. Ticket configuration options are the same as for a regular ticket (as described above).
Edit ticket details
Each ticket in your ticketing system, submitted either by the client or by a staff member can be modified.
To edit ticket message click on the pencil icon on the right top corner.
To edit ticket details (department, type etc) click on Edit details button.
Manage tickets
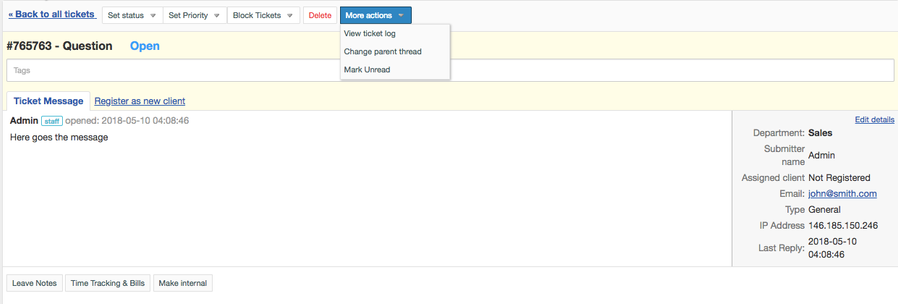
By clicking ticket subject and ID on the ticket list page you will get to ticket details section where you can manage given ticket. Following options are available:
Set Ticket Status
Here you can manually change ticket status. HostBill comes with a set of default tickets statuses but it also allows to define custom ticket statuses. If you feel that those available by default don't fit your needs you can create your own individual ticket status in General settings → Support → Ticket Statuses. Also, you can re-arrange the already available ones to enhance your business workflow.
Set Ticket Priority
You can manually change ticket priority level (critical, high, medium, low).
Block Tickets
HostBill allows you to prevent spam by blocking certain content. You can choose to block tickets from certain email addresses, with certain subject lines or those that include specified text. Tickets are blocked before you see them in listing.
Delete Ticket
This option allows you to delete ticket from your ticketing system.
Assign Ticket
This tab enables to assign a certain tickets to a particular staff member working in the Support Department. The assigned member receives an email notification that he/she has been assigned to a given ticket. The message also states by whom the member was assigned to a ticket.
View Ticket Log
All actions performed on tickets are logged and can be accessed by clicking view ticket log button. You may find it useful when you would like to check your staff workflow or time of response.
Change Ticket Parent thread
You can move tickets between different threads to help your team better organize their work
Mark Ticket as Unread
Here you can mark ticket as unread. It's a very convenient option while dealing with a great number of tickets at the same time.
Leave Notes
Notes added to tickets are for internal use only - they are not visible to your clients.
Make the Ticket Internal
Internal ticket will not be available or sent to assigned customer. You can use it to collaborate with other staff members. Internal flag can be removed by staff at any given point.
Ticket Time Tracking and Bills
HostBill allows you to add bills for support service. If you enable this option, billing information will be displayed here. You can read more about Ticket Billing in this article.
Merge Tickets
From the Ticket List page you can choose tickets that you want to merge into one using this button.
Easy access to support tickets
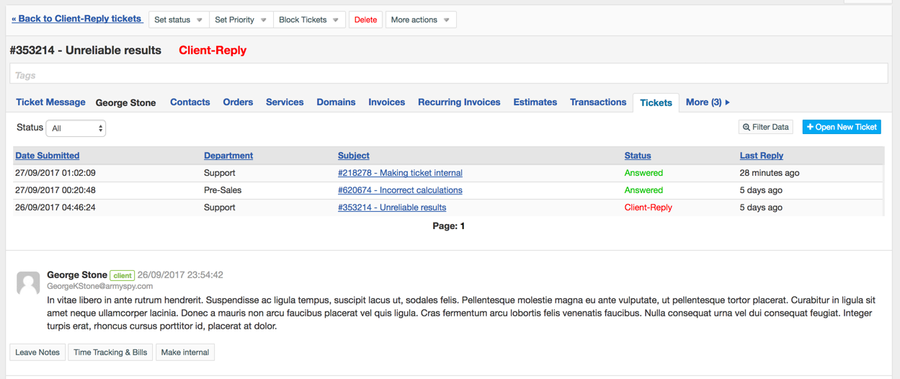
You can access customer support tickets from any section of HostBill interface. Tickets are available at your fingertips under Tickets tab, whether you are browsing account, order or domain details. You can browse customer tickets, check their statuses, track past tickets all in one place, but accessible from multiple places.
Additionally you can open new tickets for given customer from any HostBill section, just by opening customer tickets listing.