Swish
- HostBill
- HostBill Support
- HostBill
Overview
Swish is a mobile payment company created by Nordic banks. HostBill supports Swish payments out of the box.
Activating the module
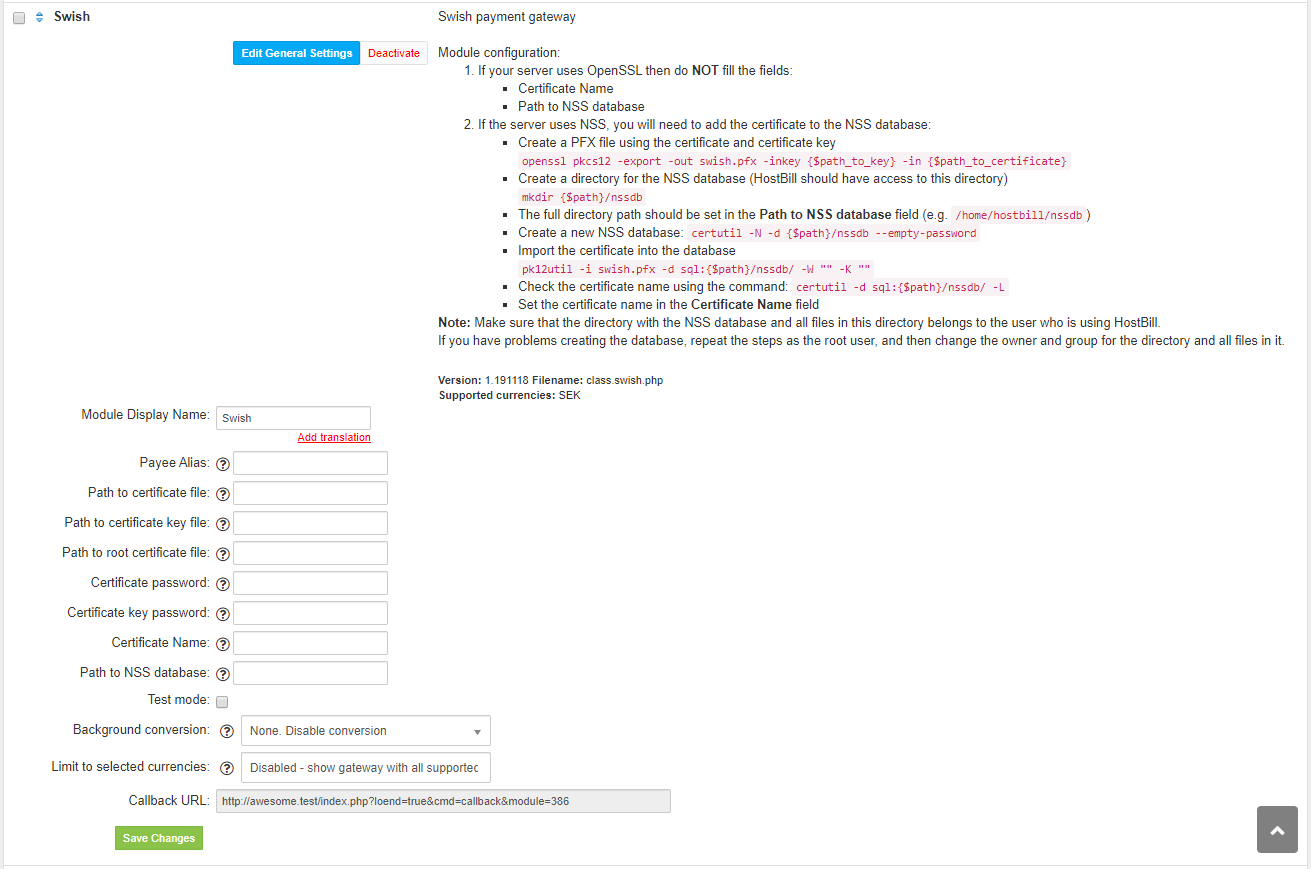
Module configuration
Then proceed to fill in all other configuration fields:
Payee Alias - Swish number e.g. 1231181189. Required field
Path to certificate file - The path to the certificate in .pem format
Path to certificate key file - The path to the certificate key in .pem format
Path to root certificate file - The path to the root certificate in .pem format
Certificate password - Set only if a password is set for the certificate (for the .pem file)
Certificate key password - Set only if the password is set for the certificate key
Certificate Name - Required field if your server uses NSS instead of OpenSSL. Set this option only if your server uses NSS
Path to NSS database - Full path to the NSS database. Required field if your server uses NSS instead of OpenSSL. Set this option only if your server uses NSS
Test mode
NSS database configuration
If your server uses NSS, you will need to add the certificate to the NSS database. To do this, follow these steps:
Create a PFX file using the certificate and certificate key
openssl pkcs12 -export -out swish.pfx -inkey {$path_to_key} -in {$path_to_certificate}Create a directory for the NSS database (HostBill should have access to this directory)
mkdir {$path}/nssdbThe full directory path should be set in the Path to NSS database field (e.g. /home/hostbill/nssdb)
Create a new NSS database
certutil -N -d {$path}/nssdb --empty-passwordImport the certificate into the database
pk12util -i swish.pfx -d sql:{$path}/nssdb/ -W "" -K ""Check the certificate name using the command:
certutil -d sql:{$path}/nssdb/ -LSet the certificate name in the Certificate Name field (e.g. 1234679304 - Swedbank AB (publ))
Make sure that the directory with the NSS database and all files in this directory belong to the user who is using HostBill.
If you have problems creating the database, repeat the steps as the root user, and then change the owner and group for the directory and all files in it.
Generating PEM from PFX
To generate PEM files from PFX use the following commands (assuming the PFX file is named swish.pfx):
openssl pkcs12 -in swish.pfx -clcerts -out cert.pem
openssl pkcs12 -in swish.pfx -cacerts -out root.pem
openssl pkcs12 -in swish.pfx -nocerts -out key.pem
FAQ
Answer: This module does not support the currency you attempt to display it in, please use background currency conversion.