Overview
DirectAdmin is an easy to use yet effective web hosting control panel. With the DirectAdmin module for Hostbill you can now provide your customers with the best performance allowing them to manage all vital aspects of their hosting account directly from HostBill client portal: manage Domains, FTP, SSL certificates, setup email accounts, manage databases and much more.
Activating the module
- If the module is included in your HostBill edition you can download it from your client portal.
- If the module is not included in your HostBill edition you can purchase it from our marketplace and then download it from the client area.
- Once you download the module extract it in the main HostBill directory.
- Go to Settings → Modules → Hosting Modules, find and activate Direct Admin module.
Connecting HostBill with Direct Admin
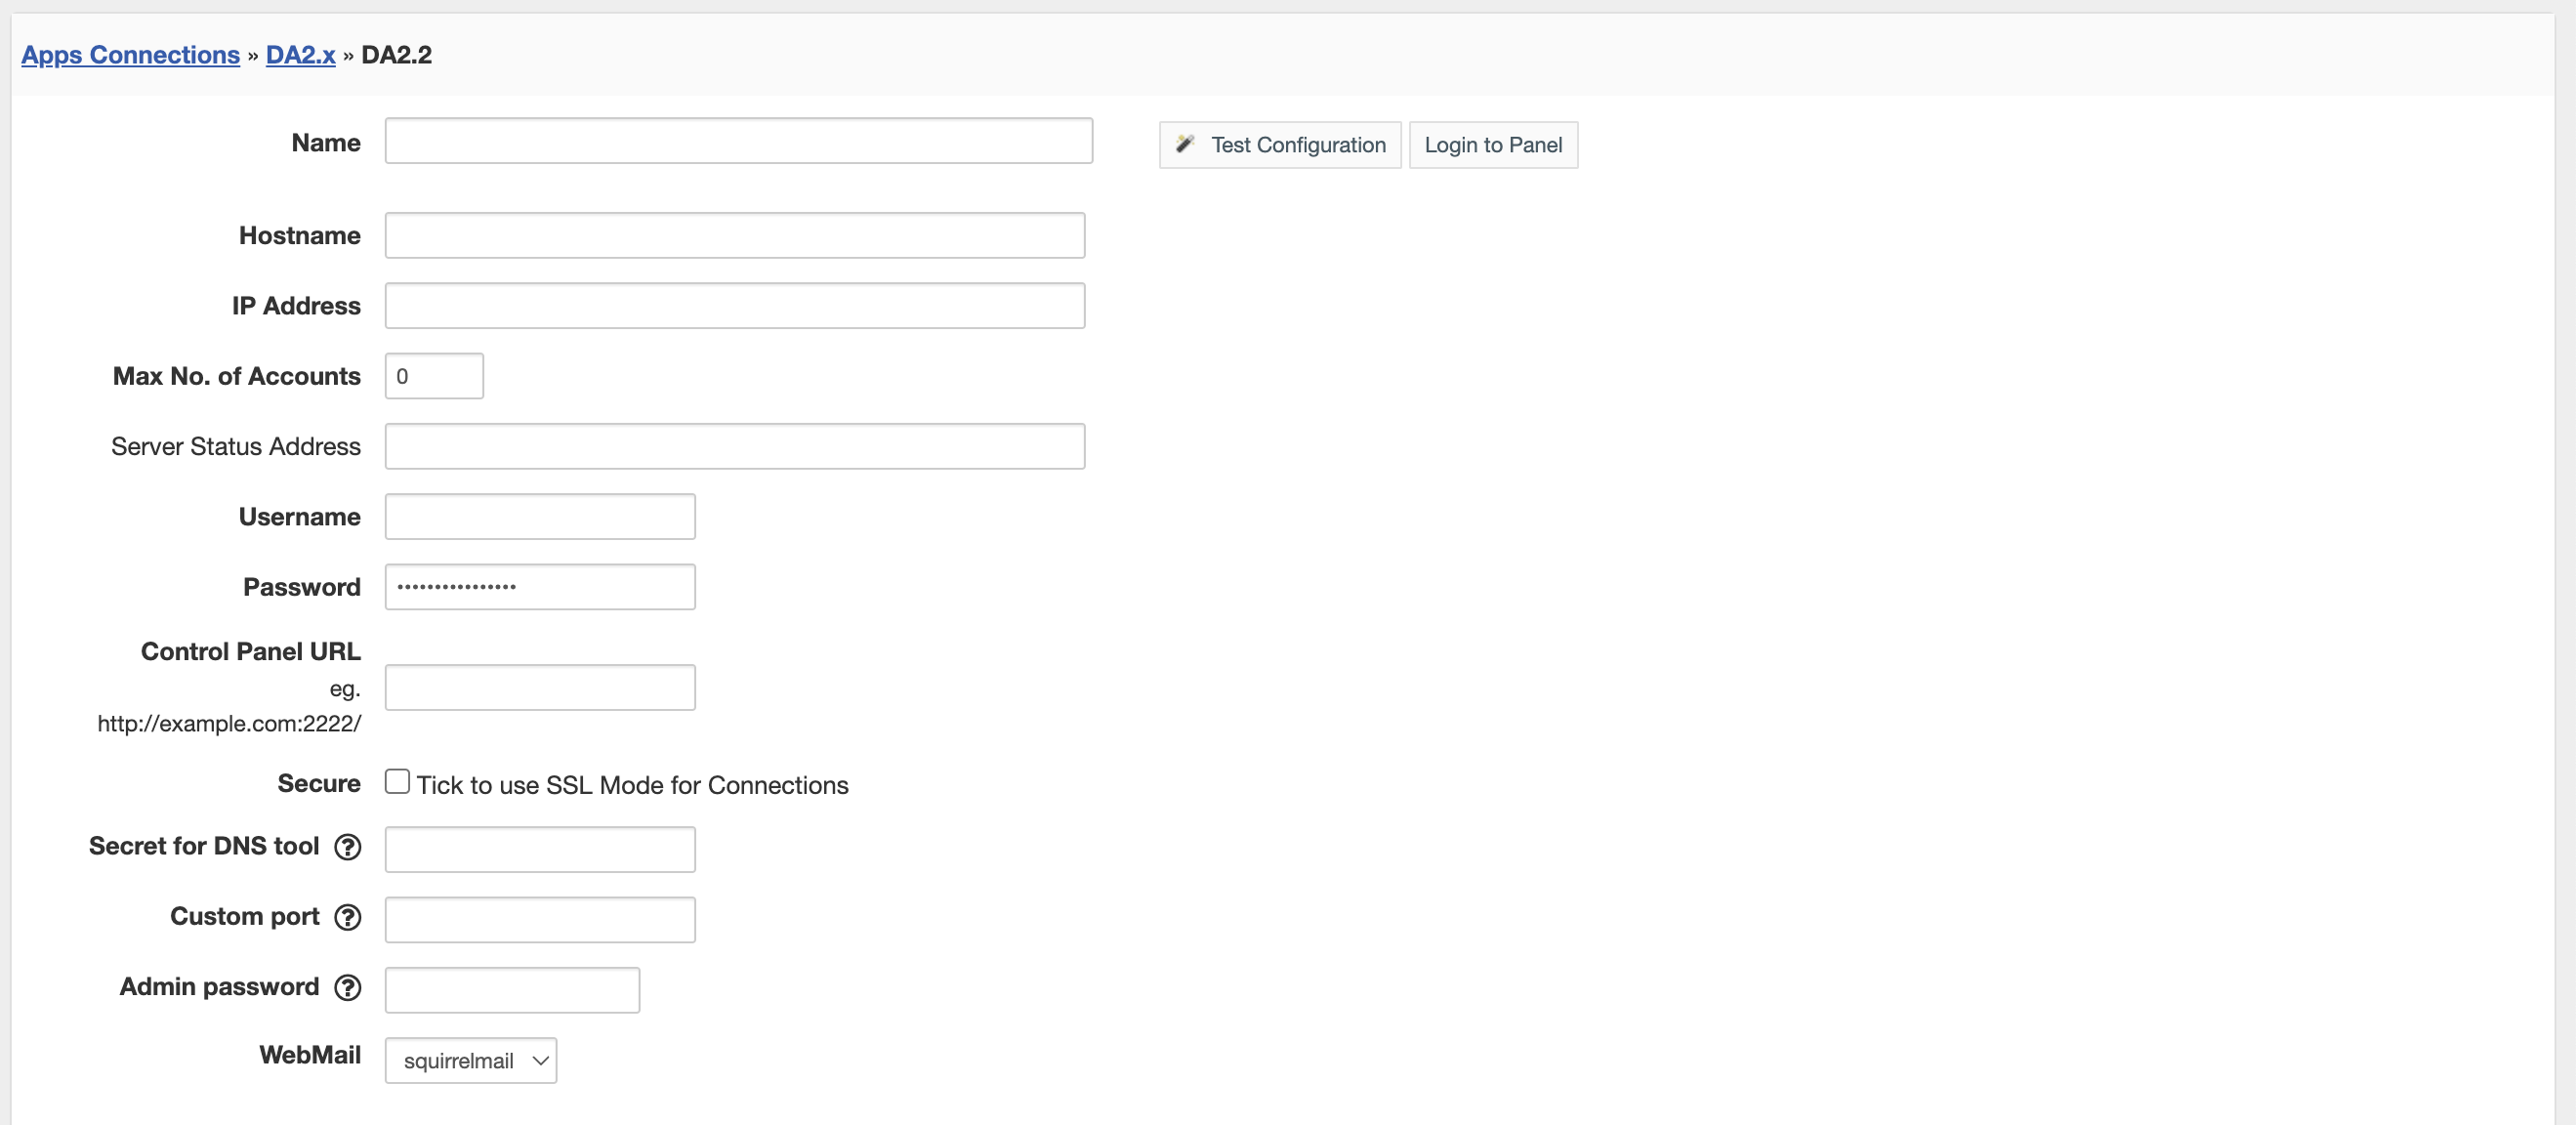
- Proceed to Settings → Apps → Add new App
- From Applications list select Direct Admin
- Enter:
- Name - Name of this connection
- Hostname - hostname of your DirectAdmin installation
- IP Address - IP for your DirectAdmin, use if no hostname is set
- Choose max number of accounts - enter max number of active accounts this server approx can handle
- Server Status Address - deprecated feature
- Username - your DA admin/reseller username
- Password - your DA admin/reseller password
- Control Panel URL - url (protocol included) to your direct admin server for clientarea login link
- Secure - tick if valid ssl is installed on directadmin
- Secret for DNS Tool - enter secret code used in DirectAdmin DNS Helper
- Custom port - enter if other than 2222
- Admin password - required if you plan to use Installatron with HostBill
- Webmail - pick webmail used by Directadmin
4. Verify entered credentials by clicking Test Connection to check if HostBill can connect
5. Save Changes
Adding Direct Admin product
- In HostBill go to Settings → Products & Services, and Add new order page
- From Order Types select Shared Accounts
- Enter your orderpage name, select orderpage template. Save Changes
- Add new product in the new orderpage. Provide product name and setup price and then Save Changes.
- In product configuration section proceed to Connect with App, select Direct Admin and App server created in previous steps.
For more generic product configuration details including price, automation, emails settings refer to Product Configuration article.
Configuring Metered Billing
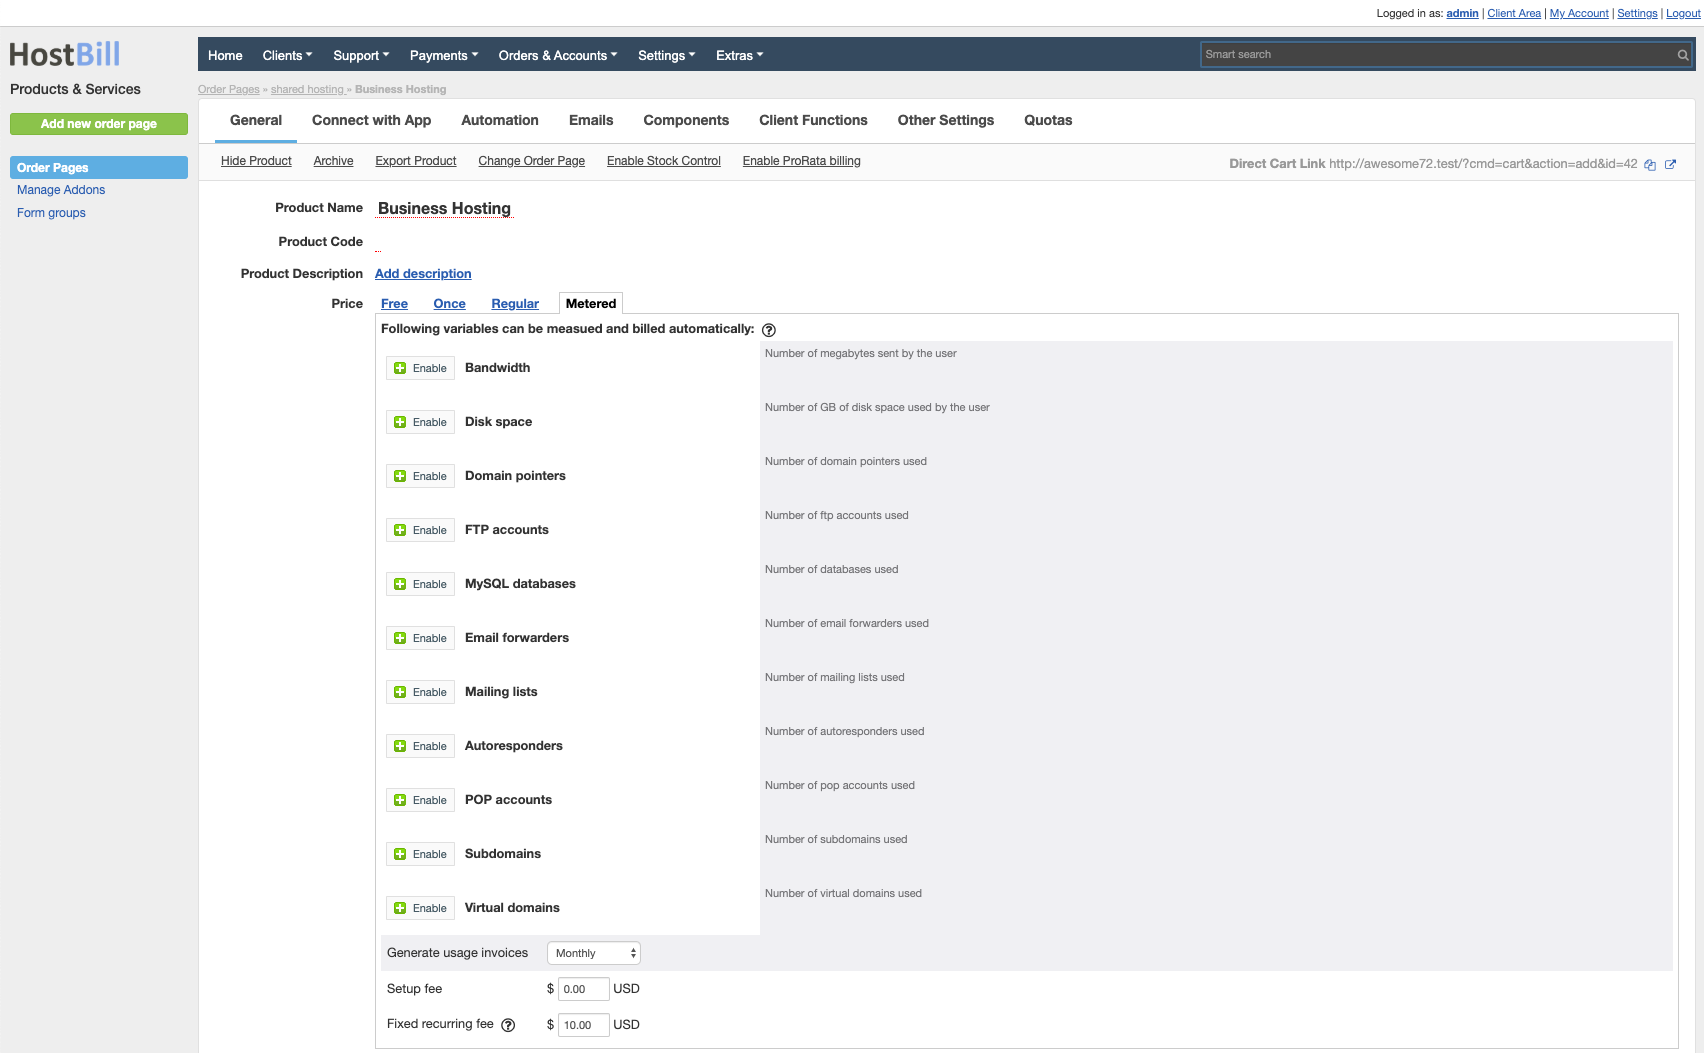
Direct Admin module supports metered billing feature. To configure your metered billing package in product configuration in "General" tab select "Metered" under Price. Following variables can be measured and bill automatically:
Badwidth
Disk usage
Domain Pointers
FTP Accounts
Databases
Email Forwarders
Mailing Lists
Autoresponders
Subdomains
Domains
Configuring Client Functions
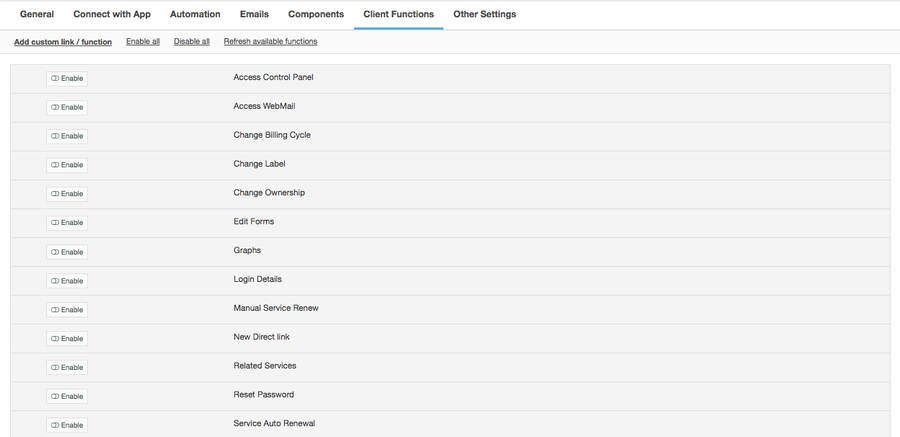
In Products & Services → Your Order Page → Your Product → Client Functions you can control what features customer will have access to in client portal, by clicking Enable/Disable next to the given option.
Use Edit button to adjust function appearance in the client portal.
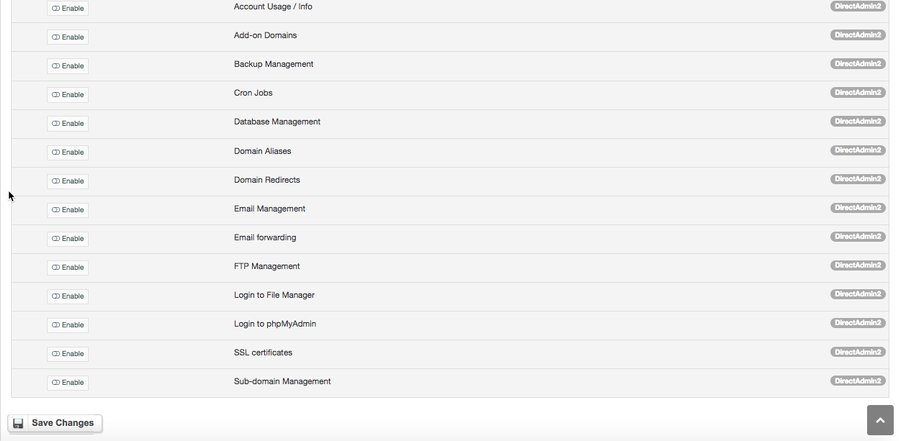
For Direct Admin you can enable the following client functions dedicated to this module:
- Access Control Panel
- Access WebMail
- Account Usage/Info
- Add-on Domains
- Backup Management
- Cron Jobs
- Database Management
- Domain Aliases
- Domain Redirects
- Email Management
- Email Forwarding
- FTP Management
- Login to File Manager
- Login to phpMyAdmin
- SSL Certificates
- Sub-domain Management
- CloudLinux PHP Selector
- CloudLinux Node.js apps
- CloudLinux Resource usage
- CloudLinux Python apps
- SSH Keys management
- Custom Error pages management
- Installed Perl modules listing
- Lets encrypt support in SSL Management
- Apache Handlers management
- DNS management
- Domain Pointers management
- Logs Browser
As well as number of standard client functions, such as
- Change Billing Cycle
- Change Label
- Change Ownership
- Edit Forms
- Graphs
- Login Details
- Manual Service Renew
- New Direct Link
- Related Services
- Service Auto Renewal


