...
...
...
...
Overview
![]()
GoCardless.com is the next generation of Direct Debit. Now you can accept Direct Debit payments with ease thanks to HostBill & GoCardless integration
Overview
HostBill GoCardless module allows to:
...
Installing HostBill
HostBill installation is fully automated and takes just seconds, more info at Installation
Configuring module
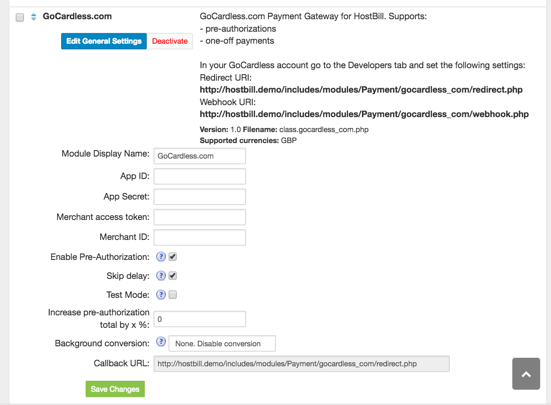
- In HostBill go to Settings > Modules, find and activate GoCardless.com module
- You will be taken to Settings > Modules > Payment to configure your module
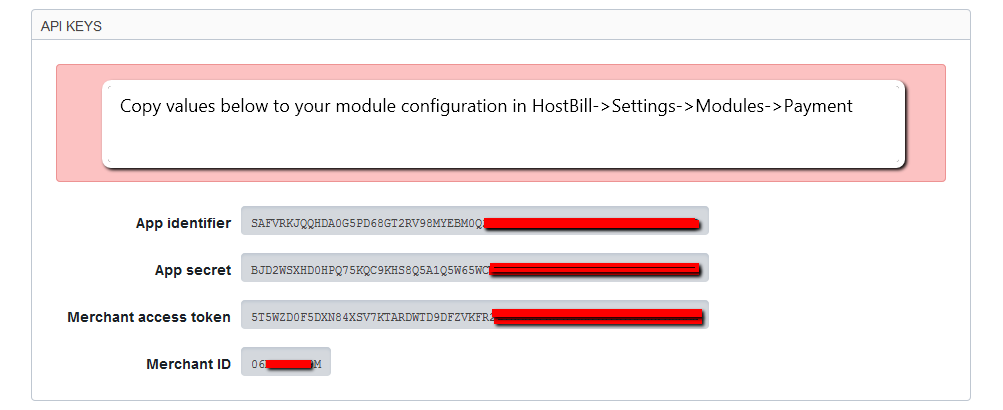
- Provide your App & Merchant settings available in Developer tab of your GoCardless.com account
- Choose module behavior using checkboxes, use of them is explained below
- Save changes
...
Setting GoCardless.com account
- In HostBill go to Settings->Modules->Payment->GoCardless.com
- Copy Redirect URI & Webhook URI
- Go to GoCardless.com, login to your account and paste URIs metioned above intoDeveloper->URI Settings
- Save changes
How GoCardless.com works with HostBill
- If you select Enable Pre-Authorization in module settings HostBill will create Pre-Authorization upon client signup with recurring service.
- Note: Pre-Authorizations are created only if invoice that is paid consist recurring service, otherwise one-off payment is requested
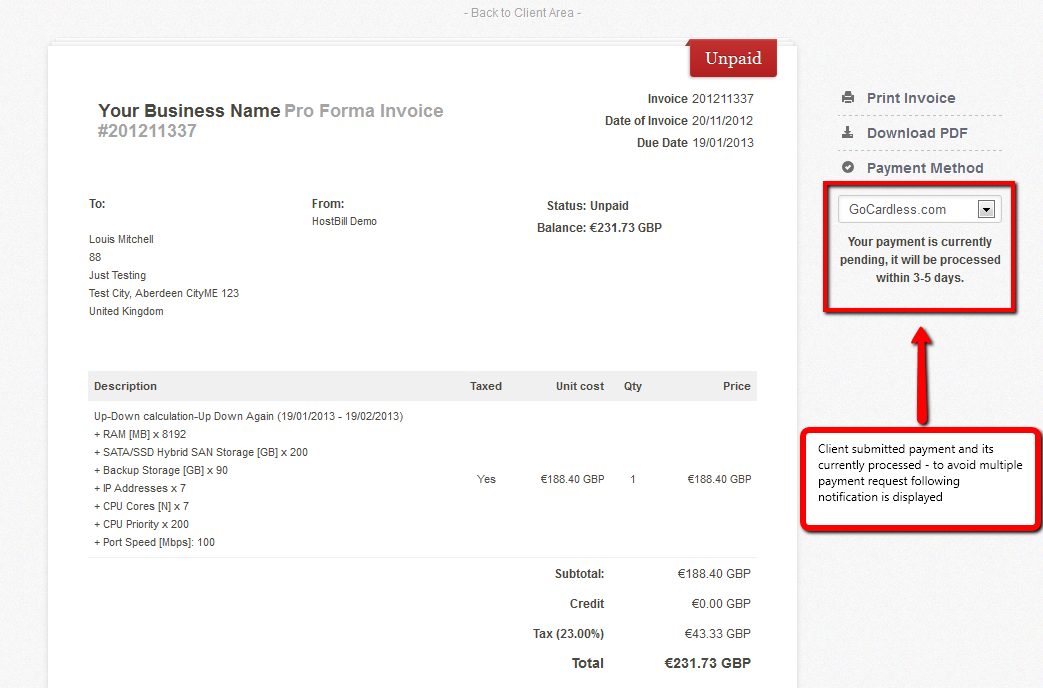
- Direct Debit payment can take up to 5 business days, invoice in HostBill will remain unpaid for this period
- If you wish your client's invoices to be marked as Paid immediatelly after submitting payment, enable Skip delay option in module configuration
- Invoices containing items with pre-authorization set up will be automatically charged by HostBill cron
...
GoCardless is a next generation online payments company. GoCardless makes it incredibly cheap and easy for anyone to take payments online using the Direct Debit infrastructure. HostBill supports GoCardless payment gateway for collecting payments out of the box.
Activating the module
...
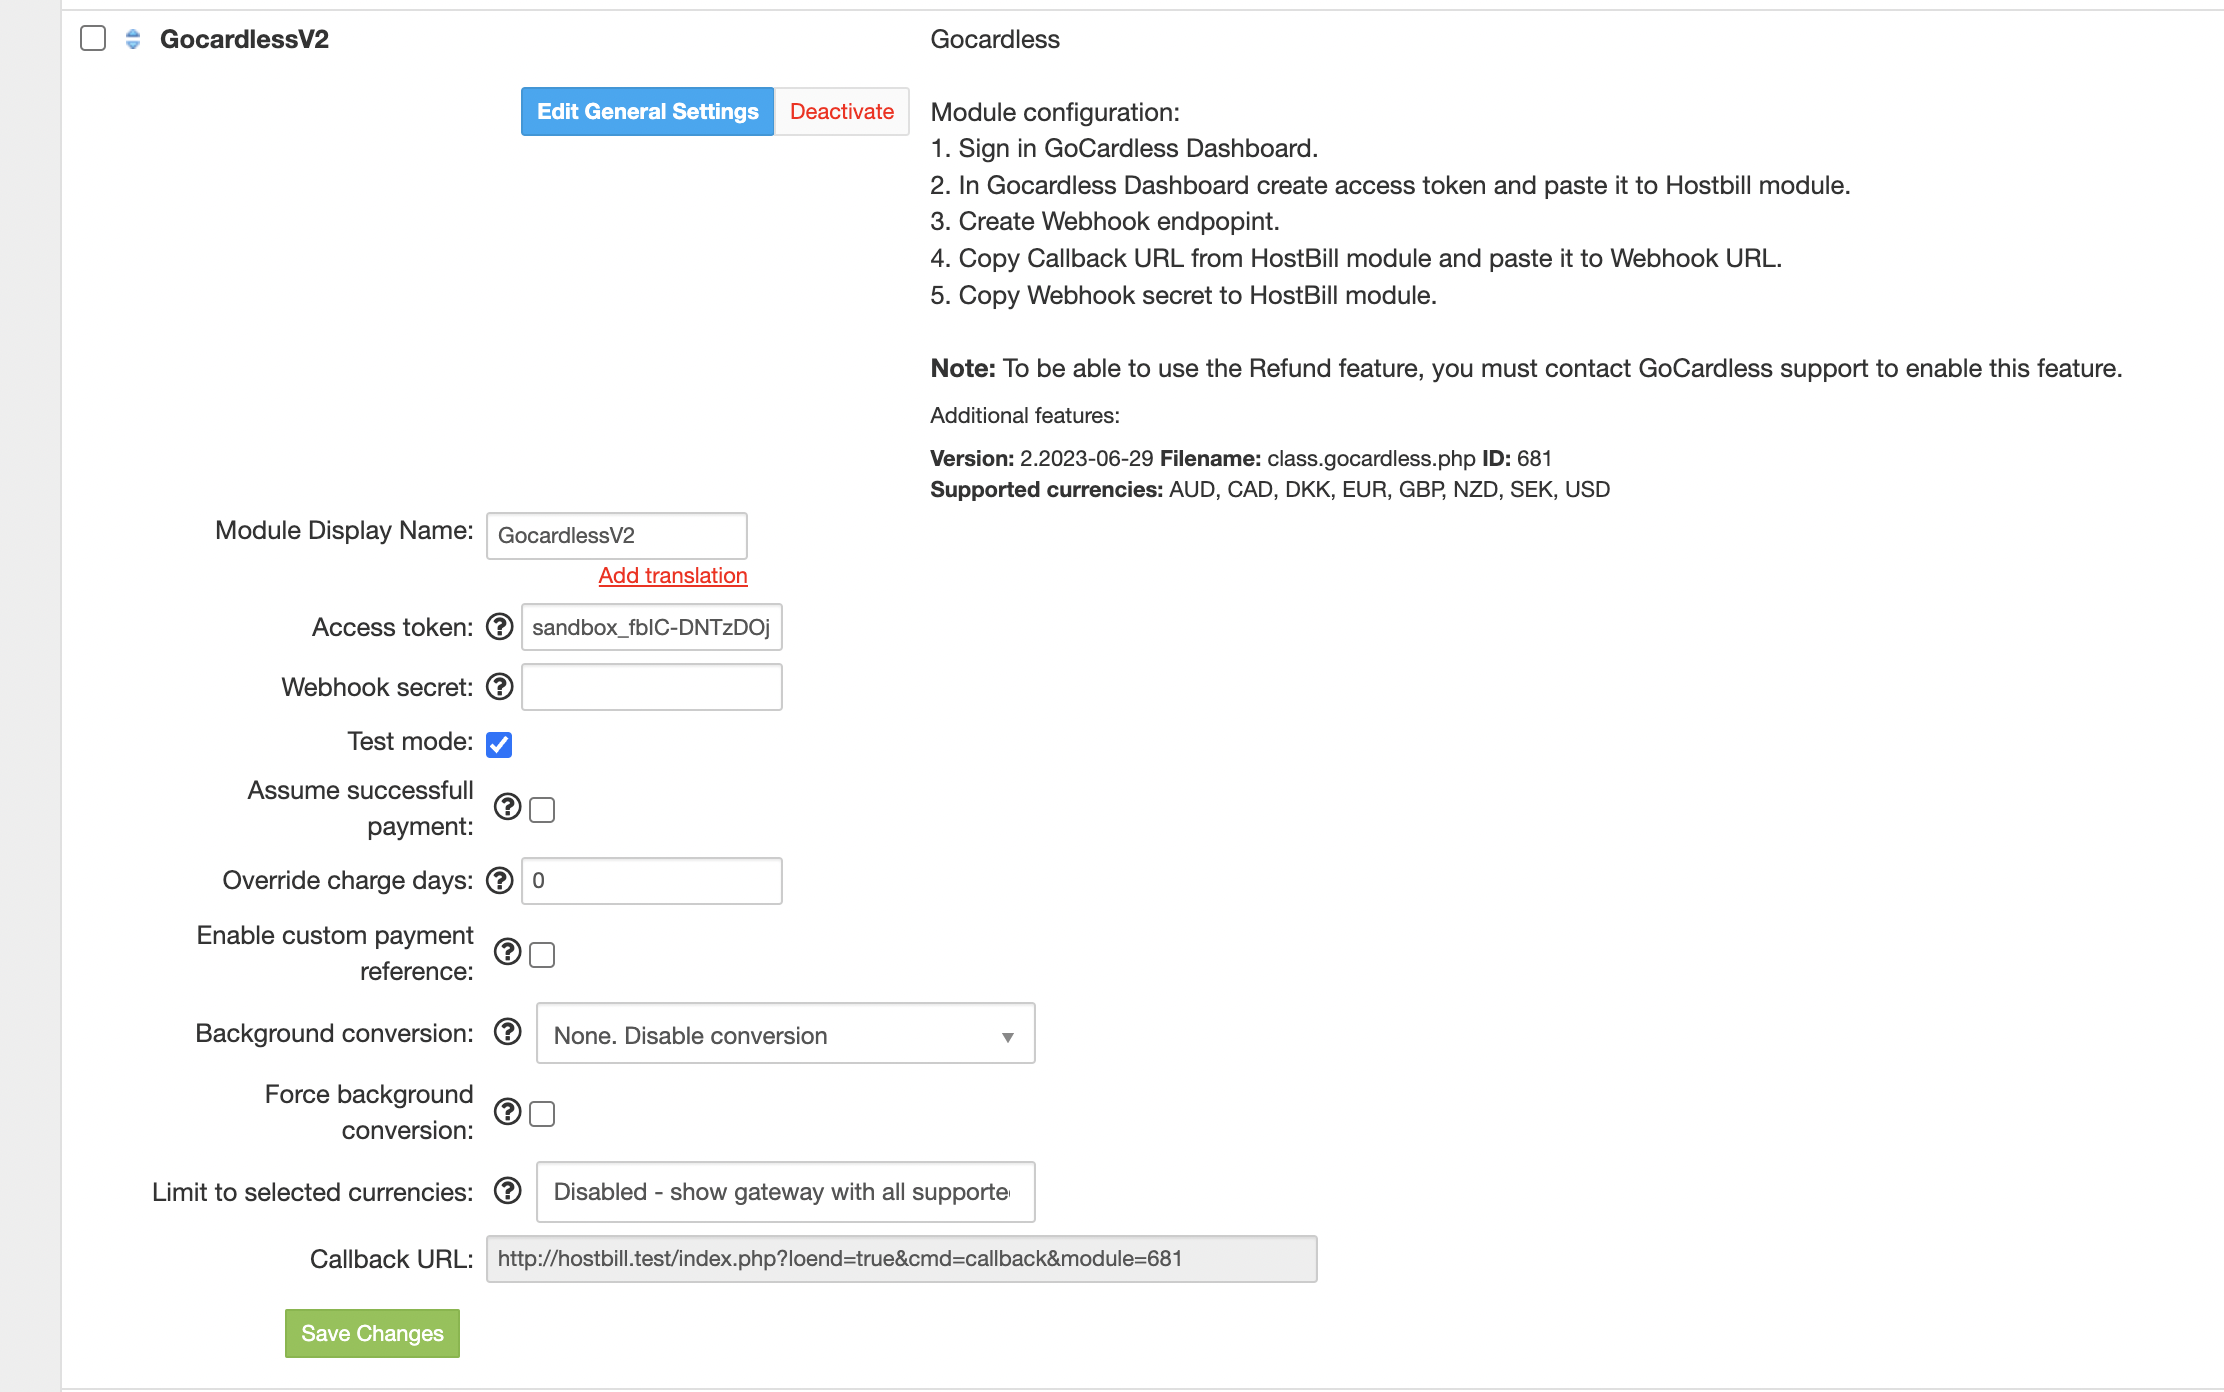
In order to activate the module login to your HostBill admin panel, go to Settings → Modules → Payment Modules, choose GoCardless gateway and click Activate.
Module configuration
...
Then proceed to filling in all other configuration fields:
- Access token - obtained from Gocardless management dashboard → Developers → Create → Access tokens (read-write)
- Webhook secret - obtained from Gocardless management dashboard → Developers → Create → Webhook Endpoint (use module's "callback url" in webhook URL field)
- Test mode - when enabled module should oparete on Sandbox token from gocardless
- Assume successfull payment - Once enabled, as soon payment is submitted it will be added to HostBill in Processing state. Once payment is succesfull it will change transaction status in HostBill to Success. If it fails, it will be charged back in HostBill
- Override charge days - Enter amount of days before due date to debit, if set to 0/empty it will use HostBill global credit card capture settings
- Enable custom payment reference - Custom payment reference needs to be first enabled at Gocardless for your scheme identifier. Once this feature is enabled, module will send reference (invoice id) to gocardless when creating payment
All required information can be obtained once you login to your GoCardless merchant panel.
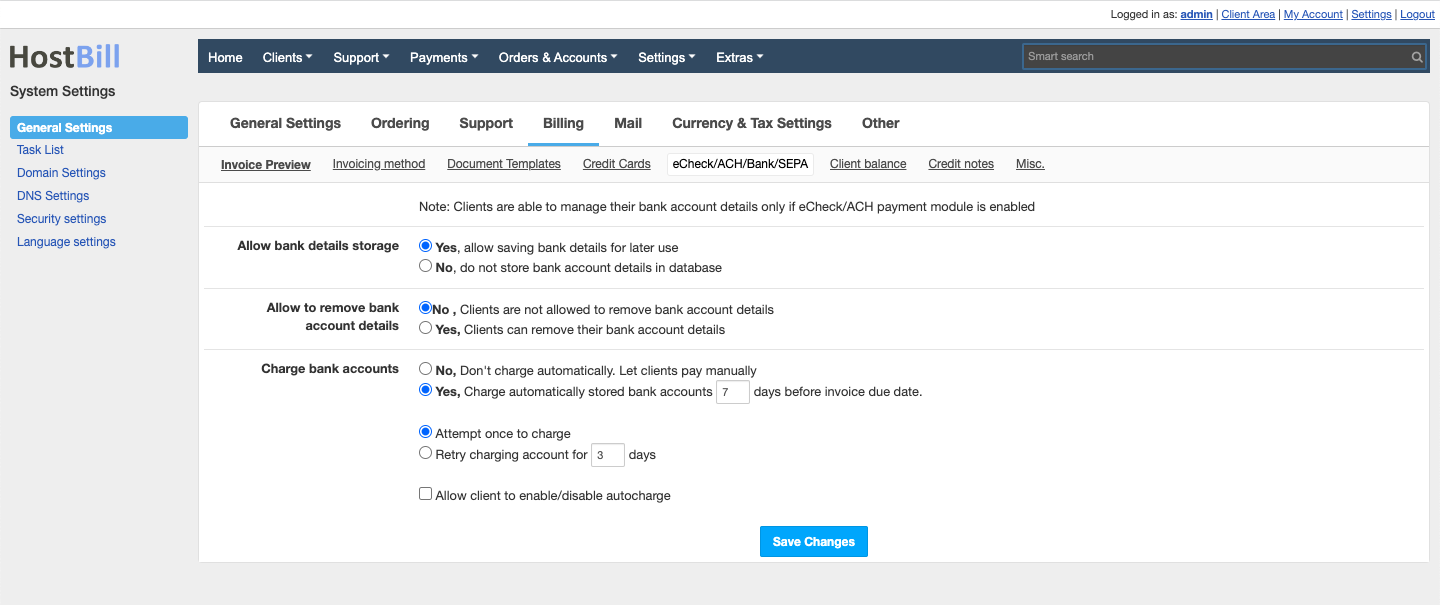
Automated mandate captures
Automated mandate captures for this module are controlled by General Settings → Billing → eCheck/ACH/Bank/SEPA
FAQ
...
Question: I've enabled the module but it does not display in my client portal.
Answer: This module does not support the currency you attempt to display it in, please use background currency conversion.
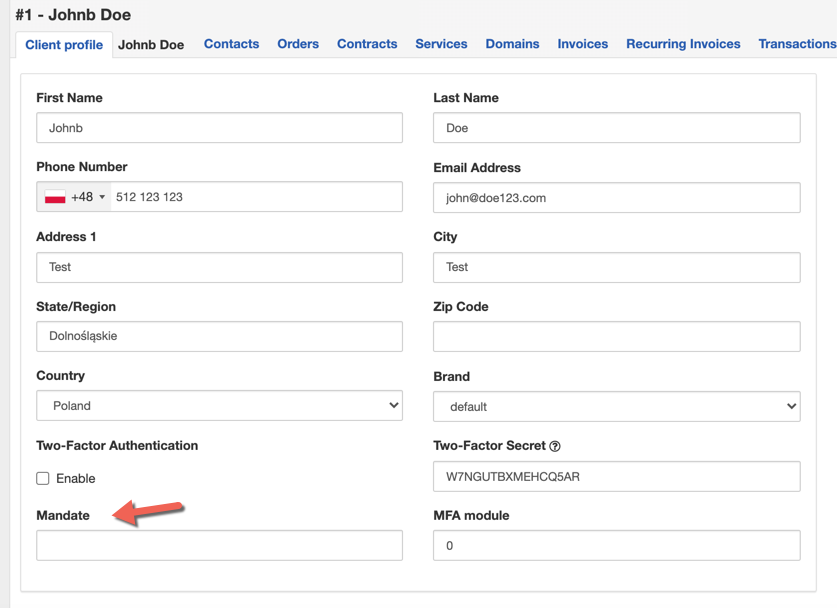
Question: How to use existing GoCardless mandates?
Answer: The "mandate" field is added to the client profile when installing the GoCardless module. Once this field is filled it will be used for next GoCardless captures. To associate an existing mandate, enter the mandate ID from GoCardless - Unique identifier, beginning with “MD”. Please note that this prefix may not apply to mandates created before 2016.
"