Why may I need this?
Hosting companies often use more than one Plesk installation.
It's hard task to keep service plans and addons in sync between all installations, as there is no automated tool to do this. Not until now.
Scenario A: Bulk updating plans.
Imagine you sell Plesk hosting products to your customers in HostBill. You connect product in HostBill to all your
Plesk installations
and make sure that service plan names are shared
across all installations. Now you'd like to offer more disk space within this plan. Previously you
would need to login to every single one of your
Plesk installation, go to service plans, increase disk space
and save changes.
With Plesk Service Plan Sync tool
it's a matter of one click.
Scenario B: Adding new plan.
If you'd like to create new product, you create new service plan in Plesk. But if you want to have this plan on all your installations - normally you would need to login to each install you have
and re-create plan over
and over again.
With Plesk Service Plan Sync you create new service plan on one (main) Plesk install and just hit Sync button.
Scenario C: Adding new
Plesk node/installation.
What if you'd like to add new location/installation to your Plesk fleet? To make it useful for your automation you
would need to create all service plans you offer on this install - it's easy
to make a mistake.
With Plesk Service Plan Sync you add your new installation to configuration
and just hit Sync button.
How it works?
This new tool allows you to create multiple configurations (ie if you have separate windows/linux
Plesk installations
or have different installations for different purposes) that consist of
Plesk servers. In each configuration you select source server, that will serve as source of actual plans & addons configuration. Other Plesk servers within configuration will have plans updated, and missing plans created with a click of a button.
| Table of Contents |
|---|
Configuring & Using Plesk Service Plan Sync in HostBill
- Find and activate Plesk Service Plan Sync plugin in your HostBill → Extras → Plugins
- Once activated proceed to Extras → Plugins → Plugins → Plesk Service Plan Sync to configure the module.
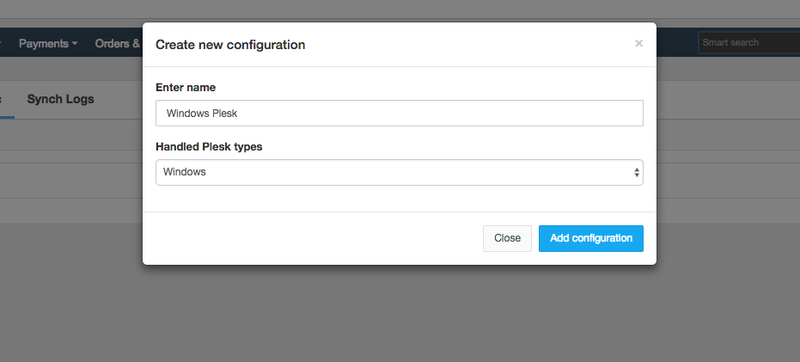
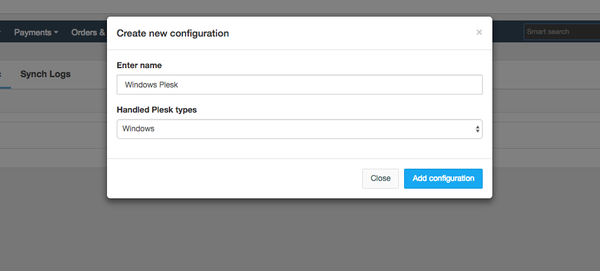
- You can create Configurations by clicking on Create new configuration button. Provide name for configuration and select Plesk type (linux or windows) for this configuration.
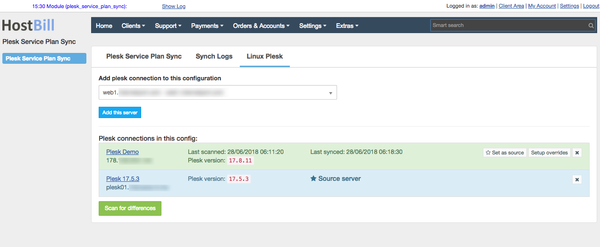
- Once configuration is added, you can add servers to this configuration. From dropdown list, select Plesk server(s) configured in Settings → App
Repeat this step for all servers you'd like to have in this configuration
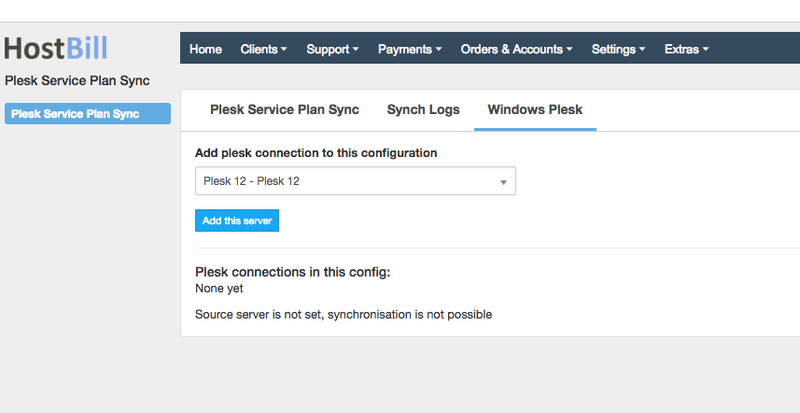
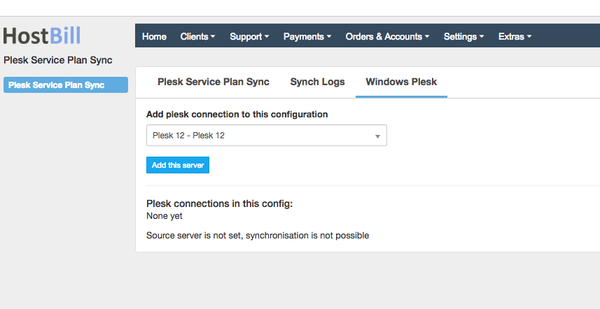
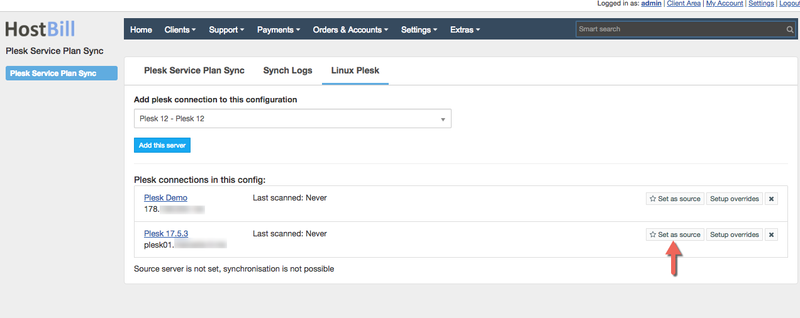
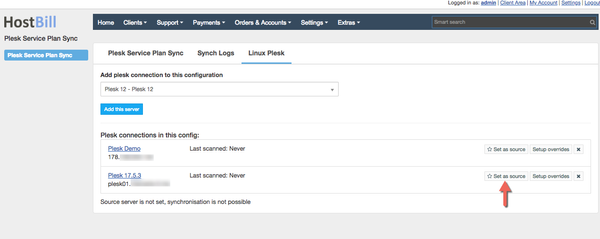
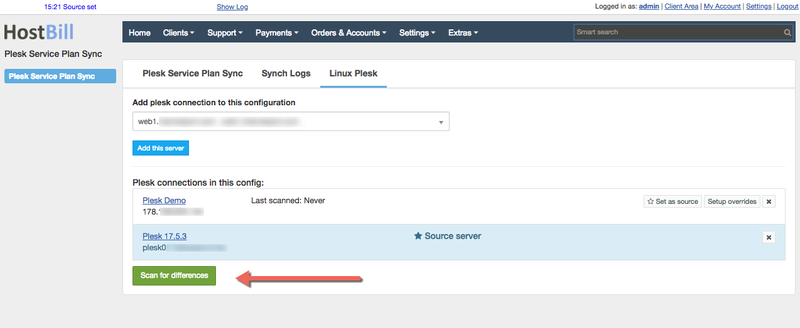
- Once you've added all servers you wish for this config, click on Setup as source next to the server that should serve as a source of plans for all other in this config
- Now its time for checking plans, it's time to check plans: click on Scan for differences, to fetch plans & addons from all installations and compare them:

- For each target server you will see all differences:

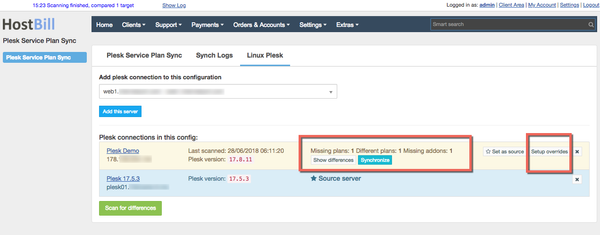
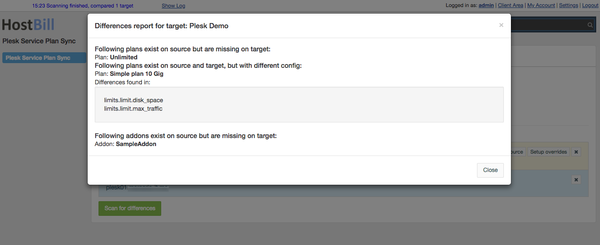
Following management options are available:- Show differences - allows you to track what plans/addons/plan settings are missing or different compared to source server

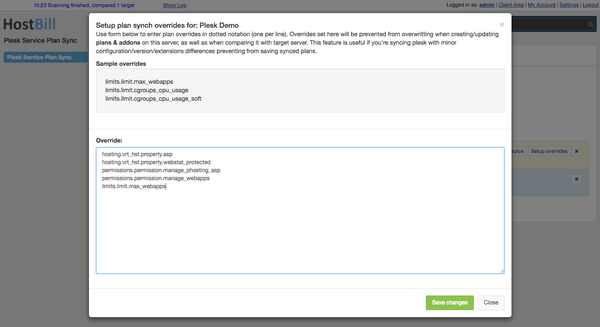
- Setup overrides - this option is helpful to enter plan overrides in dotted notation (one per line). Overrides set there will be prevented from overwritting when creating/updating plans & addons on this server, as well as when comparing it with target server. This feature is useful if you're syncing plesk Plesk with minor configuration/version/extensions differences otherwise preventing from saving synced plans.

- Synchronize - hitting this button will start synchronization process in which - plans & addons missing will be added to target server, plans & addons with matching names but conflicting configurations will have their configurations updated to match those in source pleskPlesk.
Target servers synchronized succesfully will appear in green:
- Show differences - allows you to track what plans/addons/plan settings are missing or different compared to source server
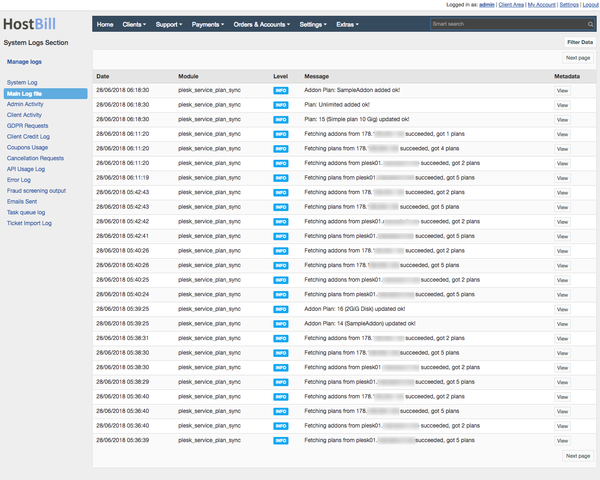
- You can check synchronization details, possible errors and conflicts in Synch Logs tab. It will direct you to logfile browser for this plugin:

- You can create Configurations by clicking on Create new configuration button. Provide name for configuration and select Plesk type (linux or windows) for this configuration.