Activating Module
- Download Module archive from HostBill Licenses Portal
- Extract archive contents in your main HostBill directory
- In your HostBill: Proceed to "Settings -> Modules -> Hosting Modules -> Inactive"
- Click "Activate" next to "SpamExperts SingleUser" module
Connecting HostBill with SpamExperts
...
Overview
...
SpamExperts offers professional anti-spam email filtering and email archiving for Webhosting providers, Resellers, ISPs and Telcos. Thanks to HostBill integration you can seamlessly and automatically provision and manage both Reseller and End-User accounts.
Activating the module
...
- If the module is included in your HostBill edition you can download it from your client portal.
- If the module is not included in your HostBill edition you can purchase it from our marketplace and then download it from the client area.
- Once you download the module extract it in the main HostBill directory.
- Go to Settings → Modules → Hosting Modules, find and activate Spam Experts (Single User) module.
Connecting HostBill with Spam Experts
...
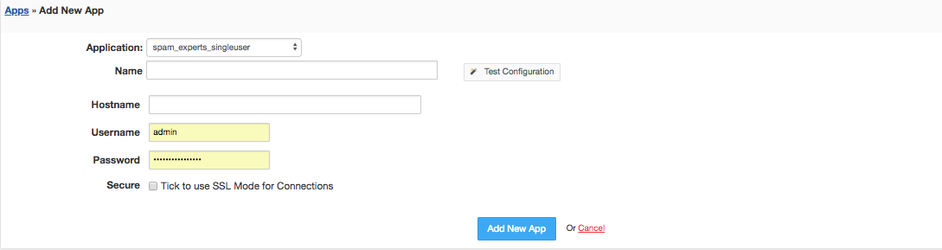
- Proceed to Settings → Apps → Add new App
- From Applications list select Spam Experts (Single User)
- Enter:
- Name - Name of this connection
- Hostname (your cloud or local cloud hostname for
...
- SpamExperts)
- Username
- Password
4. Verify entered credentials by
...
clicking Test Connection to check if HostBill can connect
5. Save Changes
...
Adding SpamExperts Product
...
...
- In HostBill go to Settings > Products → Products & Services, and Add new order page
- From Order Types select "Other Services"
- Enter your orderpage name, select orderpage template. Save Changes
- Add new product in new orderpage. Provide product name, setup price, Save Changes.
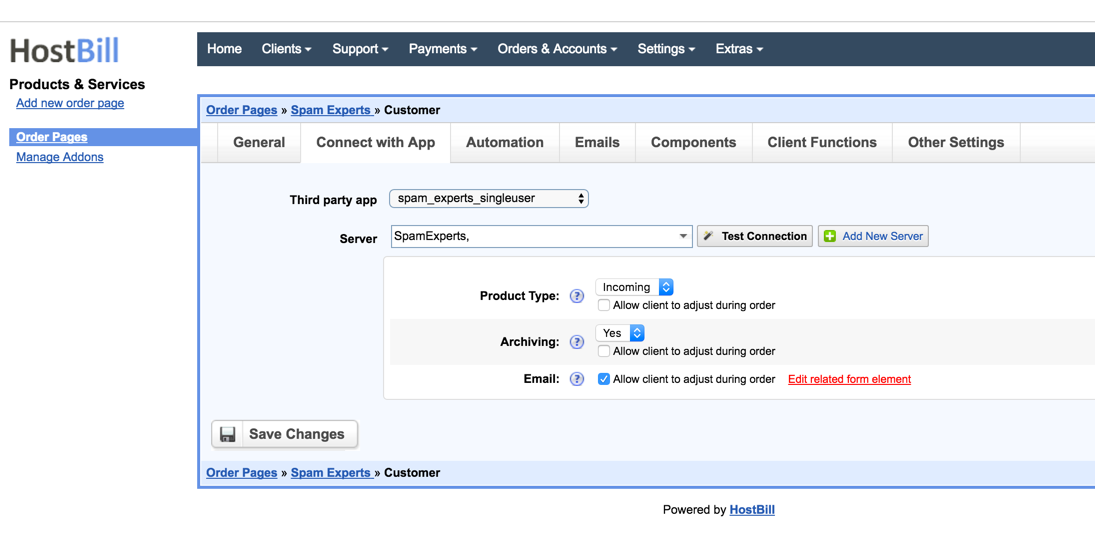
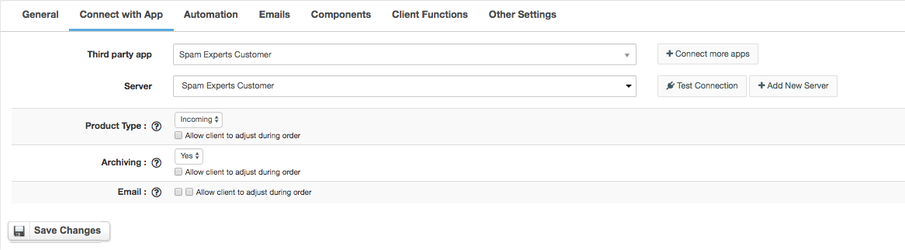
- In product configuration section proceed to "Connect with App", select "SpamExperts SingleUser" and and App server created in previous steps.
- Select Product type - whether protection should be for Incoming, Outoging or Both direction emails. Additionally you can click on "Allow client to adjust during order" to add select box into cart (optionally adding charge for certain options)
- Archiving - select to enable/disable archiving in this product. Additionally you can click on "Allow client to adjust during order" to add select box into cart (optionally adding charge for certain options)
- Email - tick "Allow client to adjust during order" to add input box for customer to enter email during order, otherwise customer email profile will be used.
- Setup Client Functions:
...
- .
For more generic product configuration details including price, automation, emails settings refer to Product Configuration article.
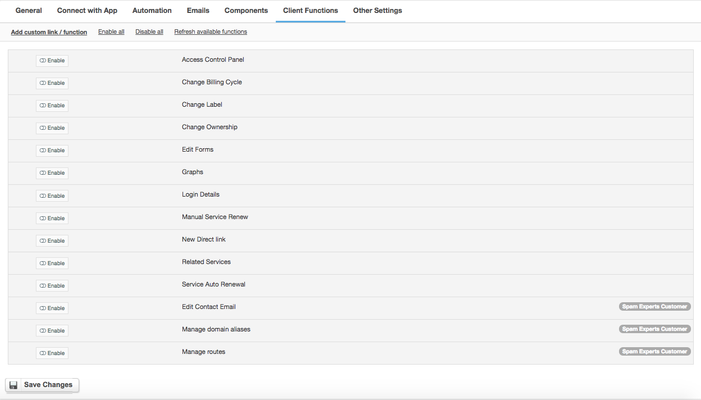
Configuring Client Functions
...
In Products & Services → Your Order Page → Your Product → Client Functions you can control what features customer will have access to in client portal, by
...
clicking Enable/Disable
...
next to the given option.
Use Edit button to adjust function appearance in the client portal.
...
For SpamExperts apart from the standard client functions, such as
- Change Billing Cycle
- Change Label
- Change Ownership
- Edit Forms
- Graphs
- Login Details
- Manual Service Renew
- New Direct Link
- Related Services
- Service Auto Renewal
you can enable the following client functions:
- Edit Contact Email - allow customer to change their domain's contact emails
- Manage Domain aliases - allow customer to manage his domain aliases
- Manage Routes - allow customer to manage routes.