Enabling client portal features
Overview
R1 Soft is a fast, scalable, multi-tenant server backup manager. R1Soft Server Backup module for HostBill allows you to resell your backup space and bill customers depending on number of servers or charge for backup quota and backup frequency, as well as automatically provision user and volume upon client signup.
Open Gallery
| Note | ||
|---|---|---|
| ||
PHP 5.3+ and php_soap extension are required for this module to work |
1. Download & install
- After module purchase visit https://hostbillapp.com/clientarea/, log-in and proceed to "Services->Provisioning Modules->Idera Server Backup Module" and from left-hand menu choose Download This Product
- After downloading, unzip archive contents in your main HostBill directory
- Log-in into your HostBill adminarea, proceed to Settings->Modules, locate your newly uploaded module and choose "Activate"
Activating the module
- If the module is included in your HostBill edition you can download it from your client portal.
- If the module is not included in your HostBill edition you can purchase it from our marketplace and then download it from the client area.
- Once you download the module extract it in the main HostBill directory.
- Go to Settings → Modules → Hosting Modules, find and activate R1Soft (IderaBackup) module.
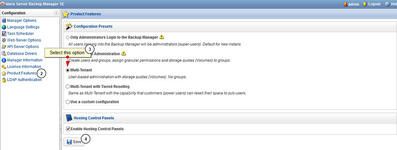
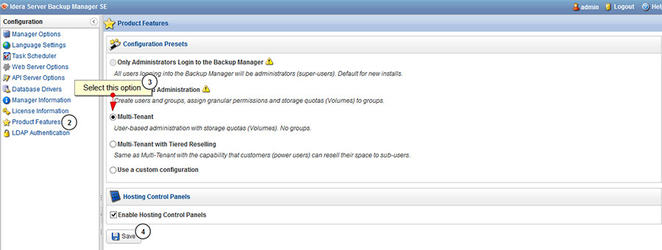
Prepare R1Soft Server Backup configuration
- In R1Soft Server Backup Manager navigate to Configuration.
- Click on Product Features.
- Select "Multi-Tenant" option.
- Save changes.
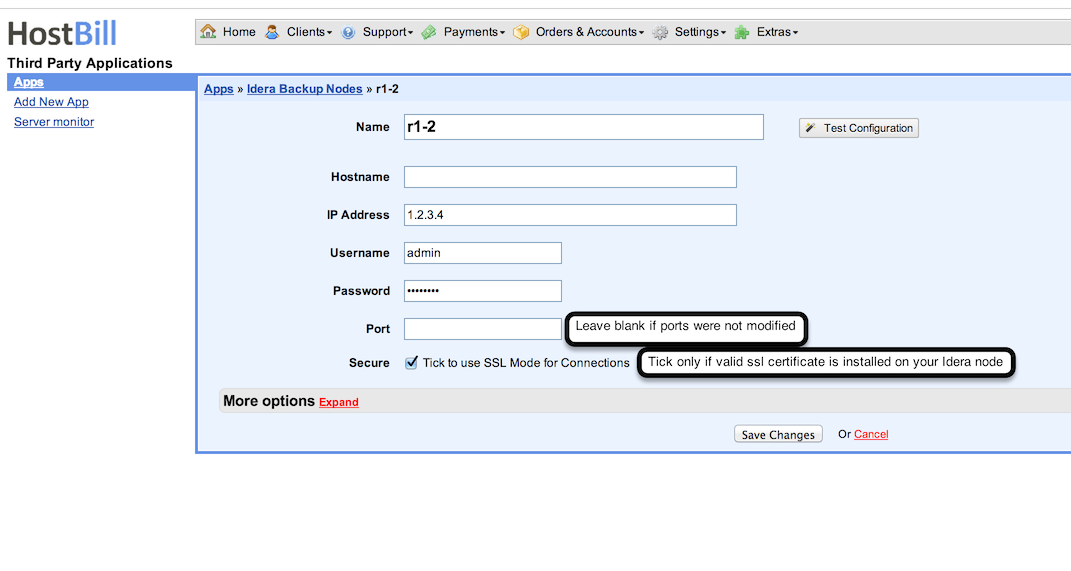
3. Connect to R1Soft in HostBill
Connecting HostBill with R1Soft Server Backup
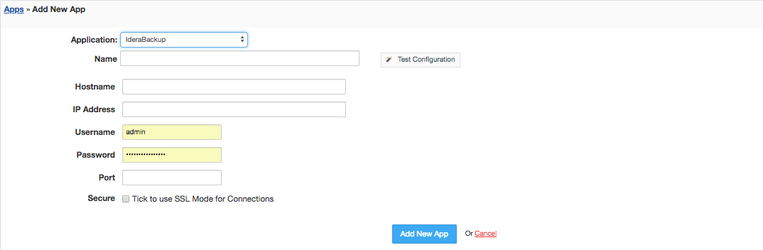
- Proceed to Settings → Apps → Add new App
- From Applications list
- select R1Soft (Idera Backup)
- Enter:
- Name - Name of this connection
- Hostname
- IP Address where your R1Soft Server Backup is installed
- Username
- Password
- Port - enter port your R1Soft API is running on, if you did not modified it, leave blank
4. Setting your backup product
- If you have valid ssl certificate installed on your R1Soft Server Backup, tick "Secure"
4. Verify entered credentials by clicking Test Connection to check if HostBill can connect
5. Save Changes
Adding ISP Manager Product
- In HostBill go to Settings → Products & Services, and Add new order page
- From order types select
- Other Services
- Enter your orderpage
- name, select orderpage template. Save Changes
- Add new product
- in the new orderpage. Provide product name and setup price and then Save Changes.
- In product configuration section proceed to Connect with App, select R1Soft (Idera Backup) and App server created in previous steps.
- You will be presented with following configuration options:
- Enter Server Limit - total count of
- servers client can backup
- Select Quota type:
On Disk Size - Quota is based on the raw Disk file size of all the Disk Safes and their files in the Volume's folder.
Size of Deltas in Disk Safe - The quotas will calculate the sum of the sizes (after compression) of the actual block level deltas in the Disk Safe file. - Enter Hard Quota - total backup space per client
- Enter Volume path prefix - Each created volume location will have this prefix, use it to distinguish drive/directory. Default / for root [linux] or Drive:\ [windows]
- Enter Recovery Point Limit - Maximum number of Recovery Points that can be stored in the Disk Safes assigned to the Volume. Set 0 for unlimited
- Enter Archive Point Limit - Maximum number of Archive Points that can be stored in the Disk Safes assigned to the Volume. Set 0 for unlimited
- Enter Replication Limit - Replication frequency for all the Disk Safes assigned to that Volume
| Note | ||
|---|---|---|
| ||
Some options |
provide "Allow client to select during order" option, once used Form element will be added to product, and customer will control this value, which you can also additionally charge, depending on customer |
setup. |

For more generic product configuration details including price, automation, emails settings refer to Product Configuration article.
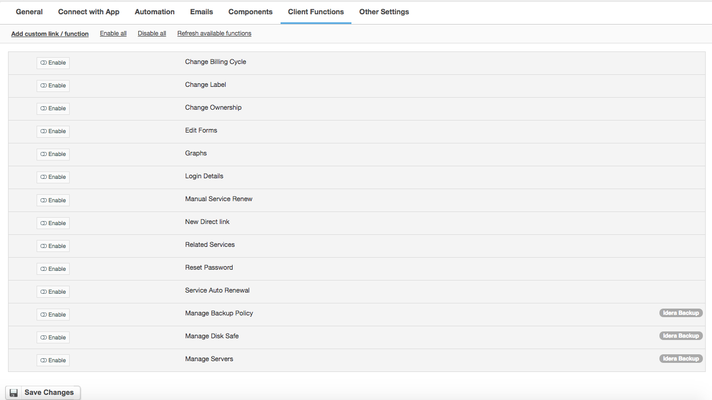
Configuring Client Functions
In Products & Services → Your Order Page → Your Product → Client Functions you can control what features customer will have access to in client portal, by clicking Enable/Disable next to the given option.
Use Edit button to adjust function appearance in the client portal.
For R1Soft apart from the standard client functions, such as
- Change Billing Cycle
- Change Label
- Change Ownership
- Edit Forms
- Graphs
- Login Details
- Manual Service Renew
- New Direct Link
- Related Services
- Service Auto Renewal
you can enable the following client functions:
- Manage Backup Policy
- Manage Disc Safe
- Manage Servers