Activating Module
- Download Module archive from HostBill Licenses Portal
- Extract archive contents in your main HostBill directory
- In your HostBill: Proceed to "Settings -> Modules -> Hosting Modules -> Inactive"
- Click "Activate" next to "TeamSpeak 3" module
Connecting HostBill with TeamSpeak 3
...
Overview
...
TeamSpeak is an easy to use and secure voice and text chat application for online gaming, education and training and business communication. HostBill integration allows to sell TeamSpeak servers and bill for number of users directly from HostBill billing panel.
Activating the module
...
- If the module is included in your HostBill edition you can download it from your client portal.
- If the module is not included in your HostBill edition you can purchase it from our marketplace and then download it from the client area.
- Once you download the module extract it in the main HostBill directory.
- Go to Settings → Modules → Hosting Modules, find and activate TeamSpeak 3 module.
Connecting HostBill with TeamSpeak 3
...
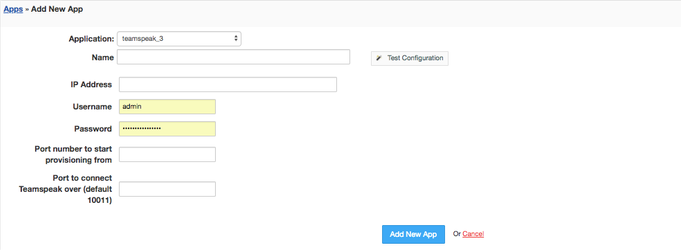
- Proceed to Settings → Apps → Add new App
- From Applications list select TeamSpeak 3
- Enter:
- Name - Name of this connection
- IP Address
- Username
- Password
- Port number to start provisioning from - this is minimal port that customer purchasing service off this server should receive
- Port to connect TeamSpeak over
4. Verify entered credentials by clicking Test Connection to check if HostBill can connect
5. Save Changes
...
Adding TeamSpeak 3 Product
...
- In HostBill go to Settings
...
- → Products & Services, and Add new order page
...
- From Order Types select
...
- Other Services
...
...
- Enter your orderpage name, select orderpage template. Save Changes
...
- Add new product in the new orderpage. Provide product name
...
- and setup price
...
- and then Save Changes.
...
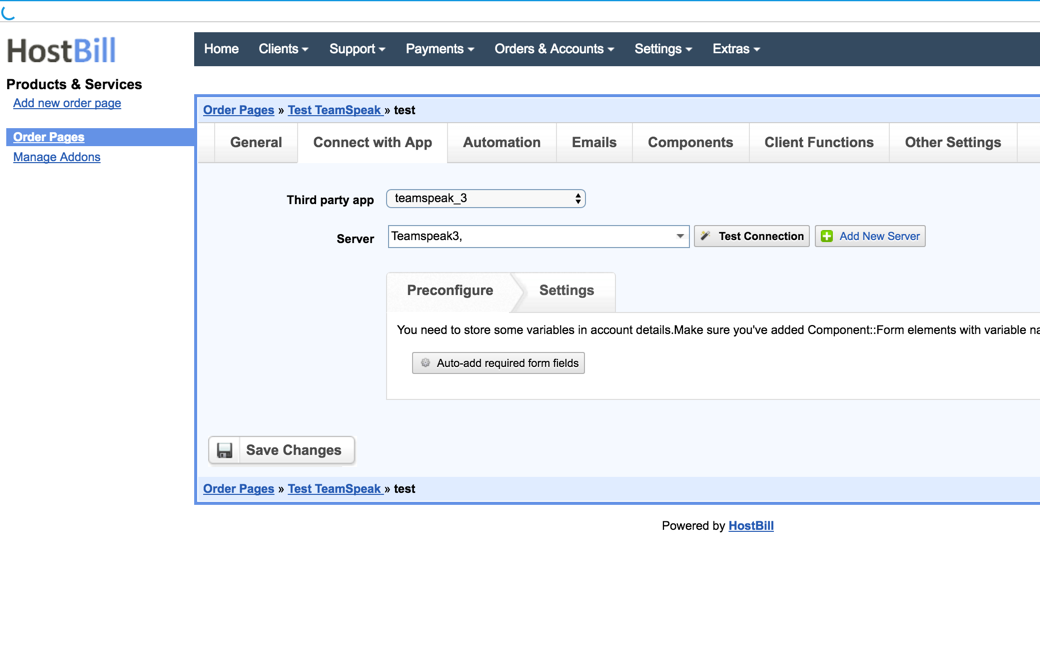
- In product configuration section proceed
...
- to Connect with App
...
- , select
...
- TeamSpeak
...
- 3 and App server created in previous steps.
- You will be presented with following configuration options:
6. 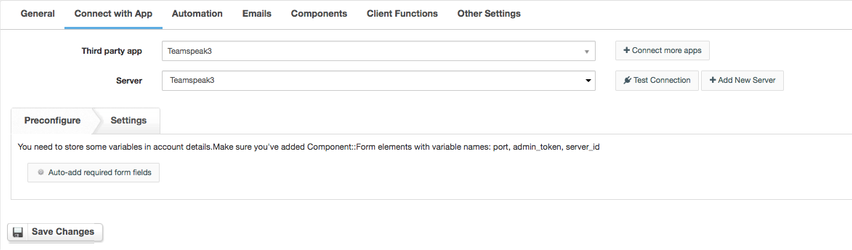
- Use "Preconfigure" feature to auto-add Components::Forms responsible for storing customer Admin Token, Server ID and Server Port
...
- Under Settings subtab, enter number of slots customer can use/create on this package. You can also add Slider or Select box Form Field, to allow customer define this number during order.
...
For more generic product configuration details including price, automation, emails settings refer to Product Configuration article.
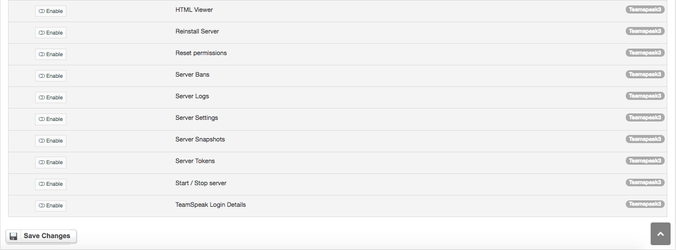
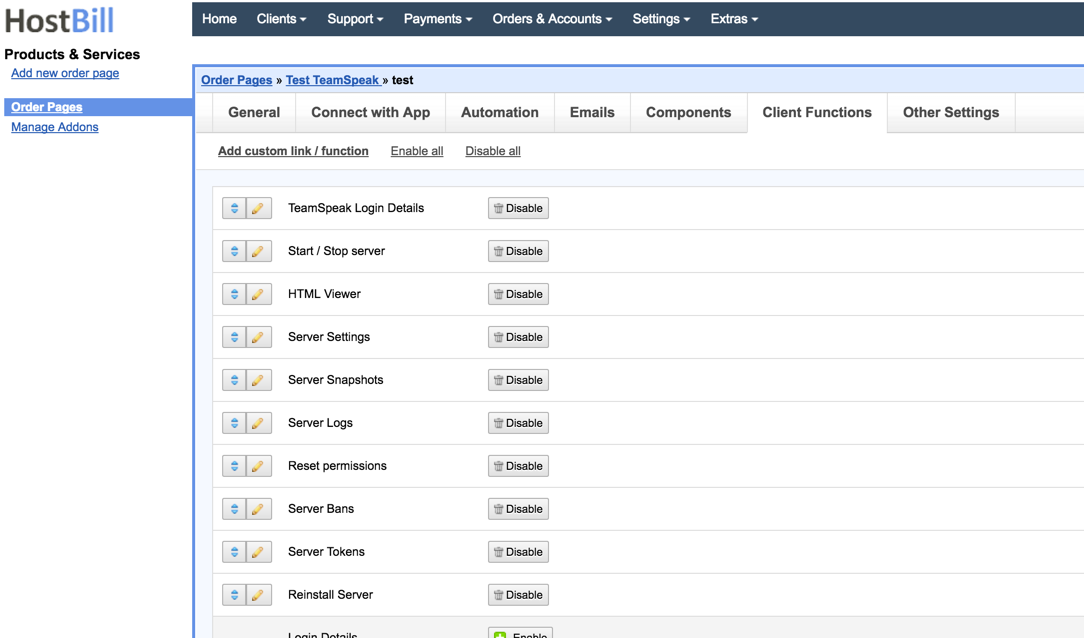
Configuring Client Functions
...
In Products & Services → Your Order Page → Your Product → Client Functions you can control what features customer will have access to in client portal, by
...
clicking Enable/Disable
...
next to the given option.
Use Edit button to adjust function appearance in the client portal.
For Libre NMS apart from the
...
standard client functions, such as
- Change Billing Cycle
- Change Label
- Change Ownership
- Edit Forms
- Graphs
- Login Details
- Manual Service Renew
- New Direct Link
- Related Services
- Service Auto Renewal
you can enable the following client functions:
- HTML Viewer - create a simple TSViewer for your Website.
- Reinstall Server - allow customer to re-install server.
- Reset Permissions - allow customer to reset permissions - restores the default permission settings on the selected virtual server and creates a new initial administrator token.
- Server Bans - allow customer to manage their server banlist.
- Server Logs - show teamspeak server logs.
- Server Settings - allow customer to adjust basic server settings (join password, welcome message, server name).
- Server Snapshots - allow customer to manage the snapshots.
- Server Tokens - allow customer to manage the server access tokens.
- Start/Stop Server - allow customer to start/stop their Teamspeak server.
- TeamSpeak login details - show teamspeak access details (port, ip, token).