Skip to end of metadata
Go to start of metadata
You are viewing an old version of this page. View the current version.
Compare with Current
View Page History
Version 1
Next »
Version info
Version info:
This version pertain to InterWorx <= 4.2
Activate Module
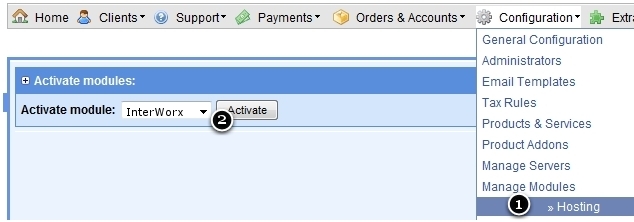
 1) Open hosting module manager
 2) Select "InterWorx" and click "Activate".
Add Server
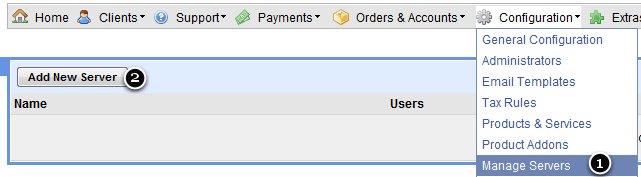
1) Open "Manage Server".
2) Click on "Add New Server".
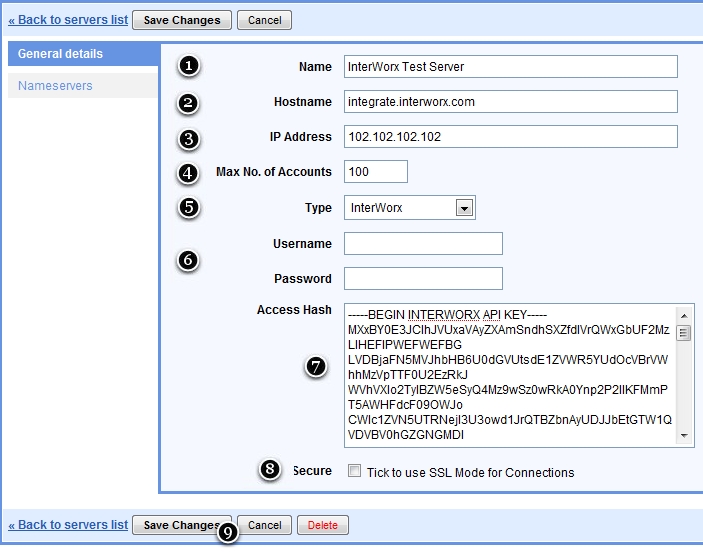
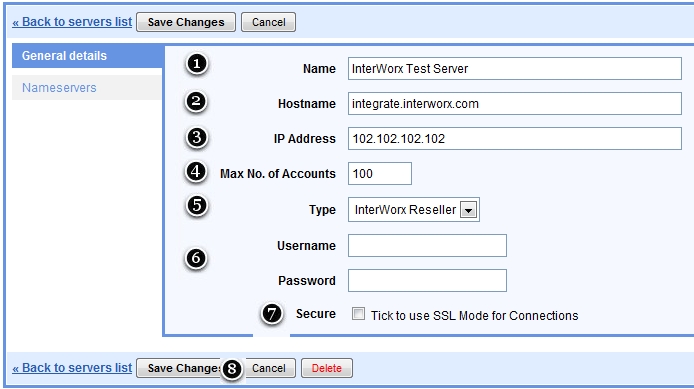
 1. Enter Name of Server. The Name will be visible in HostBill in product configuration/account information section.
 2. Your Server's Host Name.
 3. IP address of remote server.
 4. If you want create only 100 account on this server. Set this value to 100.
 5. Select InterWorx module.
 6. [optional] Username & password for InterWorx.
 7. Paste Access Hash. Note that Access Hash can save you from having to put username and password.
 8. Tick to enable HTTPS connections with InterWorx.
 9. Click "Save Changes".

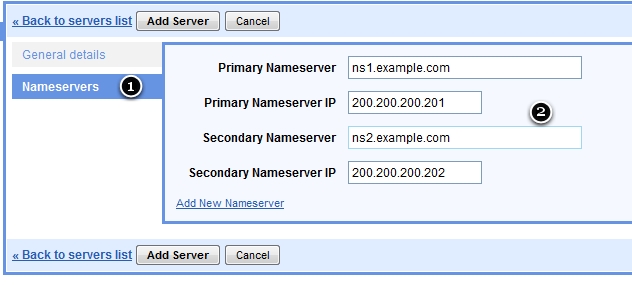
 1. Go to Name Server configuration.
 2. Add Hostname and IP for each Name Server.
InterWorx - Reseller
Version info:
This version pertain to InterWorx <= 4.2
Activate Module
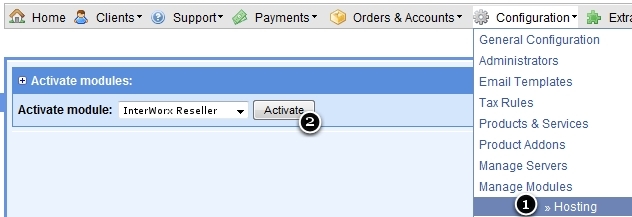
 1) Open hosting module manager
 2) Select "InterWorxReseller" and click "Activate".
Add Server

 1) Open "Manage Server".
 2) Click on "Add New Server".
 1. Enter Name of Server. The Name will be visible in HostBill in product configuration/account information section.
 2. Your Server's Host Name.
 3. IP address of remote server.
 4. If you want create only 100 account on this server. Set this value to 100.
 5. Select InterWorx Reseller module.
 6. Username & password for InterWorx.
 7. Tick to enable HTTPS connections with InterWorx.
 8. Click "Save Changes".
 1. Go to Name Server configuration.
 2. Add Hostname and IP for each Name Server.