
eSELECT Plus Hosted setup guide
To setup your eSELECT Plus module, just follow these steps:
- Login to your eSELECT Plus Merchant Resource Centre.

- Click on ADMIN.
- From the sub menu select hosted config.

- Click on "Generate a Version2 Configuration" or "Generate a Version3 Configuration".
- If you have chosen to generate Version 3 Configuration set following options to:
- Transaction Type: Purchase
- Payment Methods: Credit Cards
- Response Method: Sent to your server as a POST
- Approved URL:

- If you have chosen to generate Version 2 Configuration set following options to:
- Transaction Type: Purchase
- Response Method: Sent to your server as a POST
- Approved URL: Callback url taken from eSELECT Plus plugin configuration
- Declined URL: Callback url taken from eSELECT Plus plugin configuration

- Copy "ps_store_id" and "hpp_key" values and save them somewhere
HostBill setup guide
- Login to HostBill admin area and navigate to Settings > Modules
- In the search input enter 'eSELECT Plus', hit Enter and activate it, or go to Payment Modules > Inactive and find & activate it there
- On the module configuration page, enter your "ps_store_id" and "hpp_key" from eSELECT Plus Hosted Paypage Configuration
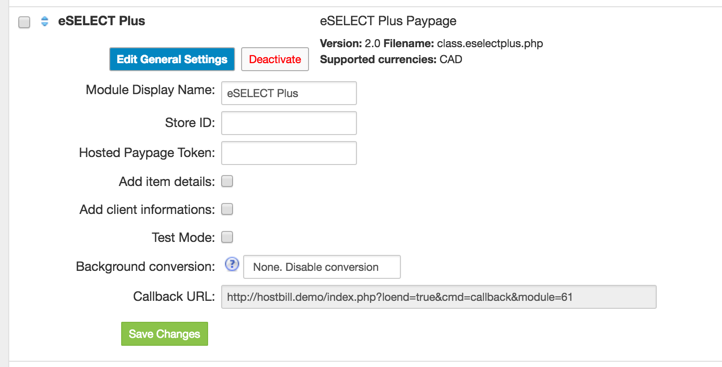
- Copy "Callback url" - you will need to enter it in eSELECT Plus Hosted Paypage Configuration
- Click 'Save changes'
Now you have to go back to eSELECT Plus
- In "Approved URL" and "Declined URL" fields, enter your 'Callback url' from HostBill
- Click 'Save Changes'
