You can find this section in HostBill Admin → Payments → Invoices
Invoice listing
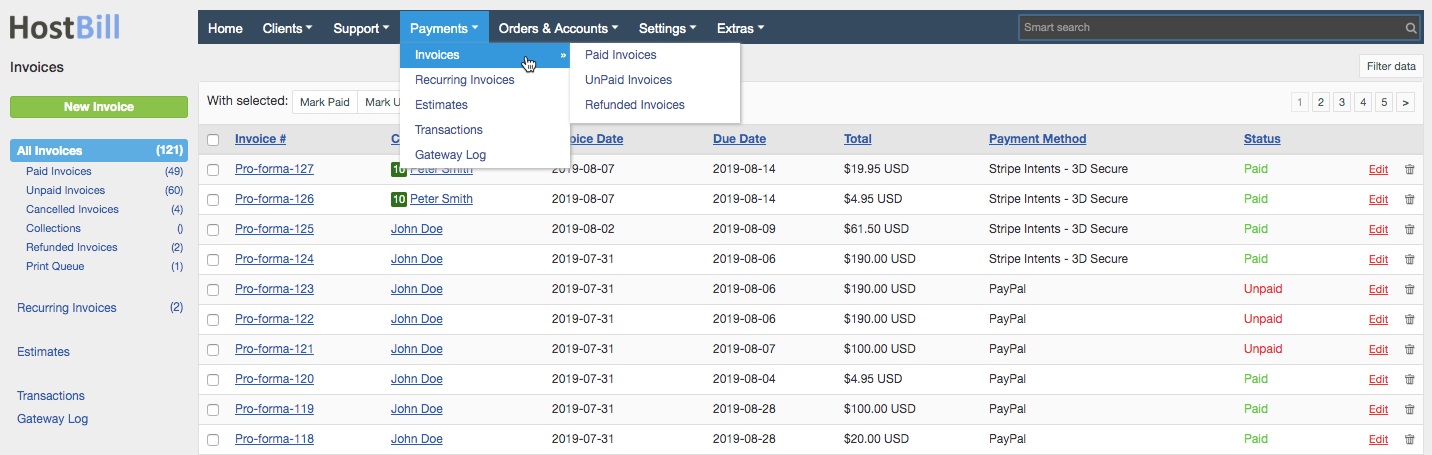
Invoice menu on the left lists and organize all invoices by grouping them into:
Paid invoices
This section lists all paid invoices.
Unpaid invoices
This section lists all unpaid invoices.
Cancelled invoices
This section lists all cancelled invoices.
Collections
This section lists
Refunded invoices
This section lists all refunded invoices.
Print Queue
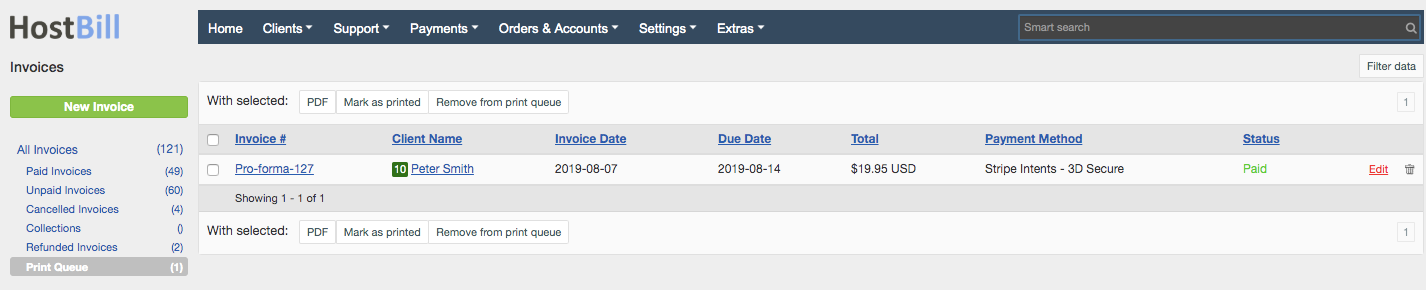
This section lists all invoices added to the print queue - to be printed out and sent to the client. You can mark invoices as printed - this will result in removing the invoice from the Print Queue, or simply remove it from the list.
Automatically generated invoices
Main advantage of HostBill is automation. This feature is especially handy when generating invoices. When client places order in client area HostBill automatically generates invoice and adds it under Payments → Invoices section. Recurring invoices are also generated automatically according to the set billing cycle. Each invoice by default is marked as Unpaid, however once the payment is received the status is automatically changed to Paid.
Manually created invoices
HostBill also gives you the opportunity to create invoice manually. You can do so for all available products, for hidden ones or for those which aren't even listed in your inventory. In order to create a new invoice you need to go under: Payments → Invoices → New invoice button (more about creating new invoice below).
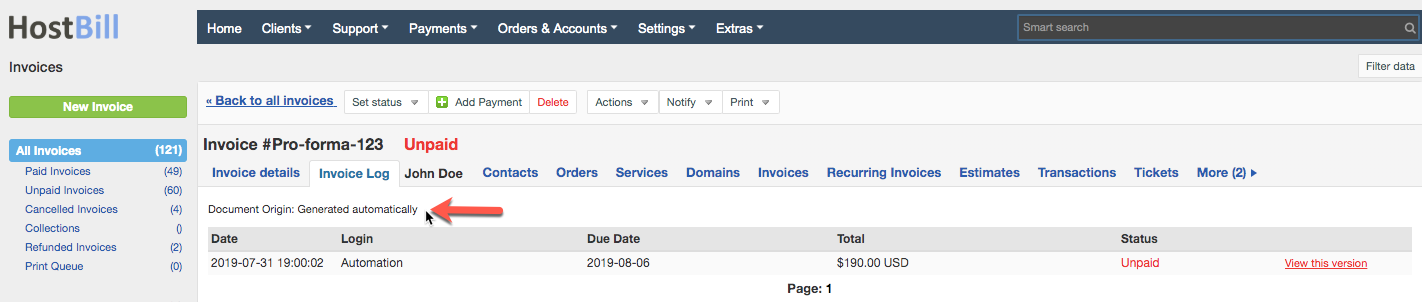
Note: Information whether the invoice was created automatically or manually (and by which staff member) can be found in the invoice log:
Managing invoices
HostBill stores both manually and automatically generated invoices under Payments → Invoices section. Here, you can find a full list of all invoices. Each invoice contains following data:
- Invoice ID - automatically generated by HostBill number assigned to each invoice
- Client Name - the client's name to whom the invoice was issued.
- Invoice Date - date when the invoice was generated. Note: You can change the date of the invoice as this field is editable. You can set the invoice date in the past.
- Due Date - date up to which the invoice is required to be paid
- Total - the total amount for a given product/service that is required to be paid by client.
- Payment Method - a payment method that has been chosen by client during placing order.
- Status - the invoice status, which may be as following: Paid, Unpaid, Cancelled, Refunded or Draft (if invoice which has been added manually hasn't been completed e.g client name is missing)
Moreover, here you can create a new invoice or perform a number of actions with selected invoices, such as:
- Mark Paid - you can mark a given invoice as Paid. You can use this option if the payment is processed manually. Marking invoice as paid in the admin area is not equivalent to actual payment. You also need to ensure to add actual transaction to invoice (in the invoice details section you can hit "Add Payment" button to manually record transaction).
- Mark Unpaid - you can mark a given invoice as Unpaid.
- Delete - you can delete a given invoice form the database.
- Send - by using this option you can send an invoice to a given client. It can be performed on client's request or after creating invoice manually.
- PDF - you can download a PDF version of selected invoice, which can be printed.
- Send Reminder to client - this option allows sending email reminders to clients who are late in terms of payment. The email is sent automatically with the use of Email templates
- Mark Cancelled - you can mark a given invoice as Cancelled, it can be used when client request cancellation of a certain product/service
- Send Message - you can compose a message to your client. Note: Instead of sending a message you can as well open a support ticket.
- Add to print queue - you can add invoice to the print queue to be printed and sent out to the client
- Remove from print queue - you can remove the invoice from the print queue
Hide/Lock unpaid invoices
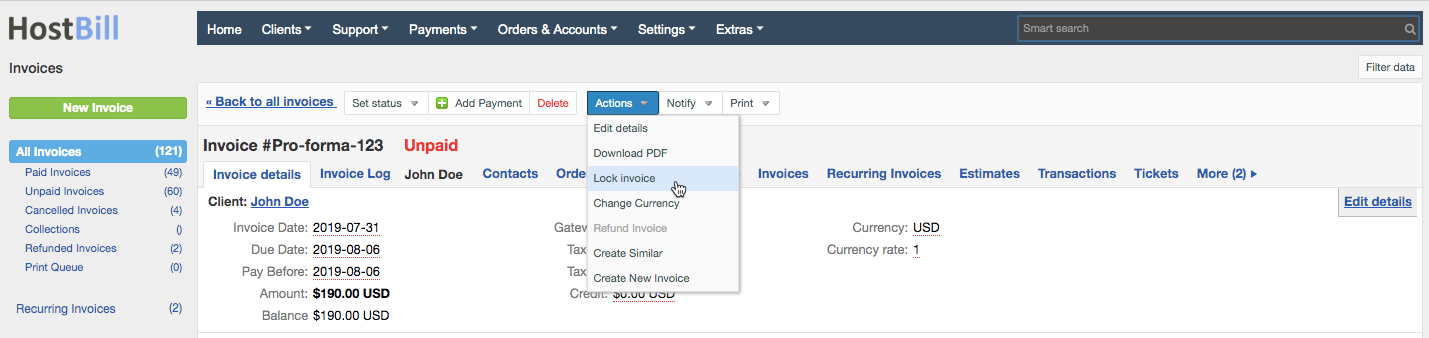
The Lock invoice option lets you hide invoice from client area without deleting it. You can set your order scenario to generate locked invoices for new services. You can only lock unpaid invoices.
Changing invoice status
HostBill allows you to set invoice statuses. The available statutes are: Paid (green), Unpaid (red), Cancelled (grey) and Refunded (black). Note, that Paid/Unpaid status is strictly connected with the presence or lack of payment. HostBill will 'see' a given invoice as unpaid despite changing manually its status to Paid as long as the payment isn't received.
Various invoice actions
HostBill offers a wide range of options through which you can edit or enhance invoicing.
- Add payment: Manually add payment to unpaid invoices
- Delete: Here you can delete a given invoice form the database.
More actions:
- Edit details - This option gives a possibility to edit a following invoice's details: Invoice Date, Due Date, Tax L1, Tax L2, Credit, Gateway.
- Download PDF: Here, HostBill will download a PDF version of a given invoice, which can be printed.
- Change currency: This option allows you to change currency in the invoice. The conversion is proceeded according to the conversion rate which is set in additional currency settings.
- Refund invoice: This option allows you to issue the refund - please scroll below for more information about refunds
- Merge invoices: This option allows to merge client's unpaid invoices. Simply select other invoices of this customer (available from the drop down menu) to merge them into current one. Items from selected invoices will be added to this invoice, and selected invoices will be removed.
- Create bulk payment: add a number of unpaid invoices to create one bulk payment invoice.
- Create similar: A very useful option to quickly create similar invoice. With this feature You can duplicate the invoice and change its details if needed.
- Create new invoice: This option gives you possibility to create a new invoice for the same client manually.
Notify:
- Send: By using this option you can send an invoice to a given client. It can be performed on client's request or after creating invoice manually.
- Send Reminder to client: This option allows sending email reminders to clients who are late in terms of payment. The email is sent automatically with the use of Email templates
- Send overdue notice: Send the client notice about overdue invoice. The email is sent automatically with the use of Email templates
- Send Message: Here you can compose a message to your client. Note: Instead of sending a message you can as well open a support ticket.
Print:
- Download PDF - download the invoice as PDF document
- Add to print queue - add invoice to the print queue
- Mark as printed - mark certain invoice as printed
- Mark as not-printed - if the invoice was marked as printed, you can undo the action by marking it as not-printed.
Add items to invoice
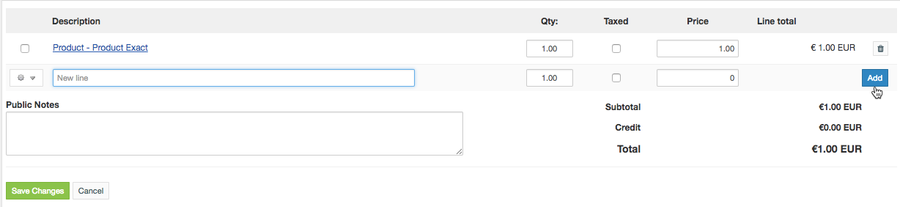
HostBill offers you the possibility to edit or enlarge invoice content. Now, you don't have to generate another invoice for addons for already purchased products. You can simply add it to existing invoice and send it to your client as an one collective invoice. Also, you can edit a quantity and price of a purchased product.
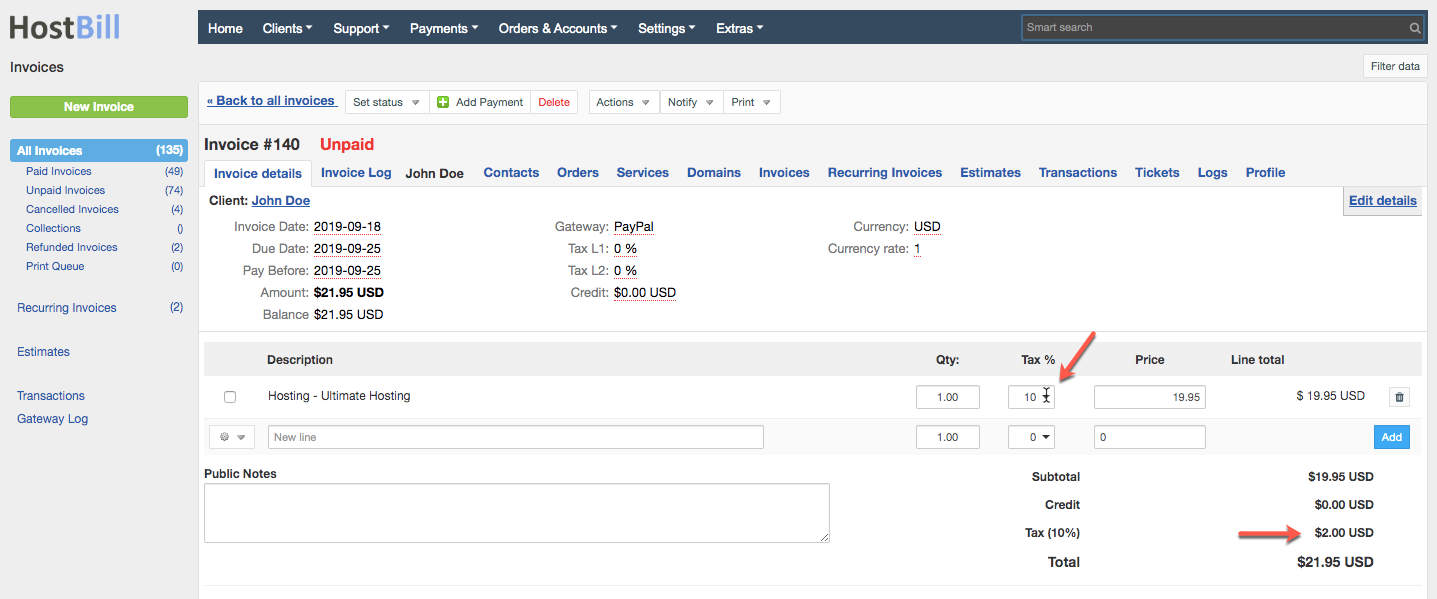
Change tax on invoice
In HostBill you can manually change the tax rate of each invoice item. Simply enter the tax rate in the Tax field, and HostBill will automatically calculate the tax and add it to the invoice.
Splitting invoice

HostBill offers the possibility of splitting invoice items. To do so, tick the box next to the product on your invoice that you want to exclude, click the settings icon below and choose: Split selected into new invoice. This will result in creating new invoice for the given product/s.
Add notes to invoice

Public notes field allows you to add some notes/description to invoice that will be visible for clients. Notes are shown both on invoice page and on PDF documents.
Creating new invoice
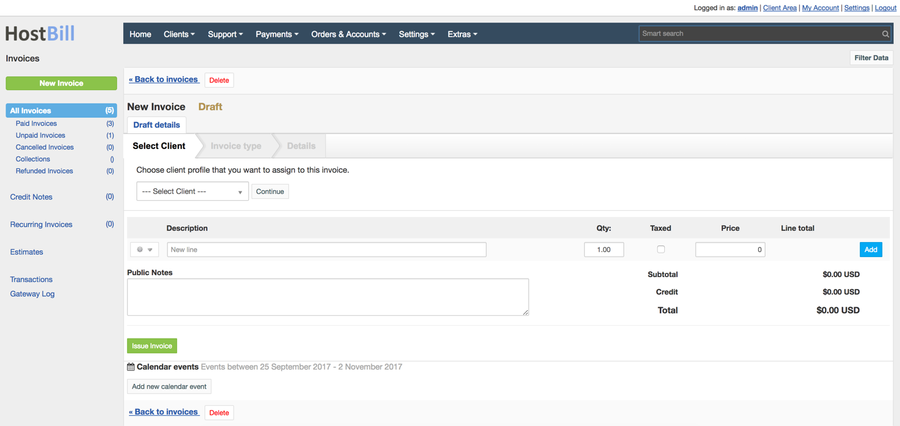
In order to create a new invoice you need to go under: Payments → Invoices → New invoice button. New invoice is always created as a Draft. You have to fill in all invoice details:
- From the drop-down list choose the client that the invoice should be issued for.
- Choose the invoice type: standard or recurring. Standard invoice is issued instantly, recurring invoice creates billing template that will be used to automatically generate invoices over time.
- Fill in the invoice details:
- Invoice date
- Due date
- Pay before
- Gateway
- Currency
- Tax
For recurring invoice:
- First invoice date
- Due days
- Pay before days
- Frequency
- Occurrencies - until when the invoices should be issued
- Gateway
- Currency
- Tax
4. Add products/services. Click on the settings icon to select products/services which are available in your inventory. Once you have chosen a given item HostBill will automatically fills its price in. When you decide to issue an invoice for product/service which isn't officially available you need to fill all details manually. If the invoice is ready, you need to click Save Changes and a new invoice is ready. Since it's not an automatic process you need to send an invoice to your client by using Send button.
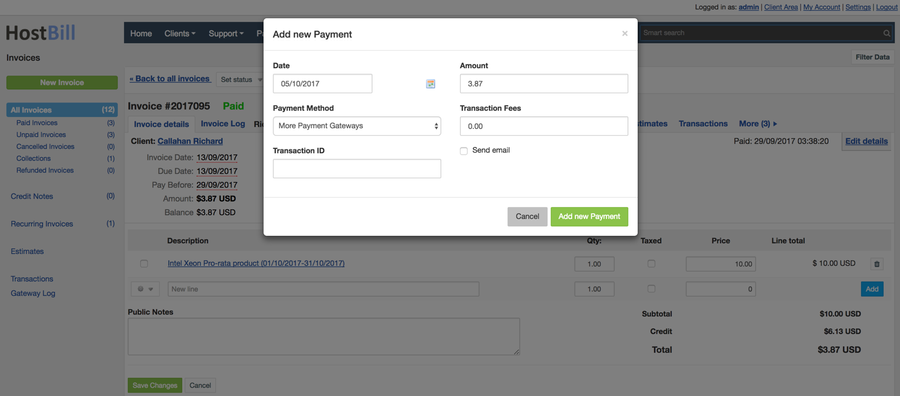
Adding payment to invoice
HostBill is fully automated in terms of payments, however we understand that sometimes clients can't or don't want to pay by payment gateways and they prefer paying for instance by check. That's why HostBill allows adding payment to invoice manually. Once the transaction is processed, the invoice status is changed to Paid. More info about adding transactions can be found here.
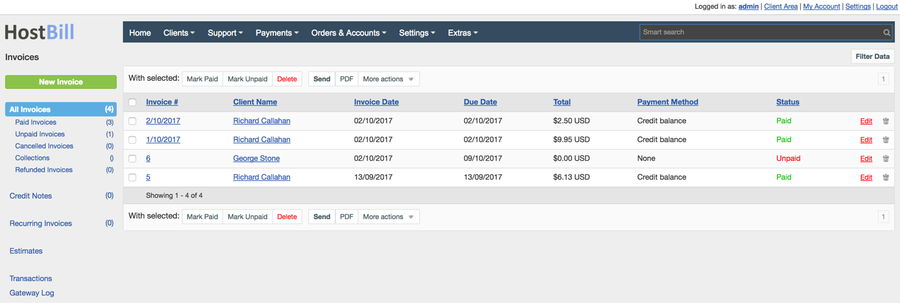
Applying credit from Client profile to invoice
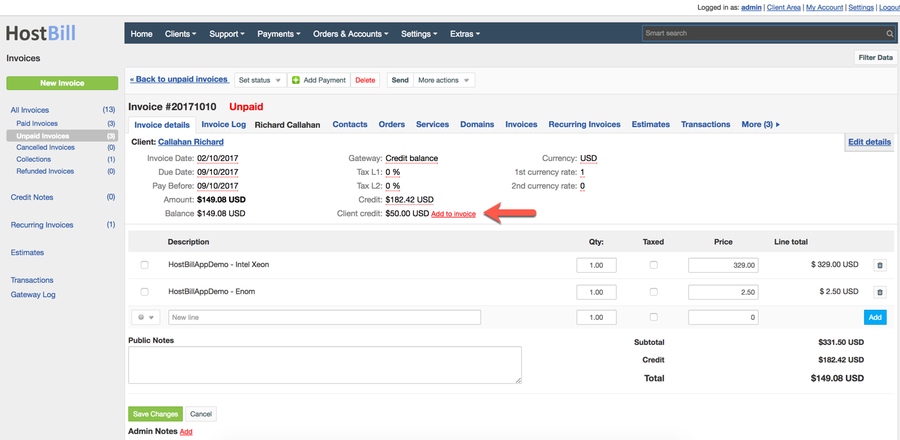
If customer have positive credit balance in their account, this credit can be applied to the client due invoice by staff member.
- Proceed to Payments → Invoices and select customer invoice from the list
If customer have credit available, a field "Client Credit" will appear
- Use "Add to invoice" to apply credit from client profile to invoice.
- Enter amount of credit to be applied, by default HostBill will load maximum amount available from client credit that is not higher than invoice balance
- Click on "Apply from credit"
- Customer credit will now be decreased, credit change will be logged in client credit changes log.
Refunding invoices & working with credit notes
Invoices in HostBill can be refunded automatically through Invoice → More Actions → Refund invoice. Following refund methods are supported:
- Automated refund through gateway - payment is sent back to customer using chosen payment method - ie PayPal
- Add credit to client balance - payment is added to customer balance as credit, for future purchases/invoice payment
- Manual refund, just record - invoice is marked as refunded, no other action is taken
After refund HostBill can automatically take certain automation tasks:
- Terminate related hosting account
- Close customer profile
- Close customer profile and ban his IP address
- Delete related account
- Suspend related account
You can also enable credit notes feature in Settings → Billing → Credit notes to issue credit note upon refund. Please refer to screencast below to learn how to use credit notes:
| Widget Connector | ||||||
|---|---|---|---|---|---|---|
|