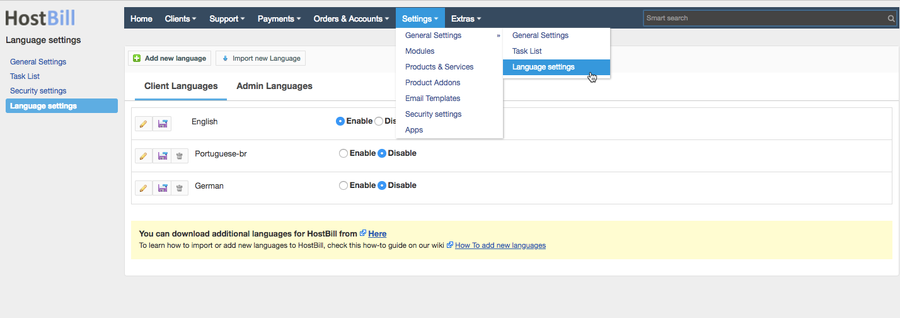
You can find this section in HostBill Admin → Settings → General Settings → Language Settings.
Add new language
To add new language
click on the Add new language
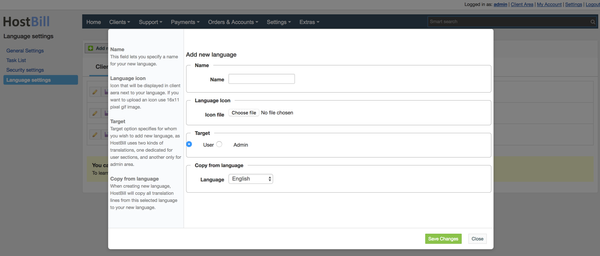
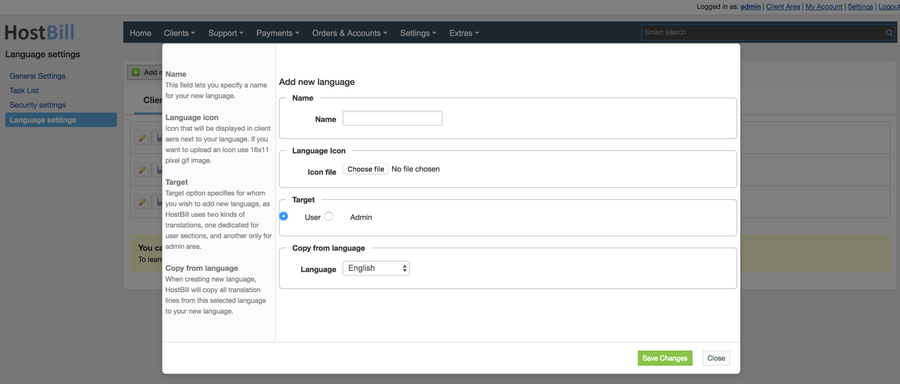
button in Language Settings section. In the newly
displayed menu insert
:
- Your language name
- Language icon - an icon that will be displayed in client area next to your language, while the client chooses the language. If you want to upload an icon use 16x11 pixel gif image and rename it according to the example it.gif -> lang_italian.
- Language targeted area - target option specifies for whom you wish to add new language, as HostBill uses two kinds of translations, one dedicated for user sections, and another only for admin area.
- Copy from language - when creating new language, HostBill will copy all translation lines from this selected language to your new language.
Once you Save Changes and the page reloads you will see your new language on the list, in
the specified category (client or admin languages section)
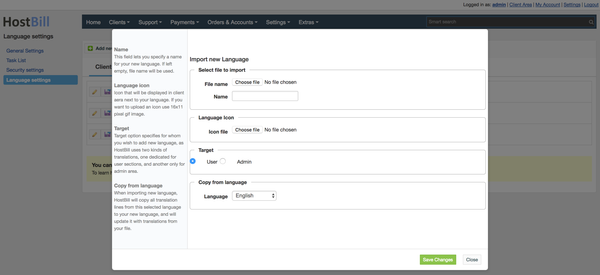
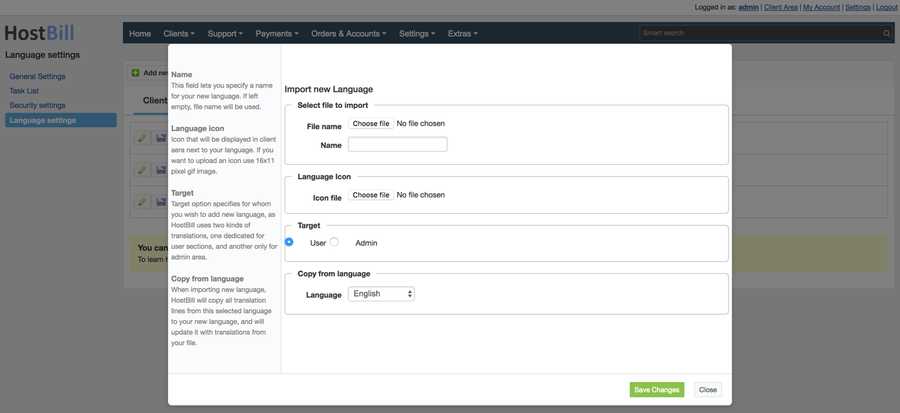
Import Language
To import a language to HostBill
click on the Import new
language button in Language Settings section. In the newly
displayed menu insert:
- File name - select your language file to import (you can download additional language files from
- here.
- )
- Provide your language name - this field is optional, if left empty HostBill will use file name for your language.
- Language targeted area - target option specifies for whom you wish to add new language, as HostBill uses two kinds of translations, one dedicated for user sections, and another only for admin area.
- Copy from language - when creating new language, HostBill will copy all translation lines from this selected language to your new language.
Once you Save Changes and the page reloads you will see your new language on the list, in
the specified category (client or admin languages section)
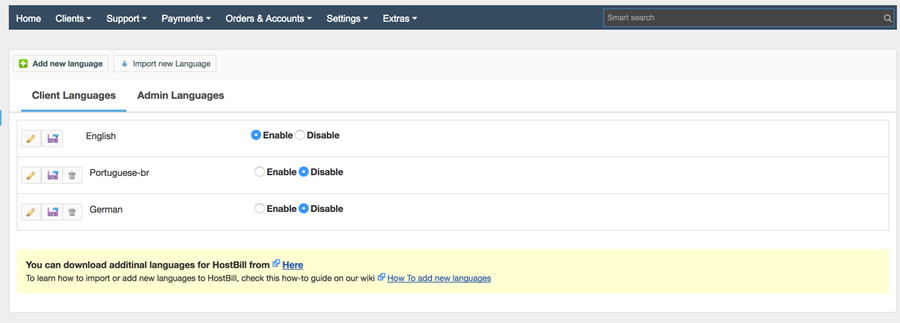
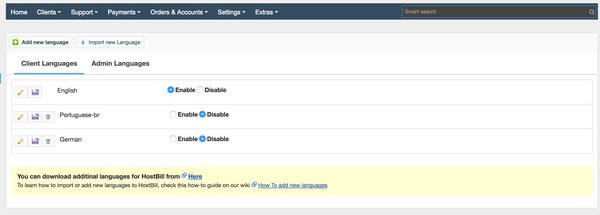
Manage languages
You chose witch languages user or clients and admins can use (by clicking enable/disable button next to the language name), export your languages to file or delete them completely from your HostBill.
Delete language
To delete a language, click on the [ delete ] Delete button and accept the confirmation popup.
Export language
If you want to export languages, click on the [ export ] Export button, depending on your browser, download will start automaticly automatically or you will have to specify location to with where the language file will be saved.
Disable/Enable language
To disable a language click on the corresponding radio button labelled Disable, to enable, click the oposite Enable radio button.
Manage translations
Translation managementYou can manage translation by clicking [ edit ] Edit button near a language you want to edit.
Add new translations
To add new translation first you need to chose a section
to which translation should apply. Global section is always available in templates, other sections are dedicated to special pages eg: langedit section of admin targeted language corresponds to Language settings page.
You can also create a new custom section by clicking Custom section button.
To add new translation lines, click on
the edit button and a new empty line should appear.
Enter a
keyword name in the first input field
- this
keyword will be used to access your translation line.
In the second field, enter your translated text.
When done, click on the Save Changes button.
| Note | ||
|---|---|---|
| ||
|
|
|
Edit translations
To edit a translation simply click on the
[ edit ]Edit button, translation field should now be editable.
When done, click Save Changes.
Delete translations
If you want to delete a translation line, click on the
[ delete ]Delete button.
Translation line will be marked to deletion, and
itits appearance will change to light red (default).
If you
changedchange your mind, you can cancel this by clicking
[ cancel ]Cancel button
. When done, click Save Changes
| Note | ||
|---|---|---|
| ||
|
Language management overview:
| Widget Connector | ||||||
|---|---|---|---|---|---|---|
|
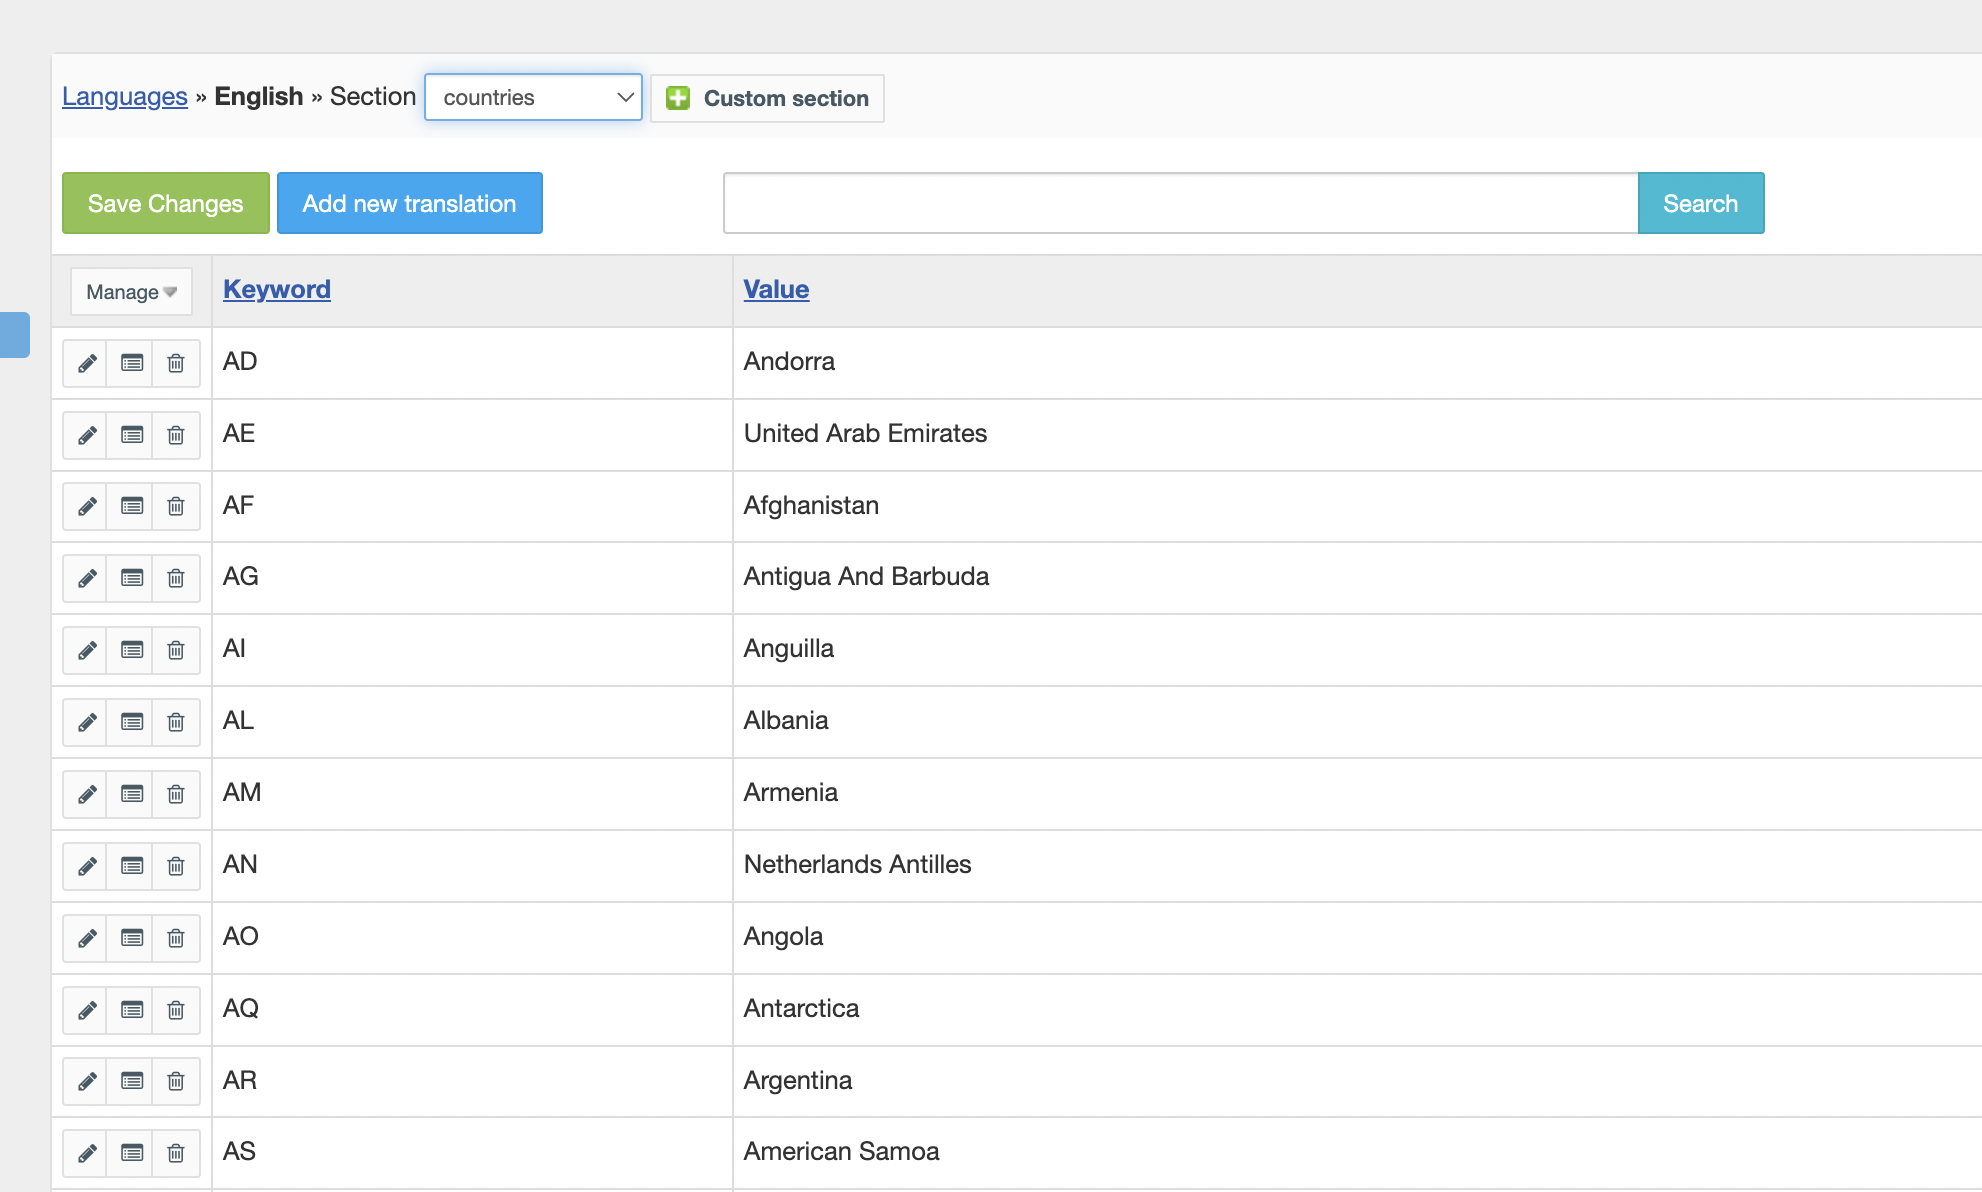
Manage countries in the Registration Form
The list of countries that appear in the registration form can be edited in the Languages section. Choose the client language you use, click on the Edit button and in the "Section" choose "countries". Here you can edit/delete countries that are displayed on the Registration Form.