In order to activate Websitepanel you need to go under Settings -> Modules -> Hosting Modules. Then, you have to click 'Activate' tab next to Websitepanel module. To configure the activated module, you ought to go under Settings -> Apps -> Add New App. Once, Websitepanel is added as a new app you can start its configuration.
After creating new App, ensure that HostBill can connect to it by pressing “Test Connection”. Proceed to Settings -> Products & Services, to create new Order Page, and add product in it. Configure product name, description and price Save changes, and proceed to “Connect with app” section in product settings. Select newly configured module & app. You will be presented with following configuration options.
...
Overview
...
WebsitePanel, formerly known as DotNetPanel, is an open-source control panel built exclusively for the Windows web technology platform. With the Website Panel module for HostBill you will gain the capability to sell shared hosting and reseller hosting services.
Activating the module
...
- If the module is included in your HostBill edition you can download it from your client portal.
- If the module is not included in your HostBill edition you can purchase it from our marketplace and then download it from the client area.
- Once you download the module extract it in the main HostBill directory.
- Go to Settings → Modules → Hosting Modules, find and activate WebsitePanel module.
Connecting HostBill with WebsitePanel
...
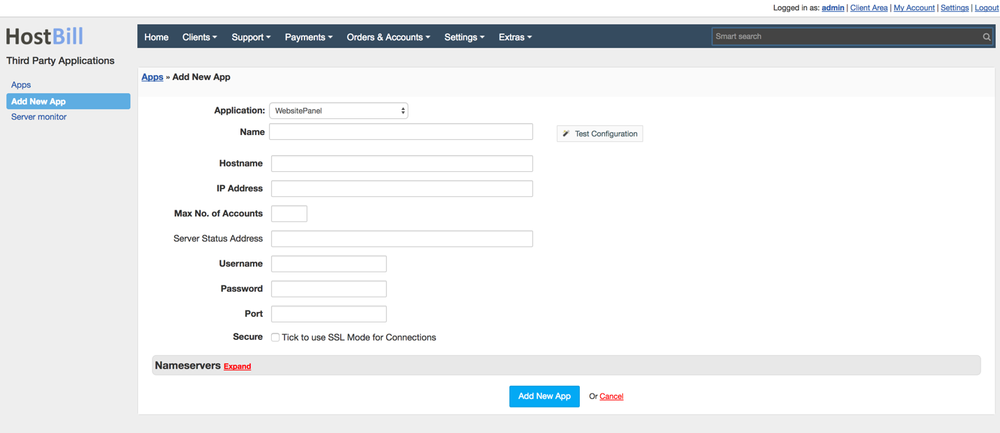
- Proceed to Settings → Apps → Add new App
- From Applications list select WebsitePanel
- Enter:
- Name - Name of this connection
- Hostname
- IP Address
- Username
- Password
- Port
4. Verify entered credentials by clicking Test Connection to check if HostBill can connect
5. Save Changes
Adding WebsitePanel Product
...
- In HostBill go to Settings → Products & Services, and Add new order page
- Enter your orderpage name, select orderpage template. Save Changes
- Add new product in the new orderpage. Provide product name and setup price and then Save Changes.
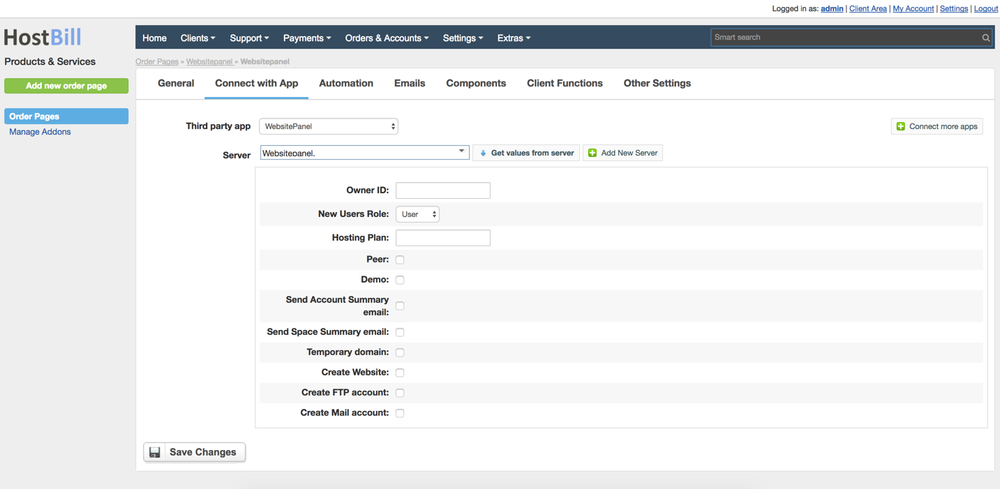
- In product configuration section proceed to Connect with App, select WebsitePanel and App server created in previous steps.
- You will be presented with following configuration options:
- Owner ID
- New Users Role
- Hosting Plan
- Peer
- Demo
- Send Account Summary Email
- Send Space Summary Email
- Temporary domain
- Create Website
- Create FTP account
- Create Mail account
or more generic product configuration details including price, automation, emails settings refer to Product Configuration article.
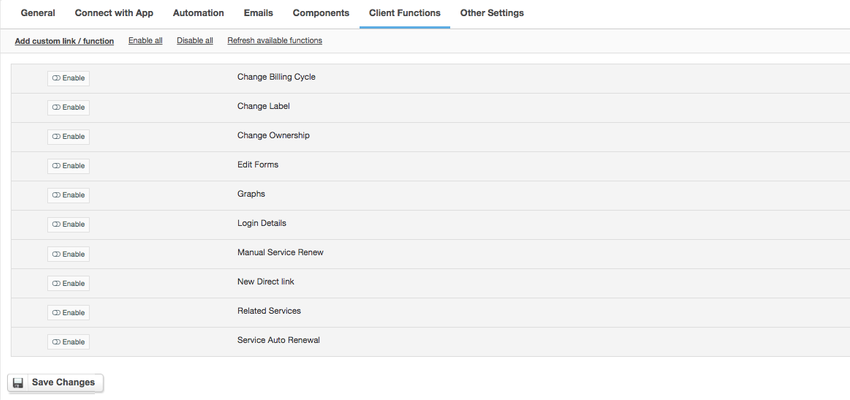
Configuring Client Functions
...
In Products & Services → Your Order Page → Your Product → Client Functions you can control what features customer will have access to in client portal, by clicking Enable/Disable next to the given option.
Use Edit button to adjust function appearance in the client portal.
For WebsitePanel you can enable standard client functions:
- Change Billing Cycle
- Change Label
- Change Ownership
- Edit Forms
- Graphs
- Login Details
- Manual Service Renew
- New Direct Link
- Related Services
- Service Auto Renewal