Overview
...
Overview
...
Jelastic is a Multi-Cloud DevOps PaaS for ISVs, telcos, service providers and enterprises needing to speed up development, reduce cost of IT infrastructure, improve uptime and security. The platform automates creation, scaling, clustering and security updates of cloud-native and traditional applications. Jelastic has a unique pay-as-you-use pricing model and is available as public, private, hybrid and multi-cloud in about 70 data centers worldwide. The platform supports Java, PHP, Ruby, Node.js, Python, .NET, Go environments, as well as Docker and Kubernetes clusters.
Jelastic module for HostBill allows to integrate Jelastic platform into HostBill billing and support system. Thanks to this module you can bill customers for Jelastic usage in HostBill and automatically issue refill invoices. With HostBill automation you can also create a HostBill account on trial upgrade in Jelastic and create a Jelastic account upon HostBill signup. HostBill module enables end-clients single sign on and login to Jelastic from HostBill client area. Admin area allows to manage billing information and control access and appearance of client panel features.
Activating the module
...
- If the module is included in your HostBill edition you can download it from your client portal.
- If the module is not included in your HostBill edition you can purchase it from our marketplace and then download it from the client area.
- Once you download the module extract it in the main HostBill directory.
- Go to Settings → Modules → Hosting Modules, find and activate Jelastic module
Connecting HostBill with Jelastic
...
- Proceed to Settings → Apps → Add new App
- From Applications list select Jelastic
- Enter:
- API Entry Point - URL to the Jelastic dashboard, for example https://app.{platformDomain}/
- Jelastic Login - email of the administrative user in Jelastic; this user has to be added via Jelastic Cluster Admin Panel → Access Control with admin role
- Jelastic Password - password of the administrative user in Jelastic
- Appstore URL - URL to the Jelastic appstore, for example https://appstore.{platformDomain}/
- User of the plugin - username set in Jelastic Cluster Admin Panel → System Settings (Expert Mode) → jbilling → external.billing.login
- Password of the plugin - user password set in Jelastic Cluster Admin Panel → System Settings (Expert Mode) → jbilling → external.billing.password
- Sign up Key - sign up API key set in Jelastic Cluster Admin Panel → System Settings (Expert Mode) → common → signup.api.key
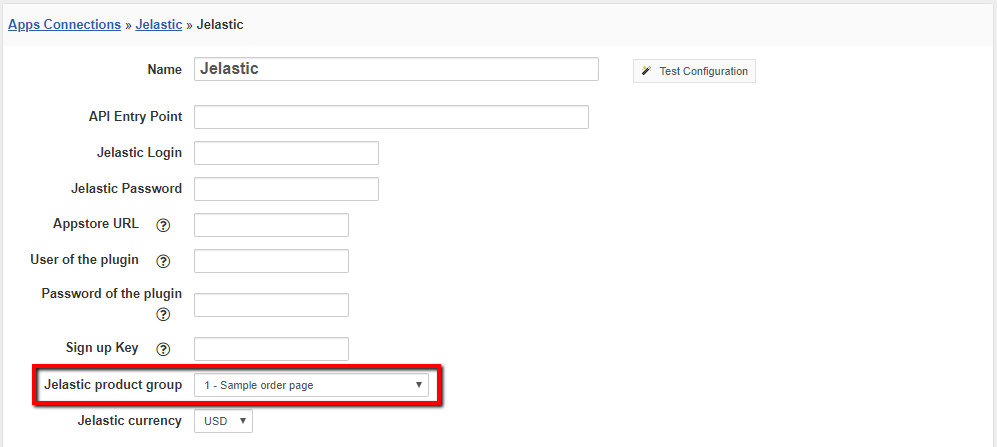
- Jelastic product group - product order page with Jelastic recharge cards
- Create client account in Jelastic - when this option is selected, creating an account in HostBill will create an account in Jelastic. Note: The product must be connected to the App in Connect with App
- Jelastic currency - currency used in Jelastic
- Invoice expire timeout - timeout in days, which will be used for expiring post-paid invoices
- VAT number field name - variable name of the custom field for clients VAT number
- Reverse charge - sets invoice VAT rate to 0%, if both company and client are from EU
- Default payment method - default payment method for the post-paid invoices
- Refill balance using payment methods - allow to refill balance using existing payment methods
- Include Tax- add tax amount to the invoice of Jelastic user
- Fund Jelastic account when order is accepted - check the box to fund Jelastic account when an order is accepted (otherwise it will be funded after invoice payment)
- Don't generate orders during each recurring refill- check the box to stop generating orders and create new client products during each recurring refill. Only invoices will be generated if a customer has at least 1 active Jelastic refill order/product with the same amount
- Apply credits to pay invoices- check the box to apply current credits of customers to pay invoices. Credits will be applied only if they cover a full invoice 's amount
- Link accounts - check the box to link a HostBill user account with an existing Jelastic user account
- Enable https for SSO - check the box to enable HTTPS protocol for SSO
- Default trial group - default trial group set in Jelastic Cluster Admin Panel → Groups → Trial Groups. Default value 'trial'
- Default billing group - default billing group set in Jelastic Cluster Admin Panel → Groups → Billing Groups. Default value 'billing'
4. Verify entered credentials by clicking Test Connection to check if HostBill can connect.
5. Save Changes
Jelastic
...
Configuration
...
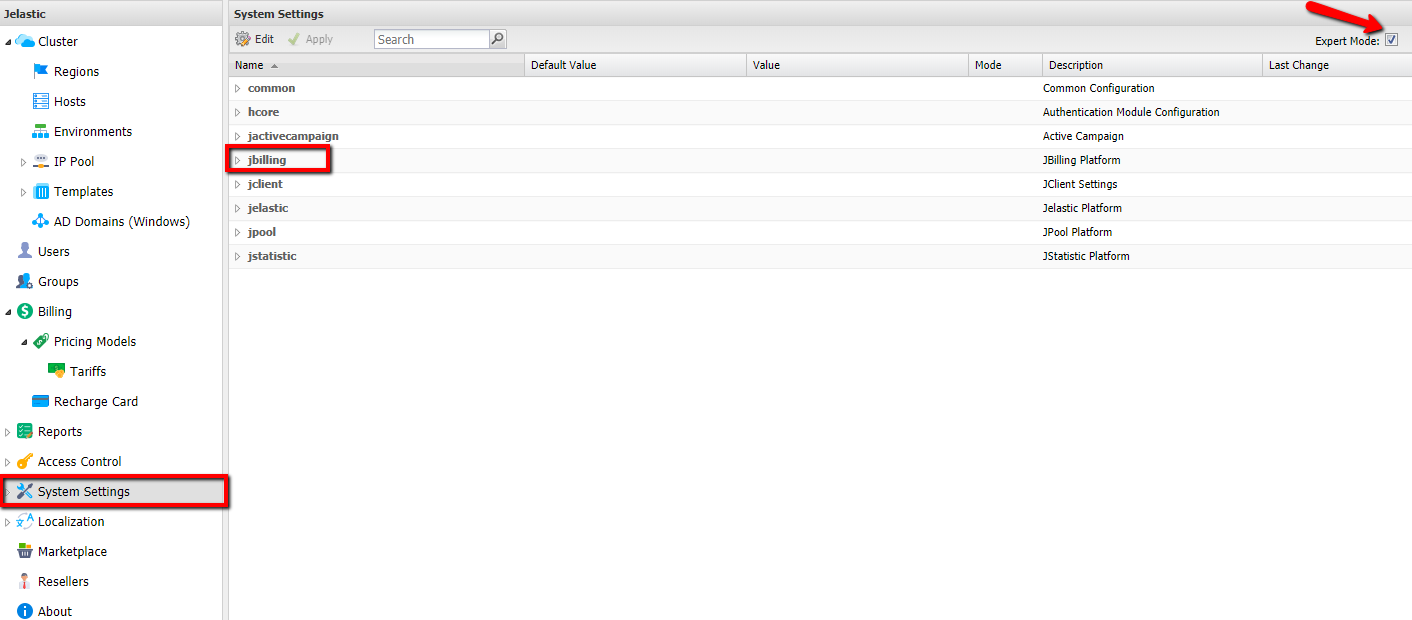
Parameters that need to be configured in Jelastic Cluster Admin Panel:
- Go to System Settings (Expert mode) → jbilling and set:
- billing.type - CEBI
- external.billing.url - https://{hostbill_url}/includes/modules/Hosting/jelastic/callback.php?action=
- external.billing.login - the value from the User of the plugin field in Apps Connections
- external.billing.password - the value from the Password of the plugin field in Apps Connections
- billing.zero_bonus_becoming_commercial - false
- external.billing.plugin.json.config - json list of maps. Each map includes parameters of 1 Jelastic plugin. 1 Jelastic plugin can correspond to 1 payment system
- type - always cebi
- jbilName - HostBill payment gateway id
- externalName - HostBill payment gateway name
- canRemember - set to false if plugin doesn’t remember used payment methods and cannot associate them with concrete users
| Info |
|---|
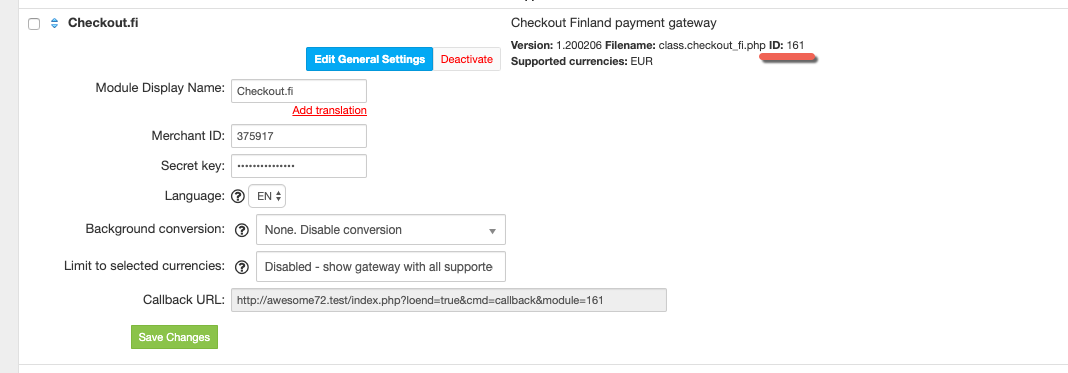
The exact value of the external.billing.url parameter can be found in the description of the Jelastic module (in Settings → Modules → Hosting Modules → Jelastic) |
...
| Code Block | ||||
|---|---|---|---|---|
| ||||
{
   "plugins":[
      {
         "type":"cebi",
         "jbilName":"123",
         "externalName":"PayPal",
         "canRemember": true
      }
   ]
} |
Payment gateway ID can be checked in Settings → Modules → Payment Modules. Module ID will appear next to its filename
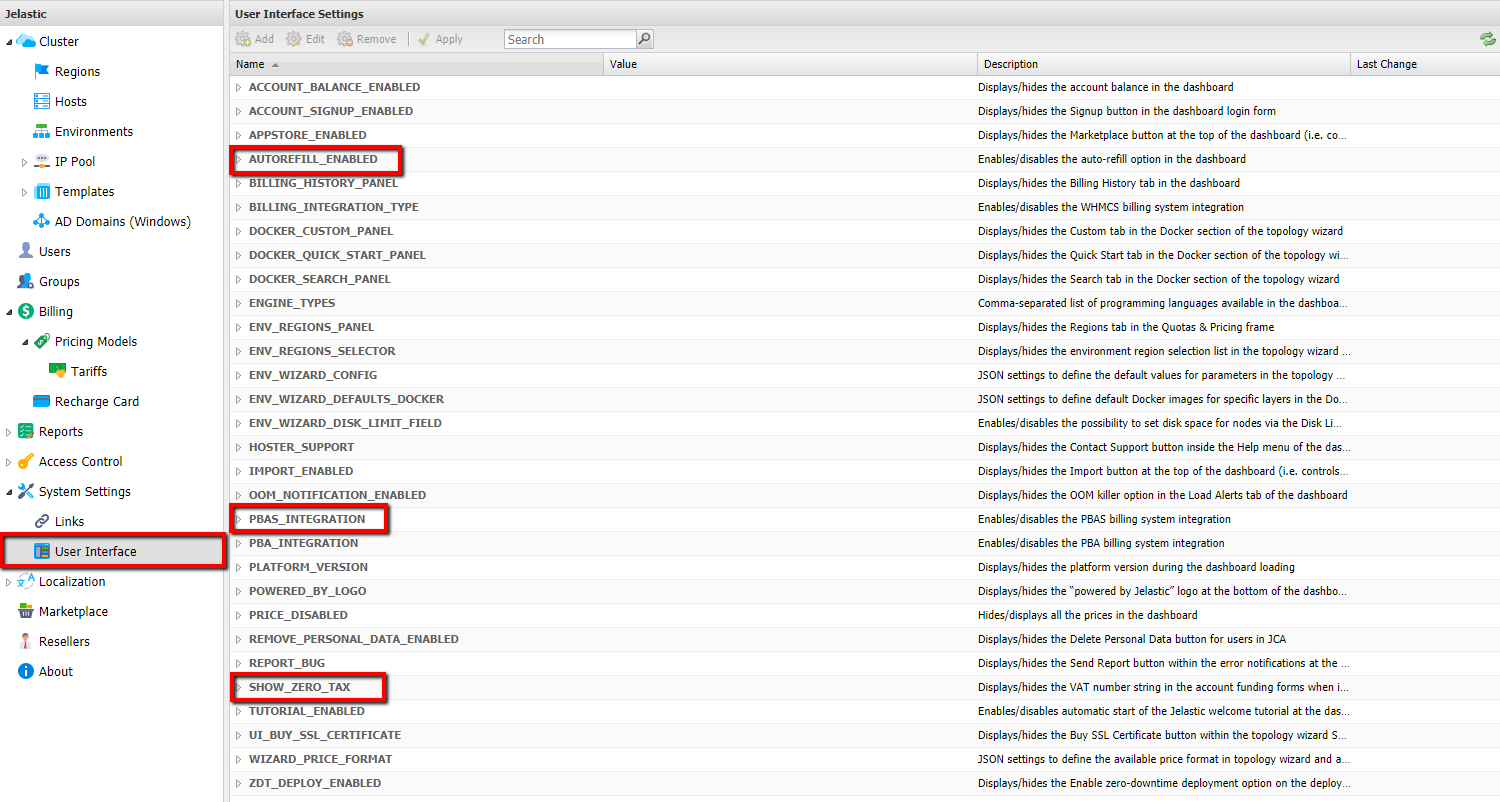
- In Jelastic Cluster Admin Panel → System Settings → User Interface set the option:
- PBAS_INTEGRATION - true
- SHOW_ZERO_TAX - false
- AUTOREFILL_ENABLED - true/false (respectively to your preference)
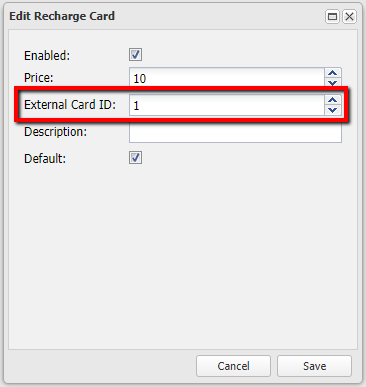
- In Jelastic Cluster Admin Panel → Billing → Recharge card you should add the recharge card
- External card id - the option must contain the id order page set in the Jelastic product group field in Apps Connections (the id is visible in the drop-down list)
Order page configuration
...
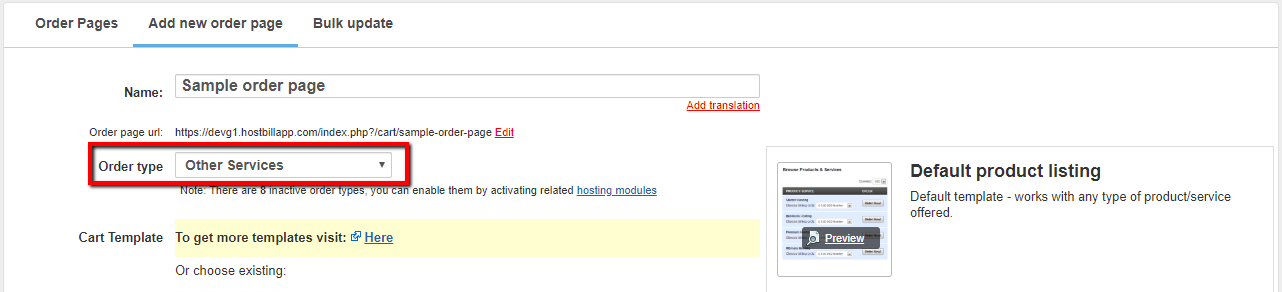
In the Jelastic product group field in Apps Connections, set the order page that will be assigned to the module. To do this, create a new Order Page with the Order Type option set to Other Services. More information on creating an order page can be found here.

After creating Order Page, create products that will be available in Jelastic. More information on creating an products can be found here. The created products do not have to be connected to any module in the Connection with App tab.


Jelastic Dashboard
...
By registering a customer account in Jelastic, the account belongs to the Trial group. In order for the client to be created also in HostBill, it is necessary to upgrade the account to the Billing group. You can do this by clicking the Upgrade Account button.


A window will appear with the fields you need to complete. Data from these fields will be used at in HostBill to create a customer account.
...
A window will appear with the Hostbill HostBill clientarea in which the client is already logged in.
| Info | ||
|---|---|---|
| ||
If you use Chrome browser and SSO does not work then you need to follow these steps:
|
Configuring Client Functions
...
In Products & Services → Your Order Page → Your Product → Client Functions you can control what features customer will have access to in client portal, by clicking Enable/Disable next to the given option.
Use Edit button to adjust function appearance in the client portal.
For Jelastic you can enable the following client functions dedicated to this module:
- Access Control Panel - access apps through auto-login
As well as number of standard client functions, such as
- Change Billing Cycle
- Change Label
- Change Ownership
- Edit Forms
- Graphs
- Login Details
- Manual Service Renew
- New Direct Link
- Related Services
- Service Auto Renewal