Installing HostBill
HostBill installation is fully automated and takes just seconds, more info at Installation
Connecting HostBill with Comodo
- In HostBill go to Settings > Modules, find and activate ComodoSSL module
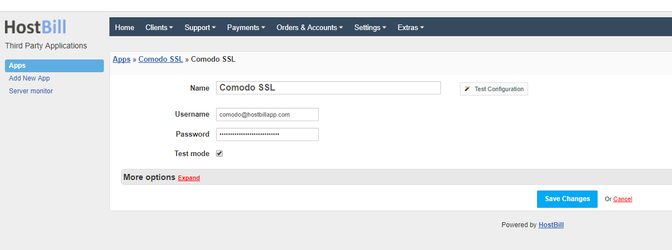
- You will be taken to Settings > Apps to set connection with ComodoSSL
- Enter your Username and Password that was provided to you by comodo, use the same details you use to access reseller panel.
- If you want to create test orders, tick "Test mode"
- Save Changes
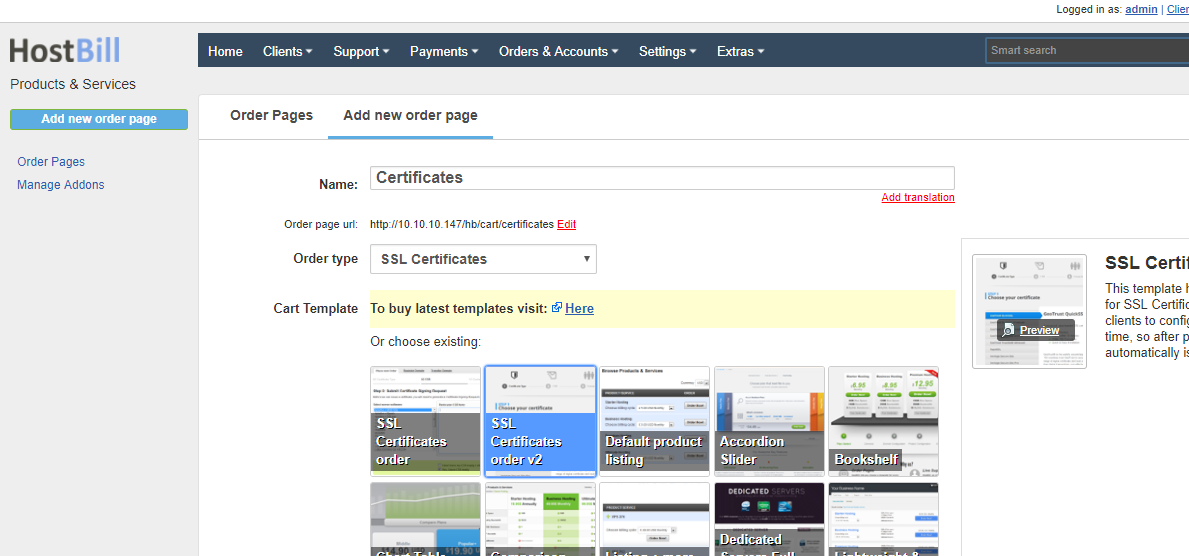
Creating your first SSL package
- In HostBill go to Settings > Products & Services, and Add new order page
- Enter your order page Name.
- From Order Types select SSL Certificates.
- Select Cart template and Save Changes.
- Add new product if you do not have one already.
- Setup your ProductName and Price, Save Changes.
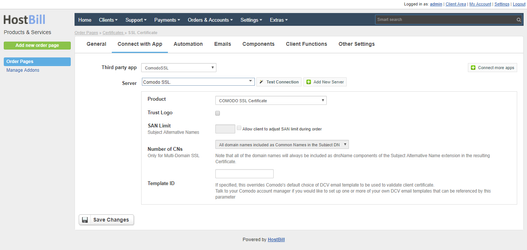
- In product configuration section proceed to Connect with App, select Comodo SSL and app Server created in previous steps.
- Select Comodo Product and setup related setting, Save changes when done.
Comodo specific product options:
- Product - intendent which product from comodo will be ordered when this service is provisioned.
- Trust Logo - if enabled orders will also include requests for trust logo. This option is not available for all products.
- San limit - number of additional domains that clients can include in their order. Only available for Multi-domain Certificates
- You can use Allow client to adjust SAN limit during order option to add a form component that allows you to define pricing for additional domains.
- Number of CNs - controls what will be included in Subject DN for resulting certificate. Only available for Multi-domain Certificates
- Template ID - reference to Domain Validation Email template that is sent by Comodo. Leave empty for default.