Installing HostBill
HostBill installation is fully automated and takes just seconds, more info at Installation
Download & install
Overview
Inventory and Asset Manager module helps you to keep track of every single item your company owns and sell and categorize assets into main categories / item types. With Inventory Manager you can track every item by its manufacturer, vendor, serial number and even physical location in your company. It helps you to create your own structures and manage/resell any asset like software, licenses, hardware, services.
Activating the module
- If the plugin is included in your HostBill edition you can download it from your client portal.
- If the plugin is not included in your HostBill edition you can purchase it from our marketplace and then download it from the client area.
- Once you download the plugin extract it in the main HostBill directory.
- Go to Settings → Modules, find and activate Inventory & Asset Manager plugin.
- Once the plugin is activated you will be directed to Settings→ Modules→ Plugins to configure the plugin.
Installing demo data
To understand module concepts
it's a good idea to play with some pre-entered data. You can install demo data set with just one click of a button.
Proceed to Extras
→ Inventory Manager → Settings
Click on Install demo data
For security purposes you will be prompted to enter sentence in the input box
Confirm by clicking Install demo data button

Adding items/categories/vendors
Check video guide on how to provide basic entries to Inventory Manager
| Widget Connector | ||||||
|---|---|---|---|---|---|---|
|
Setting up provisioning module
Inventory Manager Provisioning is a Hosting/Provisioning module shipped with Inventory Manager plugin. It is built to be used with HostBill products and connect product offering available to customer in cart with inventory manager stock. Product using Inventory Manager Provisioning module can be configured in two ways:
- To
- make use of Offered Products/Server builds feature in Inventory manager
- To reserve items selected by client in cart from Inventory
To connect provisioning module to a product:
- Proceed to Settings
- → Modules.
- Search and activate inventory_manager_provisioning module.
- Proceed to Settings
- → Apps → Add new app.
- Select previously activated provisioning module from Application list, provide arbitrary name, save changes.
- Proceed to Settings
- → Products & Services, Add new orderpage, from Order type select: Other or Colocation.
- Add new product, setup its pricing, proceed to Connect with app, select activated provisioning module and app
- .
To make use of Server Builds:
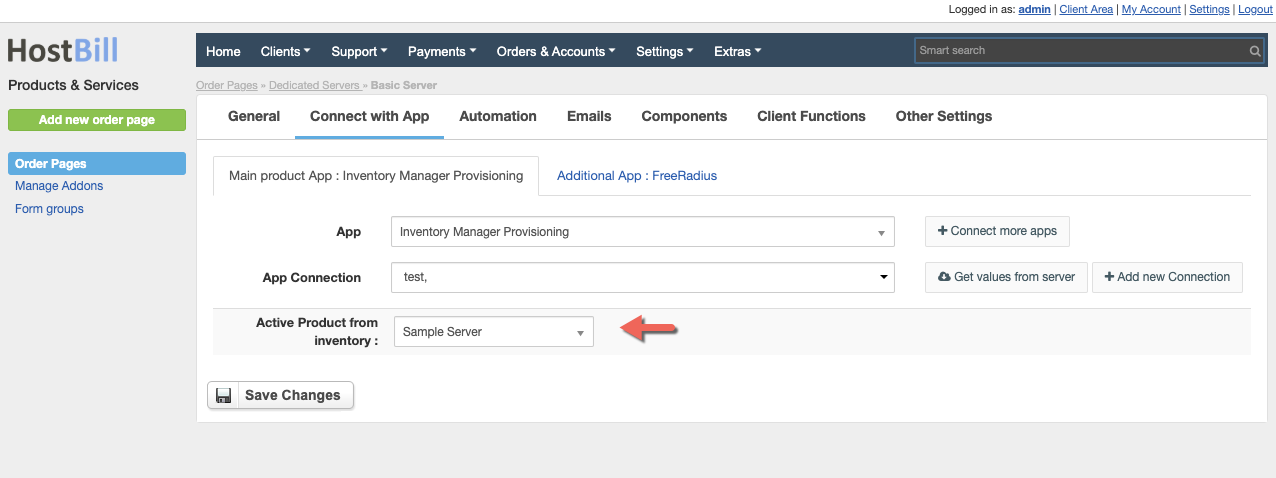
- In product configuration, Connect with App tab, click "Get values from server"
- in Active Product from Inventory option select Offered Product from Inventory manager you wish to
- connect your product to
To allow client select available items from inventory:
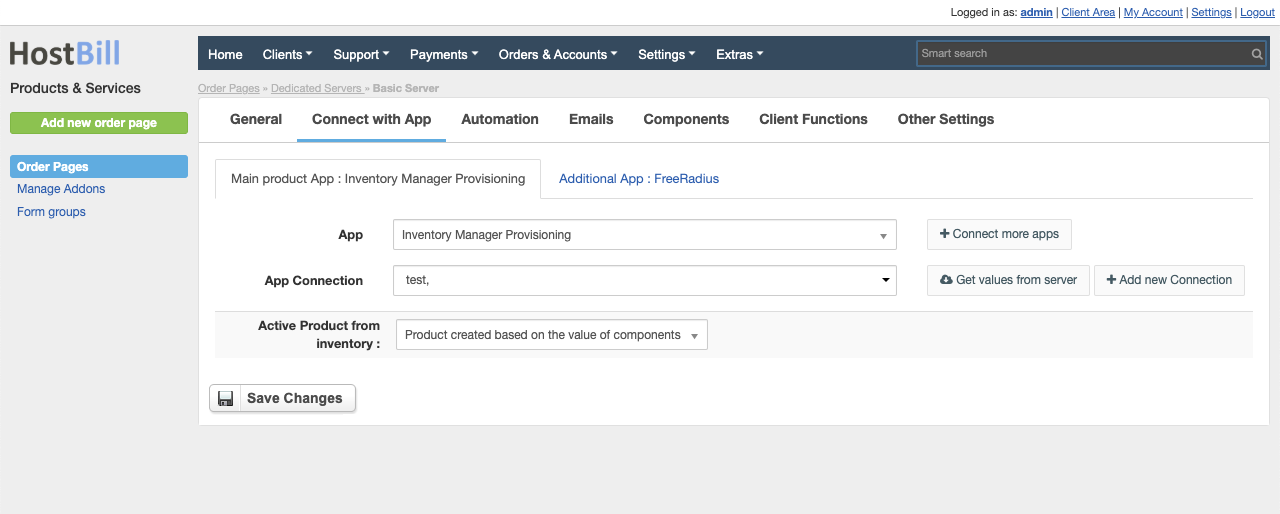
- In product configuration, Connect with App tab, click "Get values from server"
- in Active Product from Inventory select Product created based on the value of components
- Proceed to Components → Forms tab
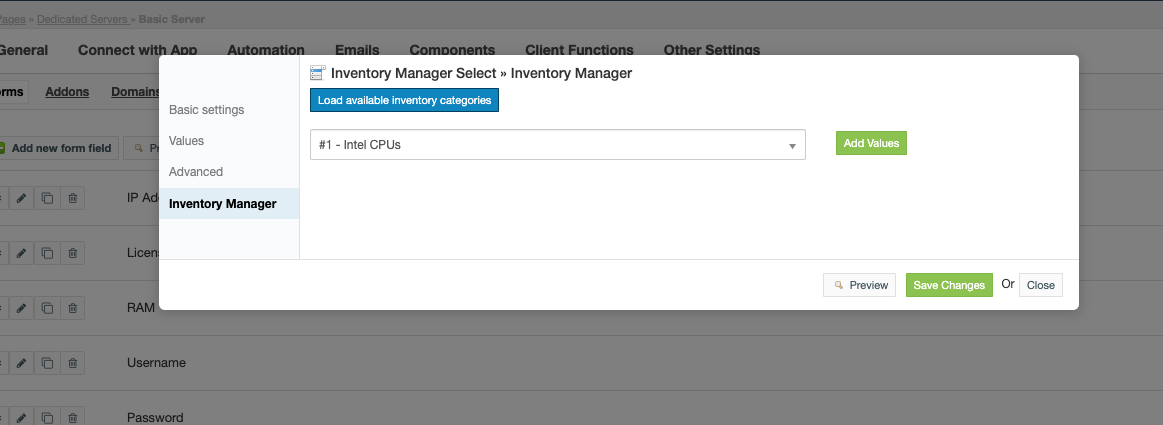
- Add new component, from available types select: Inventory Manager Select
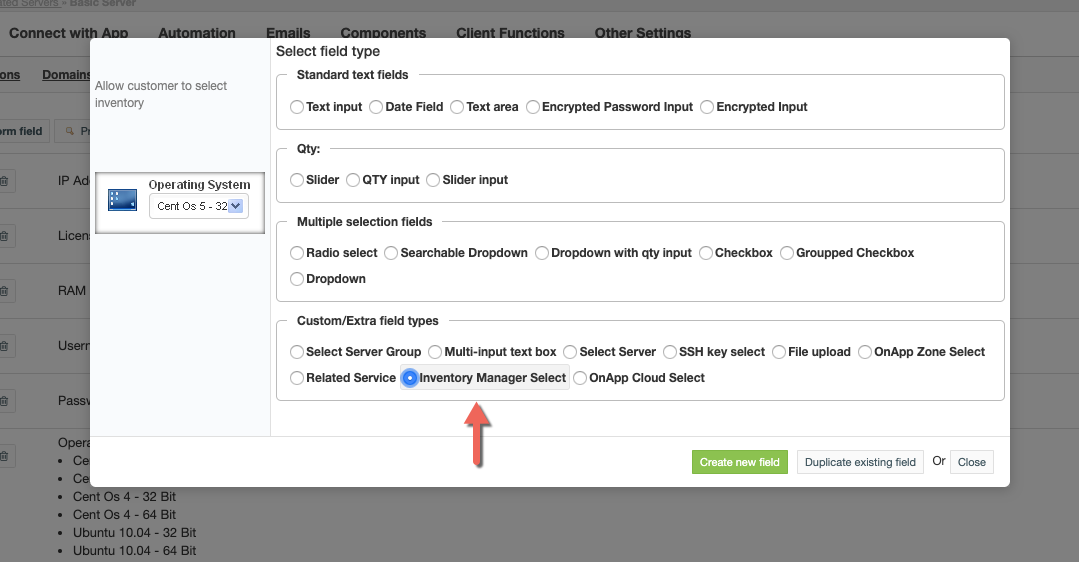
- Name component, setup dafault options, save changes
- In Inventory Manager tab click "Load available inventory categories"
- Select Inventory category to connect items with this field, confirm by clicking "Add values"
- Available CPU item types will now appear in Values tab, you can setup pricing options, enable/disable option availability:
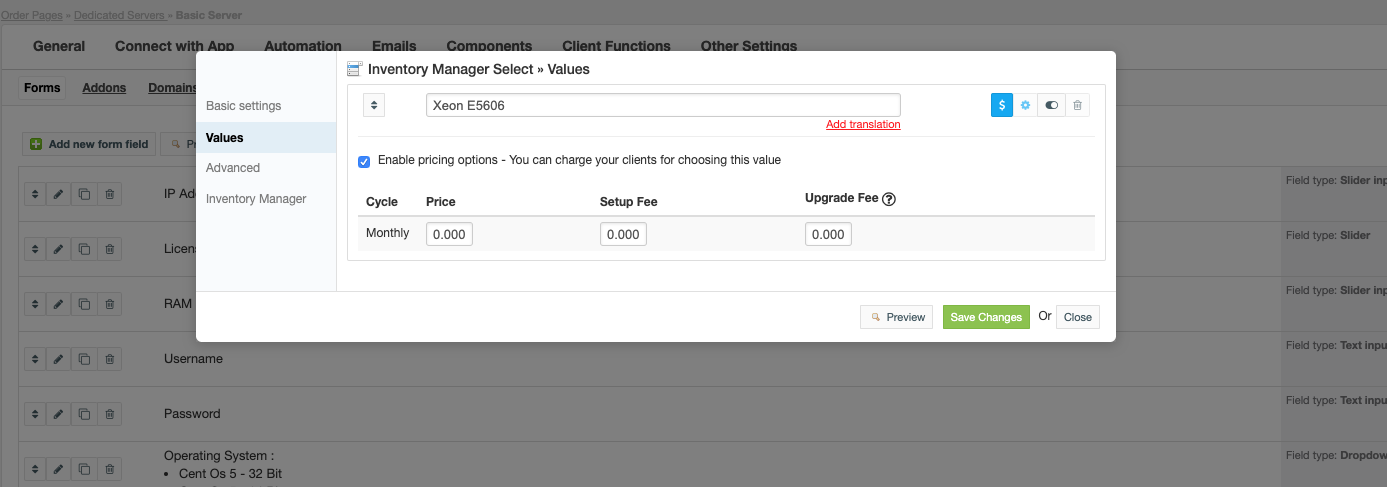
Note: Any change of related item category/item availability in Inventory Manager plugin will automatically be reflected in your Components created in product using Inventory Manager plugin.
So ie: if certain CPU will be out of stock in Inventory Manager, it will not be available to select by client during order.
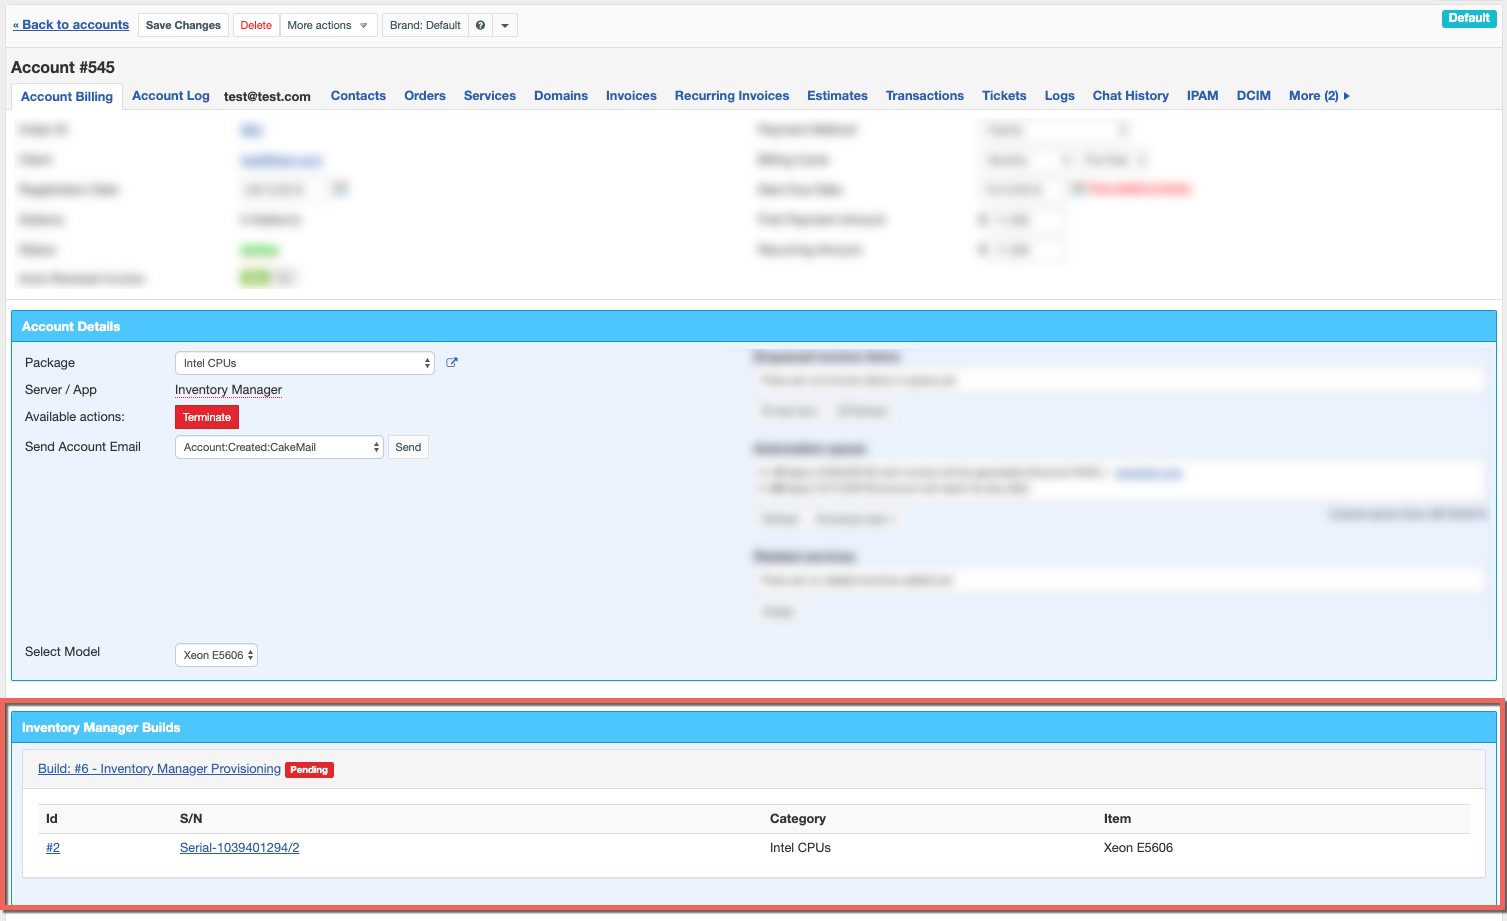
Items assigned from Inventory manager will appear in separate tab in account details: