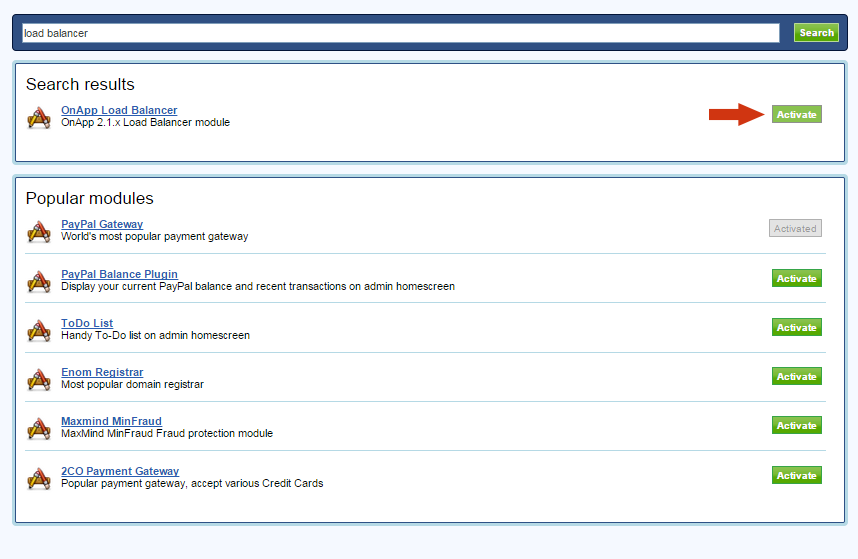
- Go to Settings -> Modules.
- In search content typein "Load Balancer" and hit search button.
- Activate module "Load Balancer".
Next:
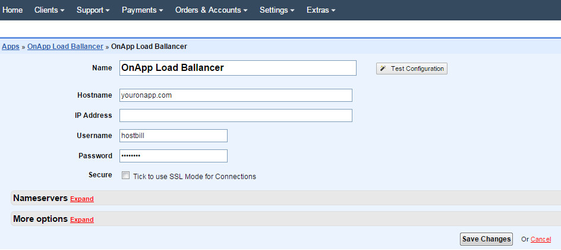
- Go to Settings -> Apps -> Add New App
- Enter OnApp hostname or ip address
- Privide your admin username and password
- Tick "Secure" if your onapp server have available SSL certificate install
Next:
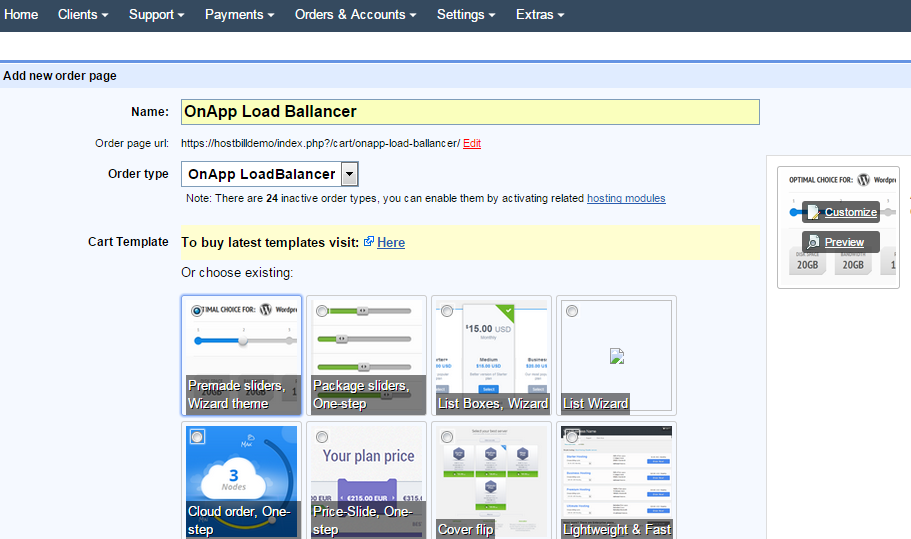
- Go to Settings -> Products & Services -> Add New Order Page
- From "Order Type" chose "Onapp Load Balancer"
Next:
- In newly created order page click "Add New Product"
- Under "Connect With App" pick "OnAppBalancer" as a third pary app and pick "Server" configured in state before.
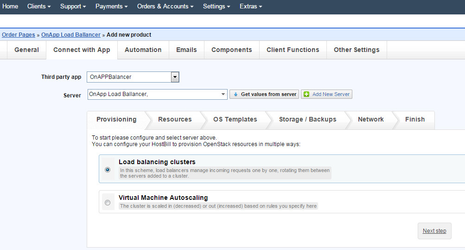
Load Balancing Clusters
With this provisioning option, your client can specify which VMs (nodes) will participate in a load balancing cluster. Incoming traffic is distributed evenly between all the VMs added to a cluster - OnApp still present a single host name to end users, but they actually access the cluster of VMs rather than a single end point. This helps application availability: if one VM fails, traffic is automatically routed to another in the cluster. Your customer can add and remove cluster VMs as required.
| LoadBalancer type: | Set to Load balancing clusters |
| Default port: | Cluster will be intially configured with this port, your customer will be able to change it in clientarea |
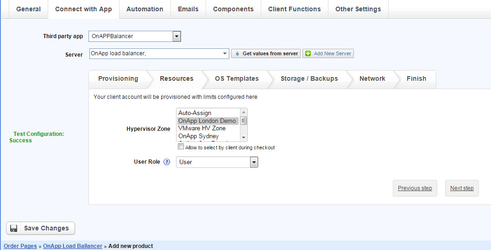
| User Role: | Use "Get values from server" button to load possible values from your OnApp. |
| Max Port Speed (Rate): | Set maximum port speed cluster can offer |
| Show link to OnApp backend: | With this option set to "Yes" your client will be able to see link to OnApp interface in HostBill clientarea. |

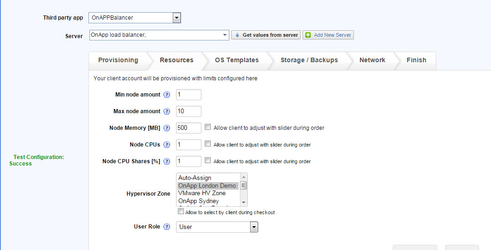
Virtual Machine Autoscaling
VM Autoscaling increases or decreases your customer VM capacity by automatically adding or removing nodes to a cluster. The cluster is scaled in (decreased) or out (increased) based on rules your customer can specify in clientarea, based on limits set with options explained below. This aids application performance and scalability.
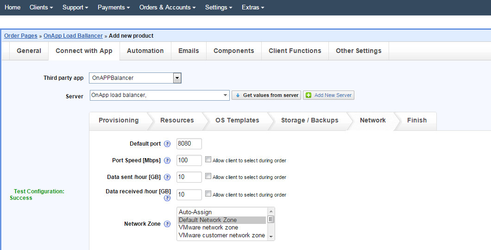
| Default port: | Load balancer will be intially configured with this port, your customer will be able to change it in clientarea |
| User Role: | Use "Get values from server" button to load possible values from your OnApp. |
| Min node amount: | Minimal number of nodes in cluster |
| Max node amount: | Maximum number of nodes in cluster |
| Node Memory Limit [MB]: | Set the amount of memory allocated per node in MB. |
| Node CPU Limit: | The number CPUs which will form each node. |
| Node CPU Shares [%]: | The single node's CPU priority. |
| Max Port Speed (Rate): | Set maximum port speed cluster can offer. |
| Show link to OnApp backend: | With this option set to "Yes" your client will be able to see link to OnApp interface in HostBill clientarea. |
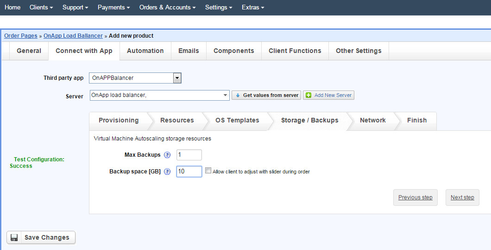
| Backups/Templates: | Total number of backups customer can create for all nodes |
| Data sent /hour [GB]: | Total data sent per hour limit for customer |
| Total data received per hour limit for customer | |
| Backup space [GB]: | Total disk space available for all customer backups |
| Node OS Template: | Next nodes will be created based on this image template |