Activating Module
- Download Module archive from HostBill Licenses Portal
- Extract archive contents in your main HostBill directory
- In your HostBill: Proceed to "Settings -> Modules -> Hosting Modules -> Inactive"
- Click "Activate" next to "CrashPlan Pro" module
Connecting HostBill with CrashPlan Pro
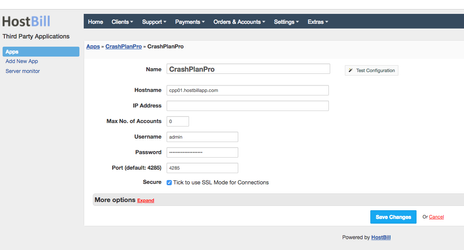
- Proceed to "Settings -> Apps -> Add new App"
- From Applications list select "CrashPlan Pro"
- Enter:
- Name - Name of this connection
- Hostname - Hostname of your CrashPlan Pro installation
- (optional) IP Address
- Username - admin username to connect to CrashPlan Pro
- Password - admin password to connect to CrashPlan Pro
- Port - API port used to connect with CrashPlan Pro (defaults to 4285)
4. Verify entered credentials by clicking "Test Connection"
5. Save Changes
Adding CrashPlan Pro Product
1. In HostBill go to Settings > Products & Services, and Add new order page
2. From Order Types select "Other Services"
3. Enter your orderpage name, select orderpage template. Save Changes
4. Add new product in new orderpage. Provide product name, setup price, Save Changes.
5. In product configuration section proceed to "Connect with App", select "CrashPlan Pro" and App server created in previous steps.
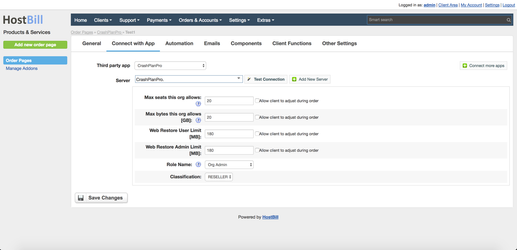
6. Setup Package Limits:
- Max seats this org allows (optionally: allow client to adjust during order using forms)
- Max bytes this org allows [GB] (optionally: allow client to adjust during order using forms)
- Web Restore User Limit [MB] (optionally: allow client to adjust during order using forms)
- Web Restore Admin Limit [MB] (optionally: allow client to adjust during order using forms)
- Role Name (a Default user role)
- User Classification
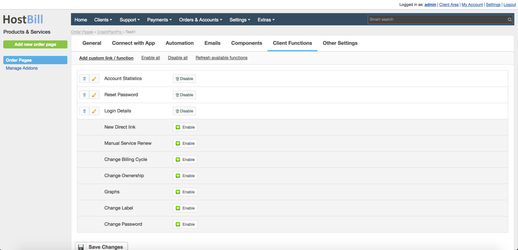
7. Setup Client Functions:
Under Client Functions you can control what features customer will have access to in client portal, by clicking "Enable/Disable" next to it.
Use "Edit" button to adjust function appearance in client portal.