Alice-IT VPS
Overview
With the Alice-IT module for HostBill you get the opportunity to resell virtual machines and sell VPS hosting. Flexible product configuration options and multiple billing modules enable to charge clients for os templates, backups, VM size, IPs and traffic limit. With HostBill, VMs are created and managed automatically. Automation rules also cover packages upgrades and downgrades. HostBill will also monitor traffic usage and execute shutdown on traffic overuse. End-clients have access to their services in client area, where they can manage and monitor their services. Depending on what client functions you enable, end clients may have access to creating, destroying, rebooting, upgrading, reinstalling VMs, accessing console and more.
Activating the module
- If the module is included in your HostBill edition you can download it from your client portal.
- If the module is not included in your HostBill edition you can purchase it from our marketplace and then download it from the client area.
- Once you download the module extract it in the main HostBill directory.
- Go to Settings → Modules → Hosting Modules, find and activate Alice-IT VPS module (AVPS)
Connecting HostBill with Alice-IT VPS
- Proceed to Settings → Apps → Add new App
- From Applications list select Alice-IT VPS (AVPS)
- Enter:
- API KEY - To generate the API KEY go to the Alice-IT dashboard and then press the profile name → Account → API Access → Create a new API Key
4. Verify entered credentials by clicking Test Connection to check if HostBill can connect.
5. Save Changes

Adding Alice-IT VPS product
- In HostBill go to Settings → Products & Services, and Add new order page
- From order types select VPS Accounts
- Enter your orderpage name, select orderpage template. Save Changes
- Add new product in the new orderpage. Provide product name and setup price and then Save Changes.
- In product configuration section proceed to Connect with App, select Alice-IT VPS and App server created in previous steps.
- Press the Get values from server button to get available values for configuration.
- Fill the fields:
- Cores - The amount of cores assigned to the server
- Memory - The amount of memory assigned to the server in MB (Min: 1024, Max: 65536) or GB (Min: 1, Max: 64)
- Memory Unit -The unit used for memory, MB or GB
- Primary Disk - The size of the primary SSD disk in GB. Min: 10, Max: 500
- Secondary Disk - The size of the secondary HDD disk in GB. Min: 0, Max: 500
- IPs - The amount of IPv4 addresses
- Backups - The amount of backups
- Operating System
- Reinstall other OS - Allow the client to reinstall the other operating system
- Disk Type
- Traffic - Hard traffic limit in GB. The Server will shutdown if it reaches the traffic limit. If the value equals 0 then the option is disabled
- Traffic Unit - The unit used for traffic, GB or TB
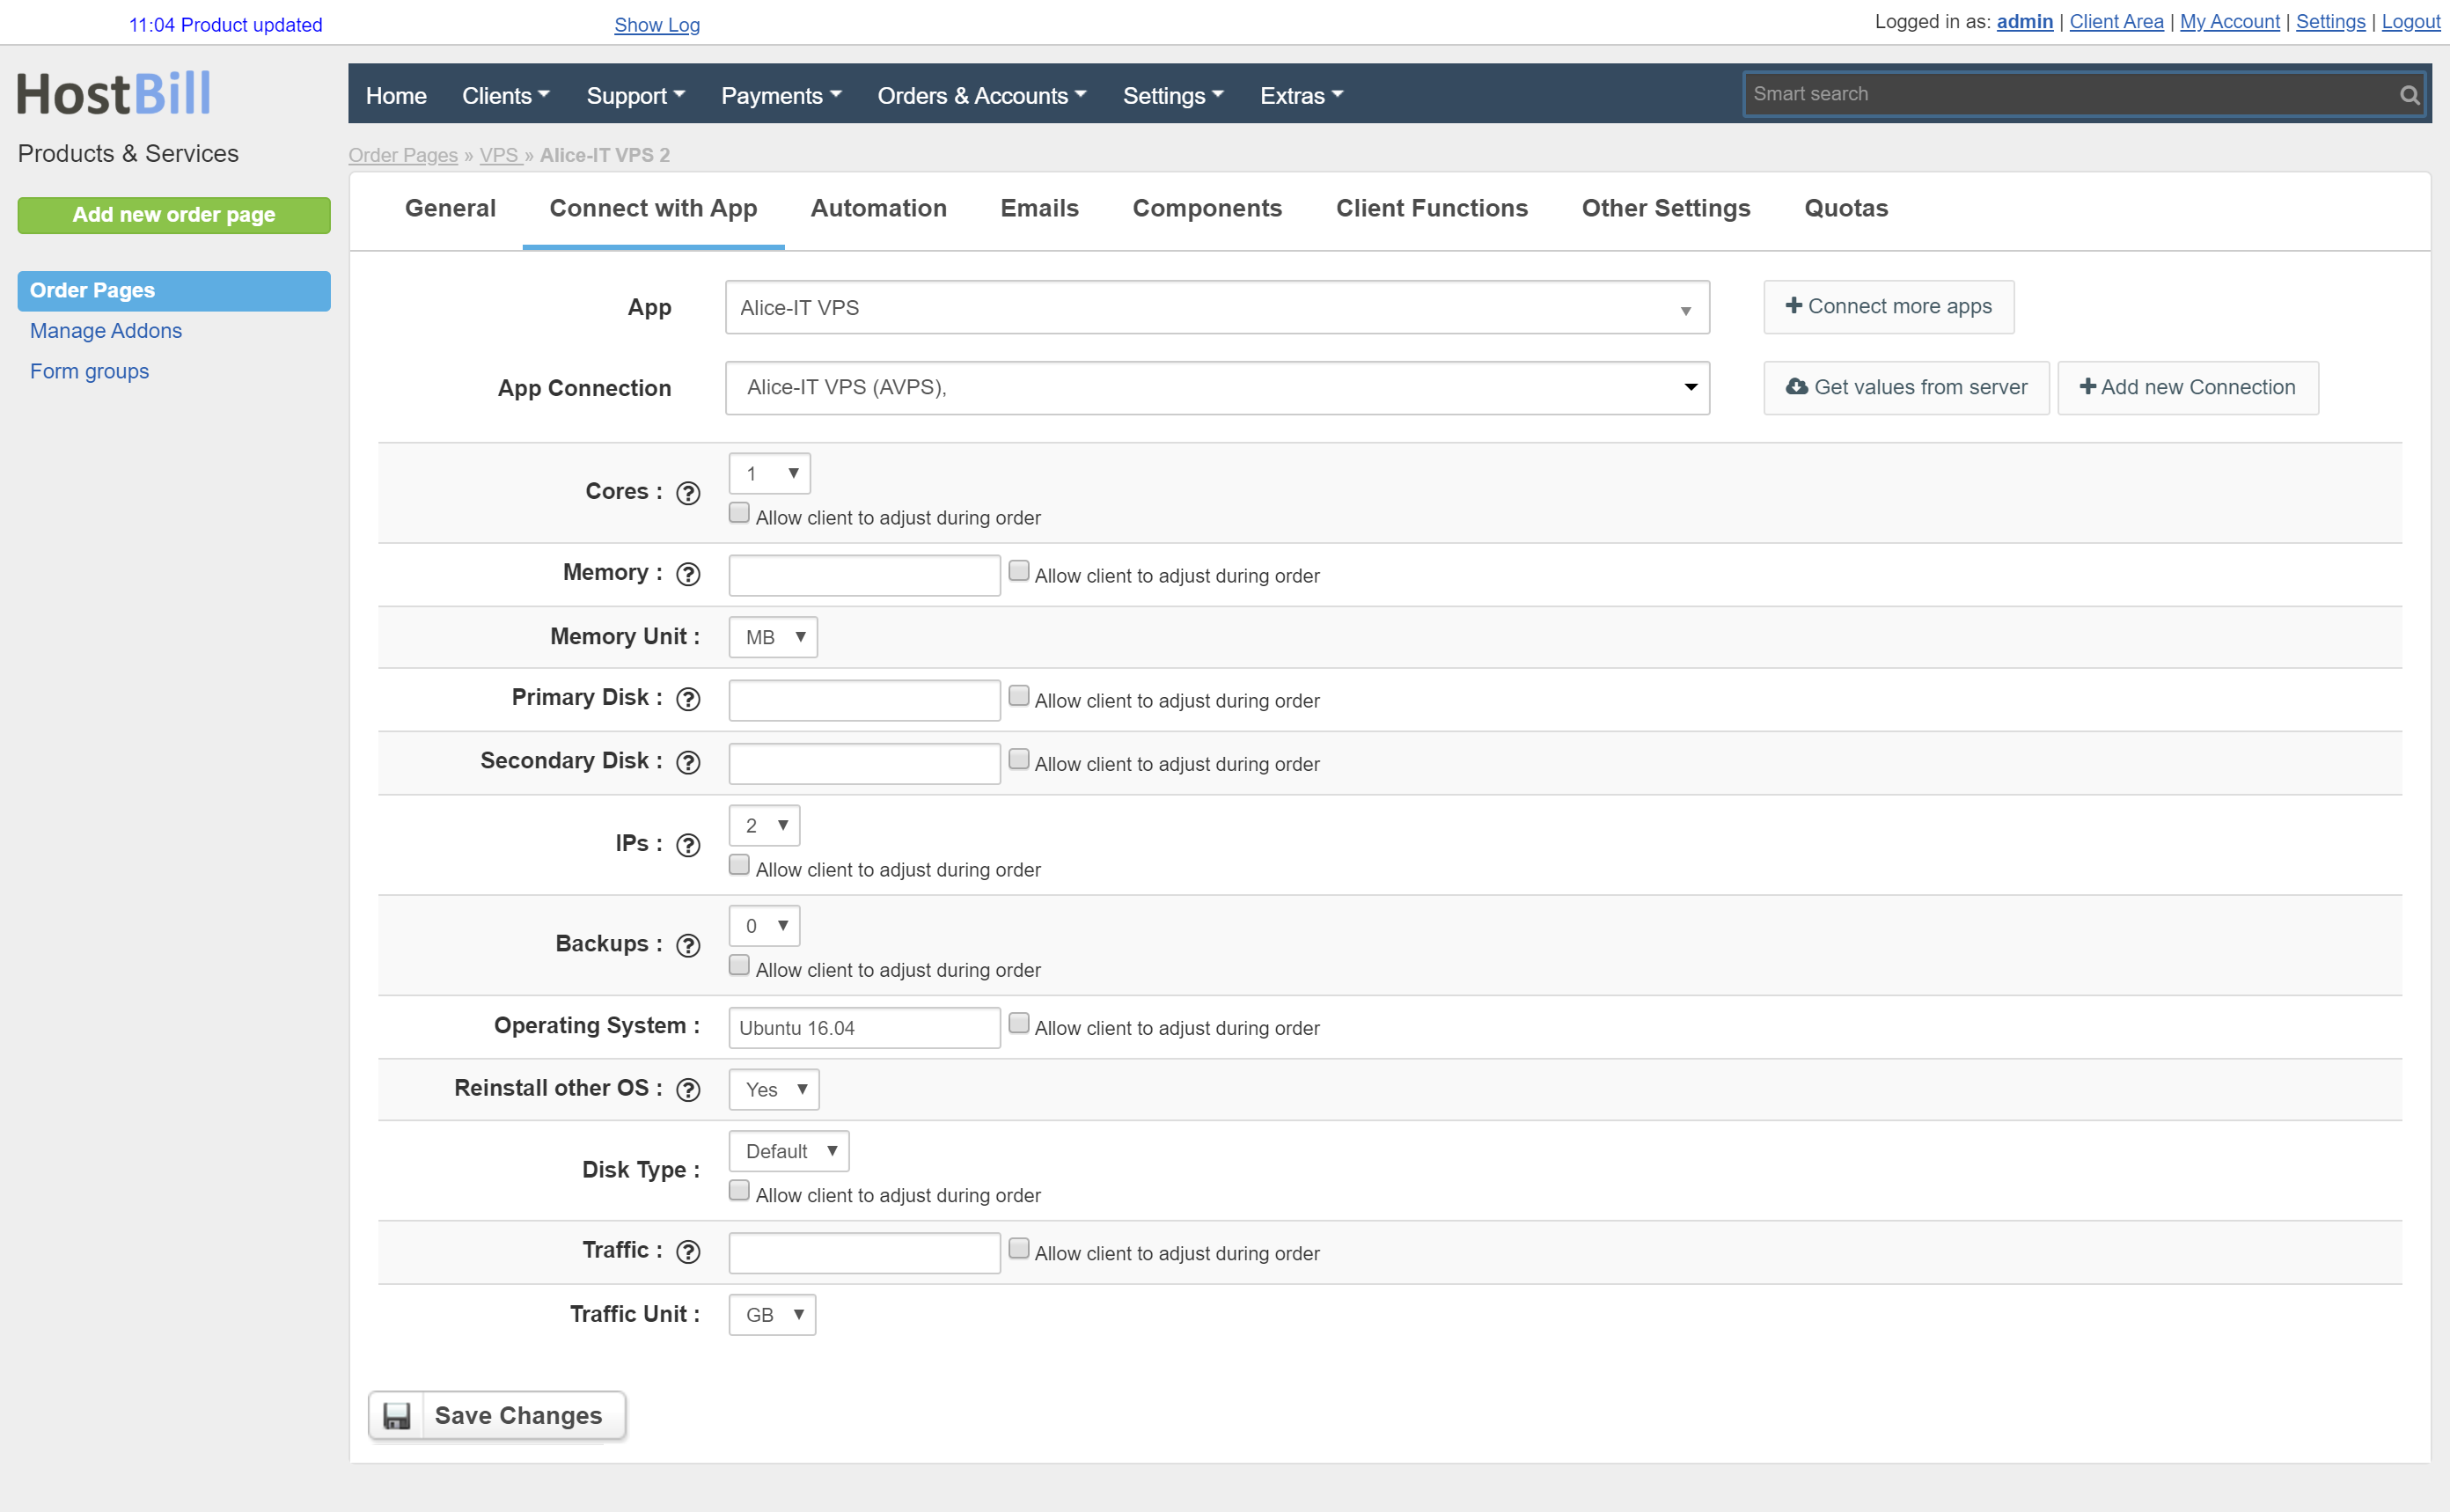
- Save changes.
For more generic product configuration details including price, automation, emails settings refer to Product Configuration article.
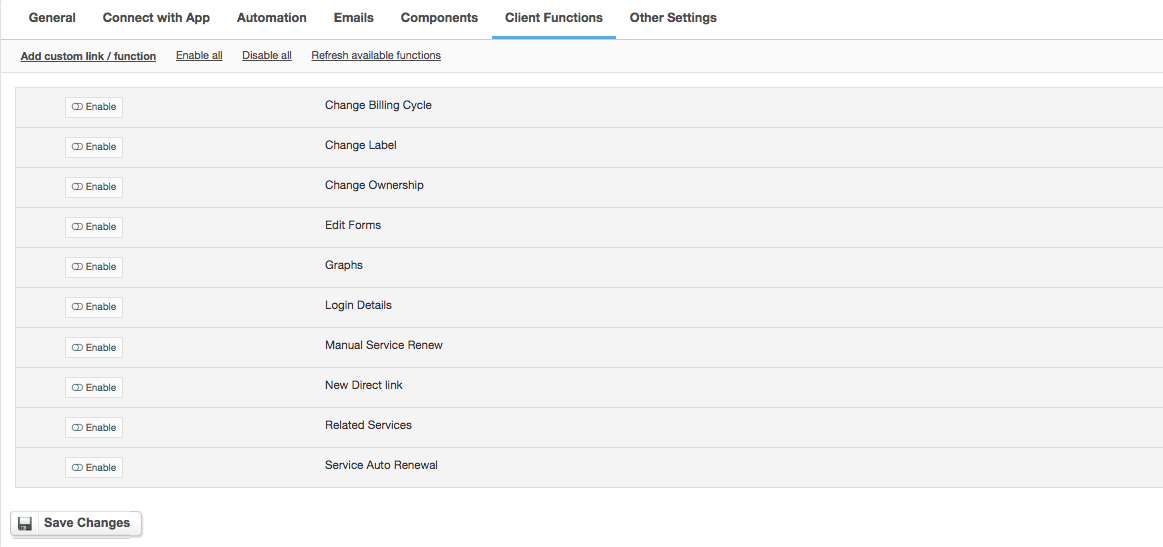
Configuring Client Functions
In Products & Services → Your Order Page → Your Product → Client Functions you can control what features customer will have access to in client portal, by clicking Enable/Disable next to the given option.
Use Edit button to adjust function appearance in the client portal.
For Alice-IT VPS you can enable a number of standard client functions:
- Change Billing Cycle
- Change Label
- Change Ownership
- Edit Forms
- Graphs
- Login Details
- Manual Service Renew
- New Direct Link
- Related Services
- Service Auto Renewal