...
...
...
...
...
...
...
...
...
...
...
...
...
...
...
...
...
...
...
...
...
...
...
...
...
...
...
...
...
...
...
...
...
...
...
...
...
...
...
...
...
...
...
...
...
...
...
...
...
...
...
...
...
...
...
...
...
...
...
...
...
...
...
...
...
...
...
...
...
...
...
...
...
...
...
...
...
...
...
...
...
...
...
...
...
...
...
...
...
...
...
...
...
...
...
...
...
...
...
...
...
...
...
...
...
...
...
...
...
...
...
...
...
...
...
...
...
...
...
...
...
...
...
...
...
...
...
...
...
...
...
...
...
...
...
...
...
...
...
...
...
...
...
...
...
...
...
...
...
...
...
...
...
...
...
...
...
...
...
...
...
...
...
...
...
...
...
...
...
...
...
...
...
...
...
...
...
...
...
...
...
...
...
...
...
...
...
...
...
...
...
...
...
...
...
...
...
...
...
...
...
...
...
...
...
...
...
...
...
...
...
...
...
...
...
...
...
...
...
...
...
...
...
...
...
...
...
...
...
...
...
...
...
...
...
...
...
...
...
...
...
...
Overview
...
Acronis module for HostBill gives you the opportunity to sell and automatically provision and manage (activate, suspend, unsuspend, terminate) both Acronis BaaS End-User and Reseller accounts with flexible packages.
Activating the module
...
- If the module is included in your HostBill edition you can download it from your client portal.
- If the module is not included in your HostBill edition you can purchase it from our marketplace and then download it from the client area.
- Once you download the module extract it in the main HostBill directory.
- Go to Settings → Modules → Hosting Modules, find and activate Acronis BAAS Acronis module.
Connecting HostBill with
...
Acronis
...
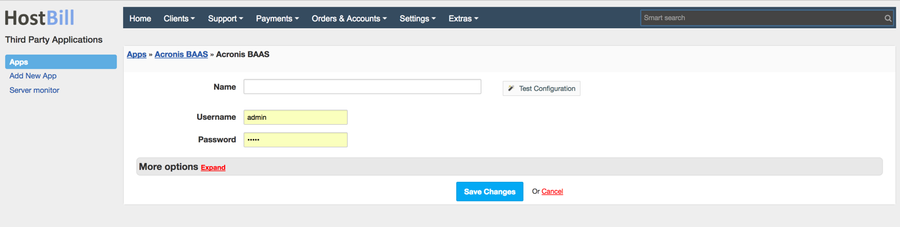
- Proceed to Settings → Apps → Add new App
- From Applications list select Acronis BAAS
- Enter:
- Name - Name of this connection
- Username - Your Acronis Username
- Password - Your Acronis Password
4. Verify entered credentials by clicking Test Connection to check if HostBill can connect
5. Save Changes
Adding Acronis
...
Product
...
- In HostBill go to Settings → Products & Services, and Add new order page
- From Order Types select "Other Services"
- Enter your orderpage name, select orderpage template. Save Changes
- Add new product in the new orderpage. Provide product name and setup price (With metered billing available) and then Save Changes.
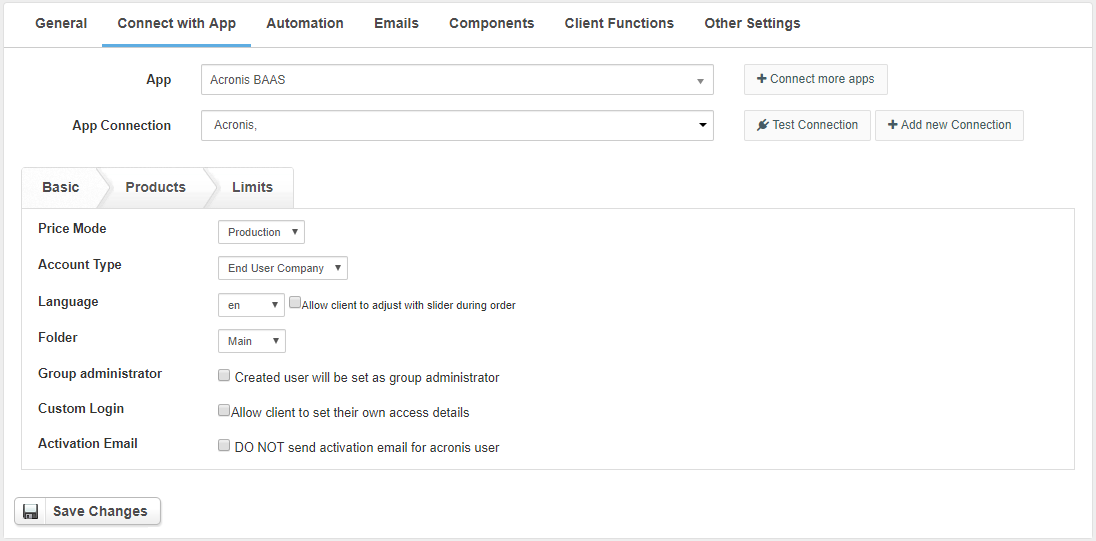
- In product configuration section proceed to Connect with App, select Acronis BAAS and App server created in previous steps.
- Setup Package
- Price Mode - Select which Acronis price mode will be used for customer account ordered with this product
- Account Type - Choice of account type between reseller and end user company
- Language - Select which language will be used in provisioning
- Folder - Select parent folder (group) where customer folder should be located in
- Group administrator - Created user will be set as group administrator
- Custom Login - Allow client to set their own access details
- Activation Email - It does not send an activation email to the Acronis user but activates the account immediately
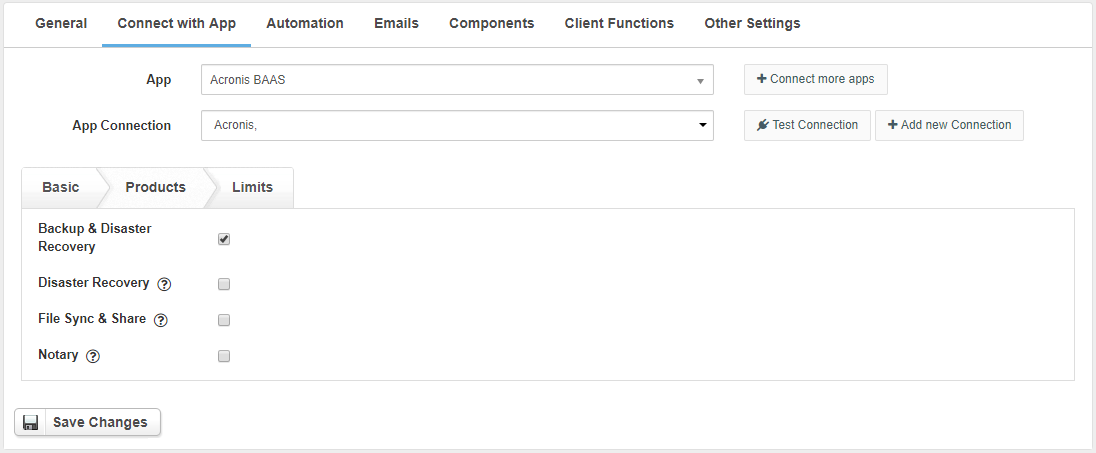
In the Products tab, we choose what products should be installed when creating an account. You need to make sure that Acronis supports selected products.
| Info |
|---|
At least one product should be selected |
Available products:
- Backup & Disaster Recovery
- Disaster Recovery
- File Sync & Share
- Notary
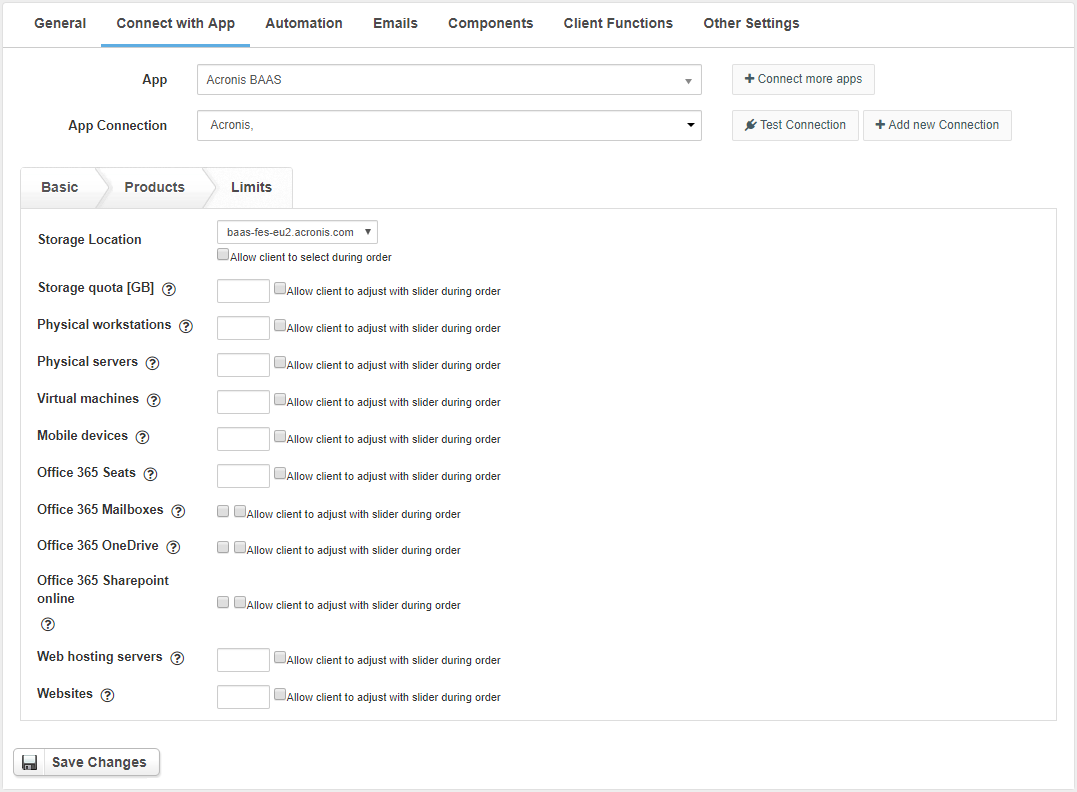
Setup Package Limits (use -1 on editable limits for unlimited, 0 if certain resource should not be available at all)
- Storage Location - Select storage location available for customer accounts after provisioning
- Storage quota - Quota limit in GB to order with this product
- Physical workstations - Workstations limit for accounts ordered with this product
- Physical servers - Server limit for accounts ordered with this product
- Virtual machines - Virtual machines limit for accounts ordered with this product
- Mobile devices - Mobile devices limit for accounts ordered with this product
- Office 365 Seats - Office 365 Seats limit for accounts ordered with this product. If this option is set, then you must enable Office 365 Mailboxes or Office 365 OneDrive
- Office 365 Mailboxes - Allow backing up Office 365 Exchange mailboxes to the local and cloud storage. If this option is enable, then you must set Office 365 Seats
- Office 365 OneDrive - Allow backing up Office 365 OneDrive files to the cloud storage. If this option is enable, then you must set Office 365 Seats
- Office 365 Sharepoint online - Allow backing up Office 365 SharePoint sites to the cloud storage
- Web hosting servers - Web hosting servers limit for accounts ordered with this product
- Websites - Websites limit for accounts ordered with this product
For more generic product configuration details including price, automation, emails settings refer to Product Configuration article.
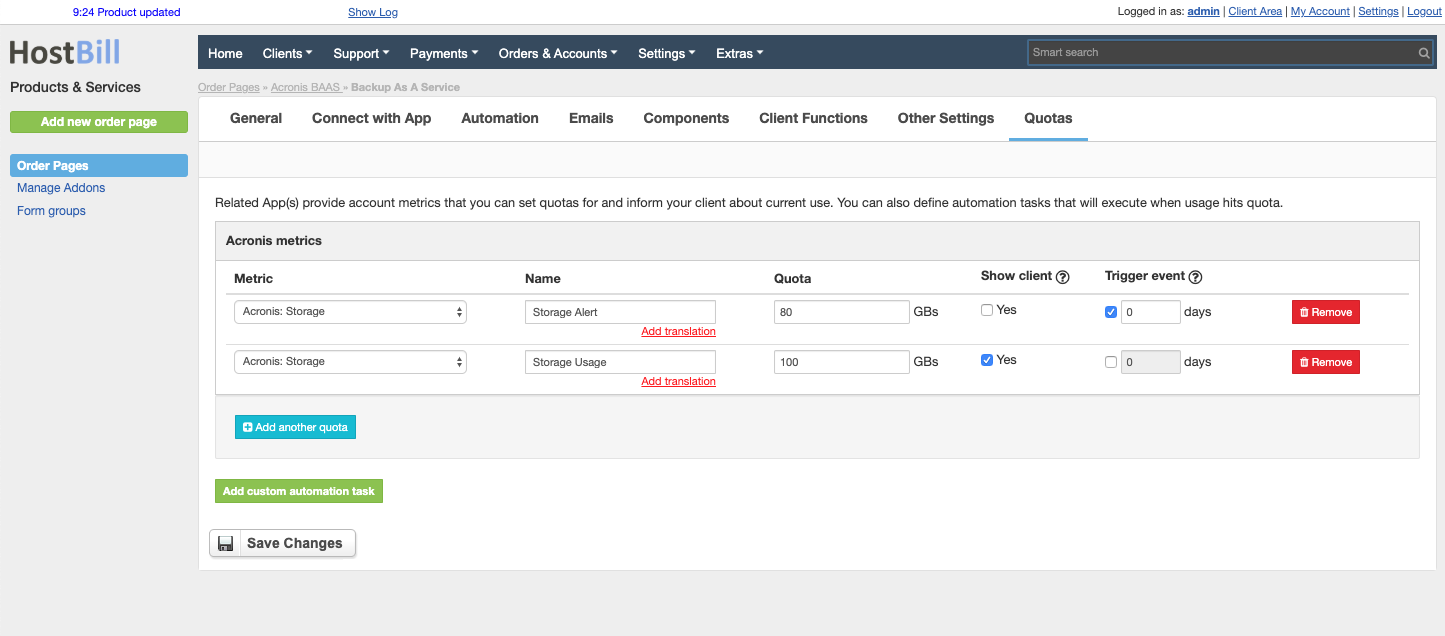
Configuring Metrics/Quotas
...
In Products & Services → Your Order Page → Your Product → Quotas you can define Quotas / Metrics for this product, and define triggers/automation rules to be executed when certain quota values are reached.
Acronis module lets you define following metrics:
- Storage
- Workstations
- Servers
- VMs
- Mobiles
- Websites
- Office Mailboxes
- Office OneDrive
- Office Sharepoint
- Office Seats
Configuring Client Functions
...
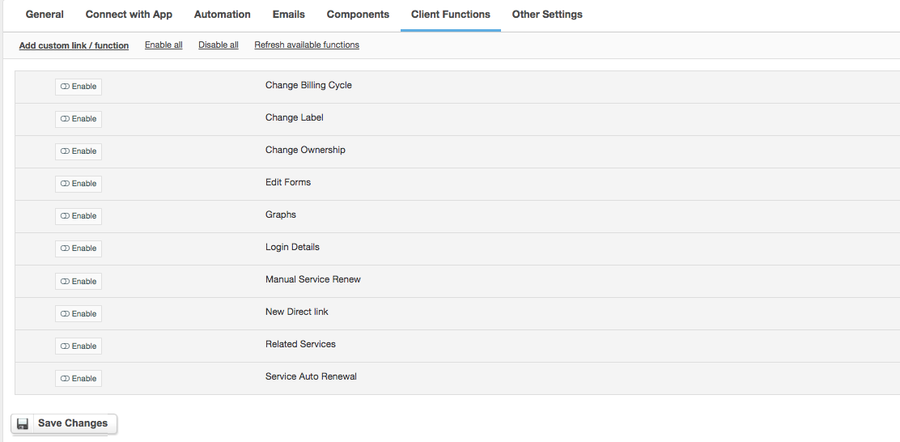
In Products & Services → Your Order Page → Your Product → Client Functions you can control what features customer will have access to in client portal, by clicking Enable/Disable next to the given option.
Use Edit button to adjust function appearance in the client portal.
For Acronis Baas you can enable standard client functions:
- Change Billing Cycle
- Change Label
- Change Ownership
- Edit Forms
- Graphs
- Login Details
- Manual Service Renew
- New Direct Link
- Related Services
- Service Auto Renewal