...
...
...
...
...
...
...
...
...
...
...
...
...
...
...
...
...
...
...
...
...
...
...
...
...
...
...
...
...
...
...
...
...
...
...
...
...
...
...
...
...
...
...
...
...
...
...
...
...
...
...
...
...
...
...
...
...
...
...
Overview
...
The MailChimp Plugin plugin in HostBill allows you to:
- automatically subscribe new clients to selected MailChimp list
- bulk export existing clients to the MailChimp list
- assign client registration fields values to MailChimp merge fields
- assign a client to configured interest groups in the MailChimp list
- push shopping cart data to MailChimp e-commerce
- reflect client orders from HostBill in the MailChimp e-commerce
For the plugin to work, you must have theHostBill Queue enabled
...
Activating the module
- Download purchased module from clients.hostbillapp.com
- Upload archive content into main HostBill directory
- Proceed to Settings->Module. Search and activate "MailChimp" module.
- Go to the module configuration in Extras → Plugins.
- Configuration fields:
...
- If the plugin is included in your HostBill edition you can download it from your client portal.
- If the plugin is not included in your HostBill edition you can purchase it from our marketplace and then download it from the client area.
- Once you download the plugin extract it in the main HostBill directory.
- Go to Settings → Modules, find and activate Geteway per client plugin.
- Once the plugin is activated you will be directed to Settings→ Modules→ Plugins to configure the plugin.
Module configuration
...
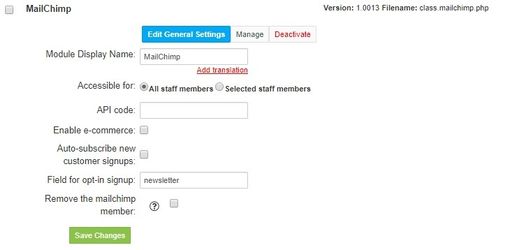
Fill in the configuration fields:
- API code: the API key from the MailChimp dashboard (in the MailChimp account: Profile name → Account → Extras → API Keys → Create a Key)
- Enable e-commerce: turns on the e-commerce service in MailChimp
- Auto-subscribe new customer signups: all new users will be added to the MailChimp list
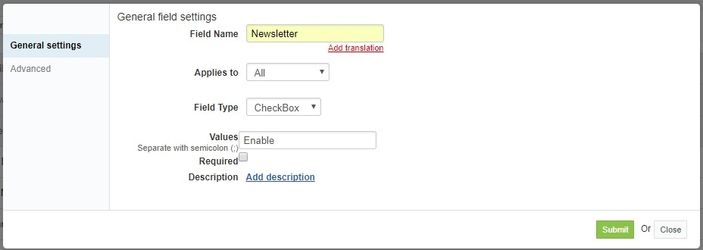
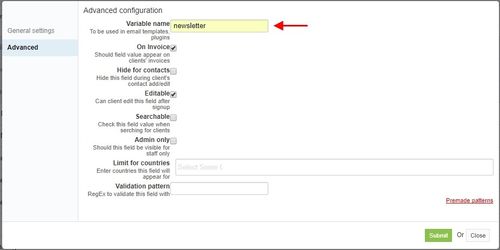
- Field for opt-in signup: name of the registration field with checkbox, which allows the user to choose whether they want to subscribe to the MailChimp list (you must create a registration field in HostBill Clients → Registration Fields → Add new field. The Field for opt-in signup should have the value of the variable name from the created field).
- Remove the MailChimp member: remove the MailChimp member along with the HB profile
Configuring MailChimp
...
- Proceed to Extras → Plugins → MailChimp to configure your MailChimp plugin.
- Select the default list for new clients
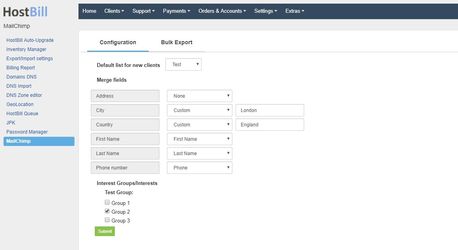
- Set the appropriate merge fields (you can choose one of the registration fields, none or custom one to enter your own value).
- Select to which groups the users should belong.
- In the Bulk Export tab a list of users who have not been assigned to any list will be displayed (you can select which users are to be assigned to the list).
...