In this short tutorial we will show you how to fast integrate your HostBill installation’s template to match your website’s look and feel. No advanced html/css skills needed – just some copy/paste and we’re done!
Tools needed:
...
- text editor (anything will do the job, best will be with syntax coloring – like free notepad ++ for windows)
- FTP client
- Firefox + FireBug plugin can be helpful for finding bugs
- small coffee
...
I’ll be using free html template from http://www.freelayouts.com/ as a original website, so HostBill will match it look and feel at the end. Template i picked: http://www.freelayouts.com/templates/-Green-and-Plain?preview=true.
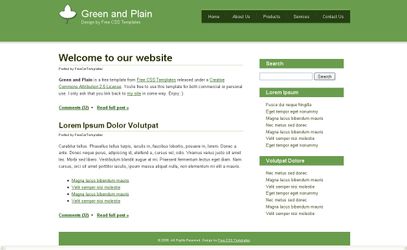

Our tutorial main hosting page
...
With your FTP client go to /path_to_your_installation/templates and create new folder under it, in this tutorial i will use test_1
Download base template to modify
...
Any template shipped with HostBill will be good – i’ll use clean template. Copy all templates/clean directory contents to your local machine.
...
Note: Only basic HTML knowledge is neccessary to create new HostBill template using old one as pattern. HostBill is also using Smarty template system, so if you have any problem with its advanced syntax refeer to Smarty documentation.
HostBill client area template is divided into few key sections, and for basic integration you should edit only theese:
...
I assume your website is not divided in many sections and every html file contains all informations to display it properly in web-browser. Same is with our tutorial index.html file (which also have its own stylesheet kept in style.css). It is important for us to understand our website current structure, here is how it looks in our example:

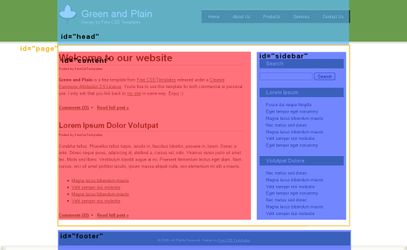
Our website structure
Modyfying header.tpl
...
Every page can contains errors or infos that need to be displayed – this are being handled automatically by HostBill, just add into your template (in header file):
| Code Block | ||
|---|---|---|
| ||
<div id=”errors” {if $error}style=”display:block”{/if}>{foreach from=$error item=blads}<span>{$blads}</span>{/foreach}</div>
<div id=”infos” {if $info}style=”display:block”{/if}>{foreach from=$info item=infos}<span>{$infos}</span>{/foreach}</div> |
What about logged users? They should be able to see client-menu only – add it simply with:
...
Modifying sidemenu.tpl
Not much to do here – all we need to change in this case is id property of outer sidebar div from id=”sidemenu” to id=”sidebar” so it will match our new styles
Modifying footer.tpl
In this file we need to close opened in header.tpl tags, and insert footer navigation/information.
Modifying style.css
To do it quick and dirty way – get content from your current website stylesheet and paste it at the bottom of style.css in HostBill template – this may create naming collisions, so page may look weird in final result – in order to fix this you should have css knowledge
Uploading files to server & testing template
Upload your modified template files into directory created in previous steps on your server using FTP client (like FileZilla on Windows or GFTP on Linux) .
In order to test your template without changing your HostBill apperance for client go to your HostBill installation in browser, and add param ?systemtemplate=test_1 to your request – where test_1 is directory name under which you stored newly created template.

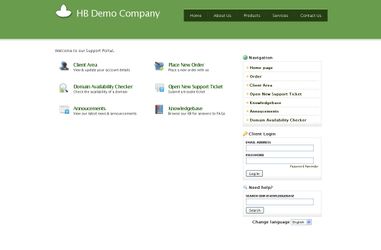
Final result
Image above contains final result of our HostBill template modifications – fast & cheap wasn’t it? About 20-30 minutes and one coffee. Note that your current website is probably way more complex than free html i used here – if you don’t code html yourself you can always hire sb to do the job right for you
...