Overview
...
// leave for marketing to fill out
...
- The plugin is free and available to all HostBill users. In order to activate the plugin go to Settings→ Modules→ Plugins → Inactive, find and activate CSV ExportDisqus plugin.
- Once the plugin is activated you will be directed to Settings→ Modules→ Plugins to configure the module.
Module configuration
...
Fill in the configuration fields:
- Choose module display name
- Select if you want the plugin to be accessible for all staff members or only selected staff members
- Once the plugin is activated you can go to Extras → Plugins → CSV Export where you can configure the data you want to exportFor the plugin to work correctly, you must complete the Code field. In this field, place the Universal Code with the Disqus Dashboard.
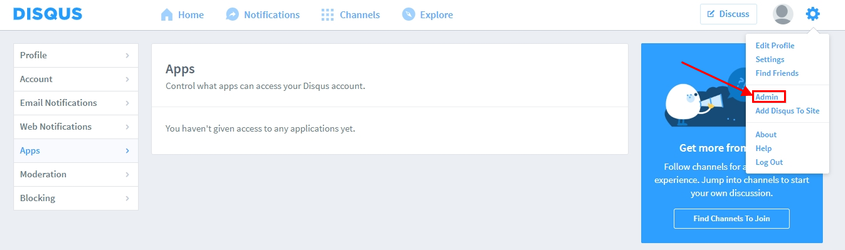
To get the Universal Code you have to log in to the Dashboard Disqus. Then go to Settings → Admin.
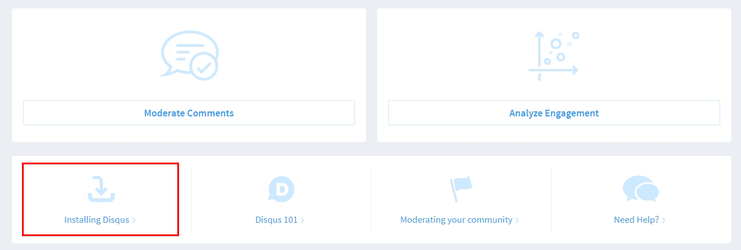
Select the option: Installing Disqus.
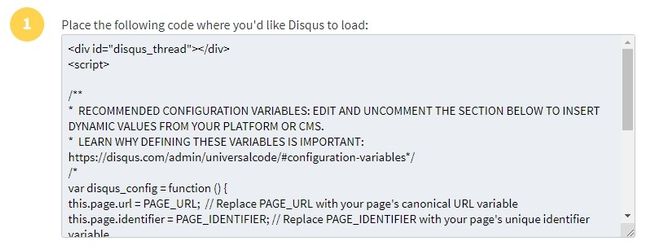
Then the list of platforms will appear. Choose the button: I don't see my platform listed, install manually with Universal Code.

The code that will be generated should be pasted into the configuration of the Disqus module in HostBill.
| Info |
|---|
The code should not be modified. All necessary modifications will be added automatically by the Disqus module. |
Template modification
...
When you use the custom template you will have to make some modifications.
Code implementing Disqus:
| Code Block |
|---|
{clientwidget module="after" section="kbasecontent"} |
The implementation code should be pasted at the end of the conditional structure {if $article} in the file: knowledgebase.tpl
Example:
| Code Block |
|---|
{if $article}
.
.
.
	{clientwidget module="after" section="kbasecontent"}
{/if} |