Installing HostBill
HostBill installation is fully automated and takes just seconds, more info at Installation
Connecting HostBill with Proxmox VE
Overview
Proxmox delivers powerful and efficient virtualization management solution for servers to help optimize existing resources and efficiencies at minimal cost. Proxmox module for HostBill enables to easily manage VMs and containers, software-defined storage and networking, high-availability clustering, and multiple out-of-the-box tools.
Activating the module
- If the module is included in your HostBill edition you can download it from your client portal.
- If the module is not included in your HostBill edition you can purchase it from our marketplace and then download it from the client area.
- Once you download the module extract it in the main HostBill directory.
- Go to Settings → Modules → Hosting Modules, find and activate Promox module.
Connecting HostBill with Proxmox
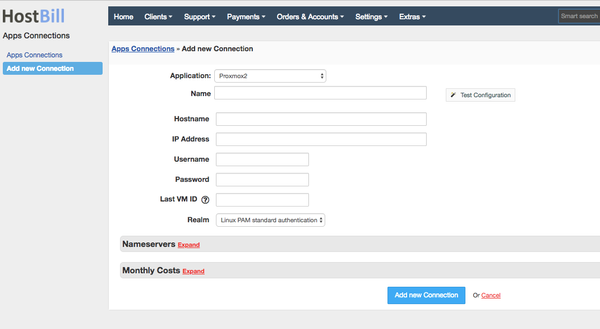
- Once you activate the module uou will be redirected to Settings → Apps to set connection with Proxmox
- Enter Proxmox VE admin credentials, use Test Connection to check if HostBill can connect
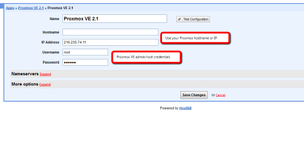
- Name - Name of this connection
- Hostname
- IP address
- Username
- password
- Last VM ID
4. Verify entered credentials by clicking Test Connection to check if HostBill can connect
5. Save Changes
Creating your first Cloud Hosting package
- In HostBill go to Settings > Products → Products & Services, and Add new order page
- From Order Types select VPS Accounts
- After creating order page add new product in it, provide name & Save changes
- In product configuration section proceed to Connect with App, select Proxmox module and App server created in previous steps.
- Proceed to configuration wizard and set your package limit for each step.
- Submit changes, your package is ready
Configuring noVNC console
Proxmox v2 module allows you to use NoVNC console. To enable it, copy file _upload_proxmox/vncconsole.html from module directory and upload to your Proxmox servers into directory:
/usr/share/novnc-pve/
Now your customers will be able to access noVNC console.
Important: Make sure to install valid SSL certificate for your Proxmox server, otherwise your customers will not be able to see noVNC console.
Setting up IP provisioning
IPAM module for HostBill can interact with ISC DHCP server that you can install on your proxmox host. With that you can automatically provision/assign IP addresses!
To learn more about it visit Configuring DHCP for IPAM