Overview
SolusIO is a virtual infrastructure management solution that facilitates choice, simplicity, and performance for ISPs and enterprises. HostBill white-label SolusIO module is a perfect tool to offer your clients VPS and Application Hosting. HostBill automated billing software enables to choose your preferred billing model and charge clients for OS Templates and backups. The whole process of creating user account and the VMs is automated, as well as upgrades and downgrades and the whole account lifecycle. HostBill easy to use client panel gives clients full control over their resources. From there, clients can manage their virtual machines: start, stop, restart, rebuild or resize; access noVNC console, display usage graphs, enable/disable rescue mode, manage backup: list, restore, remove. They can also easily login to SolusIO. Admins, apart from managing/controlling billing details and account lifecycle, have the ability to manage clients VMs and auto-generate forms for Applications Installation using HostBill admin area.
Activating the module
- If the module is included in your HostBill edition you can download it from your client portal.
- If the module is not included in your HostBill edition you can purchase it from our marketplace and then download it from the client area.
- Once you download the module extract it in the main HostBill directory.
- Go to Settings → Modules → Hosting Modules, find and activate SolusIO module.
Connecting HostBill with SolusIO
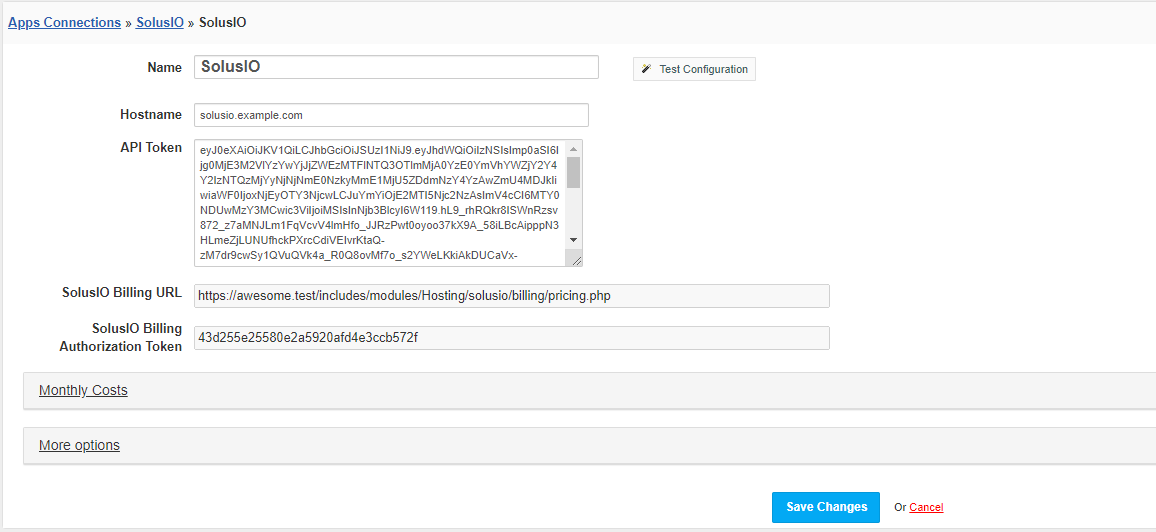
- Proceed to Settings → Apps → Add new App
- From Applications list select SolusIO
- Enter:
- Name - Name of this connection
- API Token - key obtained in the SolusIO panel
4. Verify entered credentials by clicking Test Connection to check if HostBill can connect
5. Save Changes
SolusIO Post-paid billing configuration
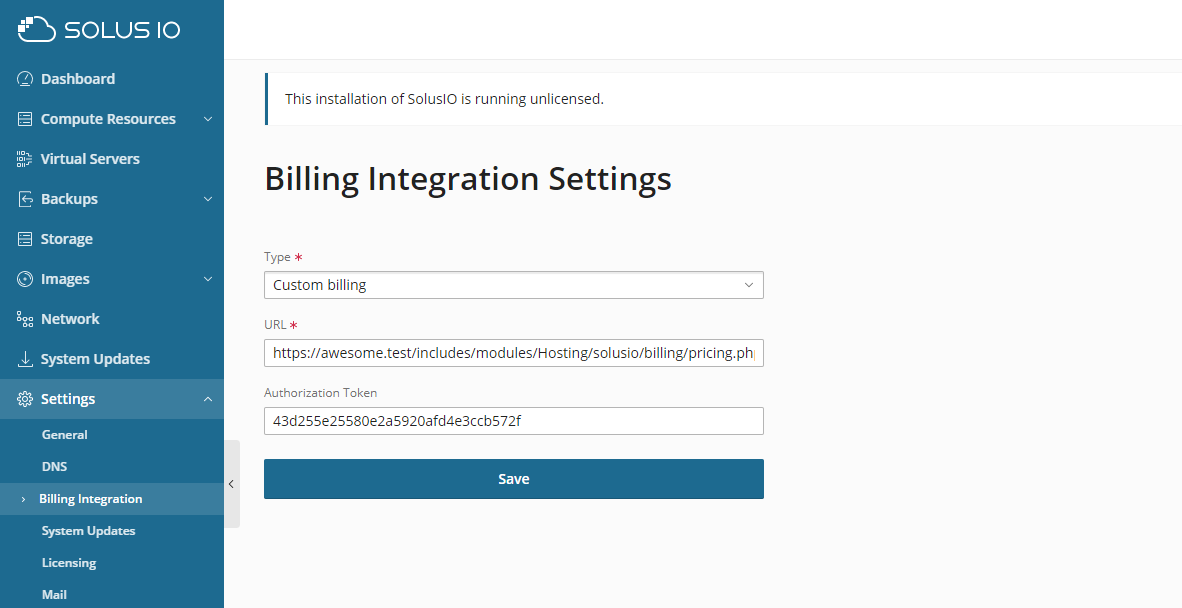
If you plan to use SolusIO module with Post-paid billing model, you must additionally configure "Billing Integration" in the SolusIO panel.
- Proceed to SolusIO panel → Settings → Billing Integration
- Enter:
- Type - select "Custom billing"
- URL - enter field value "SolusIO Billing URL" from the created app
- Authorization token - enter field value "SolusIO Billing Authorization Token" from the created app
3. Save Changes
Adding SolusIO Product
- In HostBill go to Settings → Products & Services, and Add new order page
- From Order Types select VPS Packages
- After creating order page add new product in it, provide its name and Save changes
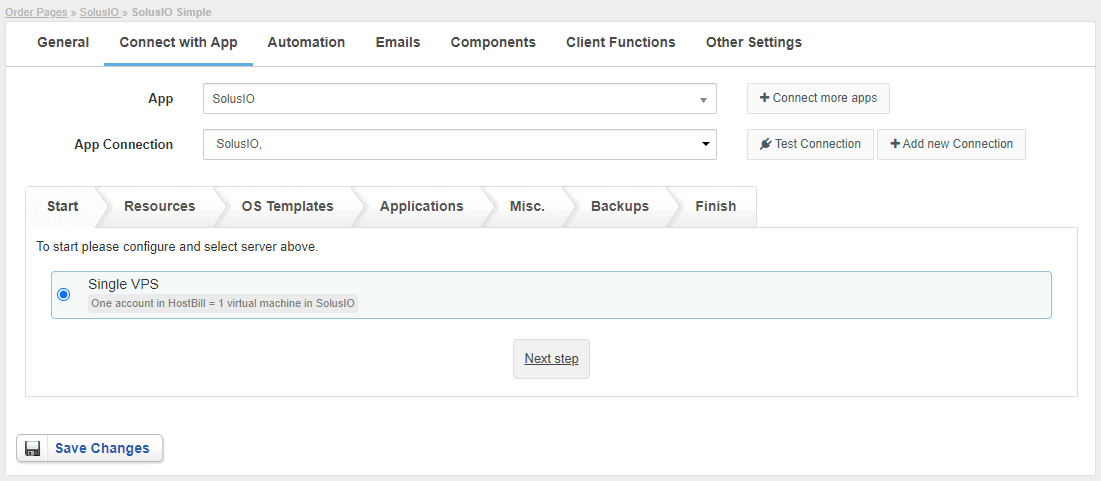
- In product configuration section proceed to Connect with App, select SolusIO module and App server created in previous steps.
- Proceed to configuration wizard and set your package limit for each step.
- Start
- Single VPS - One account in HostBill = 1 virtual machine in SolusIO
- Resources
- Plan - select the plan with which the VM will be created
- Location - select the location with which the VM will be created
- User role - select the user role with which the user in SolusIO will be created
- Limit Group - select the group with which the user in SolusIO will be created
- OS Templates
- OS template - select the OS with which the VM will be created
- Applications
- Use application instead of OS template - enable if the VM must use application (Plesk, cPanel, MariaDB etc.) instead of OS template
- Application - select an application
- Create forms - Use this button after selecting an application to auto-add Components:Forms related to selected application to this product (ie application login username, password etc)
- Misc
- SSH Key - select to add a component to product for adding SSH key during order
- User data - configuration information or scripts to use upon server creation
- Backups
- Enable backups - enable to do backups for VMs (daily backups)
- Start
- Save changes, your package is ready.
For more generic product configuration details including price, automation, emails settings refer to Product Configuration article.
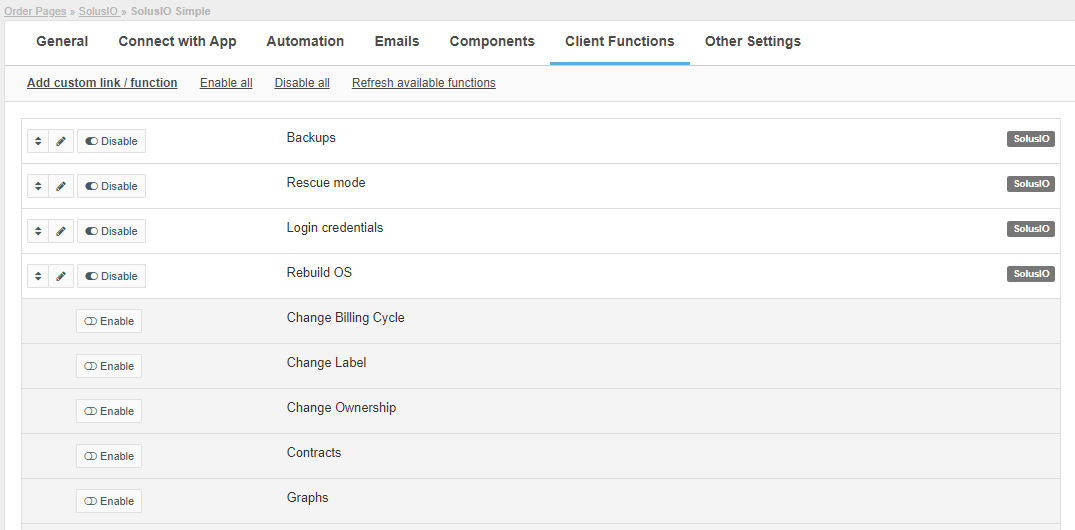
Configuring Client Functions
In Products & Services → Your Order Page → Your Product → Client Functions you can control what features customer will have access to in client portal, by clicking Enable/Disable next to the given option.
Use Edit button to adjust function appearance in the client portal.
For SolusIO you can enable the following client functions dedicated to this module:
- Backups - backups management for VM
- Rescue mode - enabling/disabling rescue mode
- Login credentials - displaying the login details for the SolusIO panel
- Rebuild OS - OS template change
As well as number of standard client functions, such as
- Change Billing Cycle
- Change Label
- Change Ownership
- Edit Forms
- Graphs
- Login Details
- Manual Service Renew
- New Direct Link
- Related Services
- Service Auto Renewal